In this quick pattern, I’ll show you how to make a border for curling Tunisian crochet projects that you can’t flatten in other ways. There will be two ways to turn the corner, so choose your favorite.
If you have Tunisian crochet projects that curl and you haven’t already taken the steps to prevent curling before finishing them (see here how to prevent curling before finishing your project or even before starting it, in this video), you might want to add a non-curling border.
First of all, you can always try blocking. I’ll be discussing blocking in other articles.
But sometimes you can’t block your item. Either it’s too big, or it’s made in a fiber that can’t be blocked, or maybe blocking isn’t suitable for the project (think any kitchen or bathroom products that you can’t just starch to get rid of the curl).
That’s where a beautiful, non-curl border comes in.
Contents
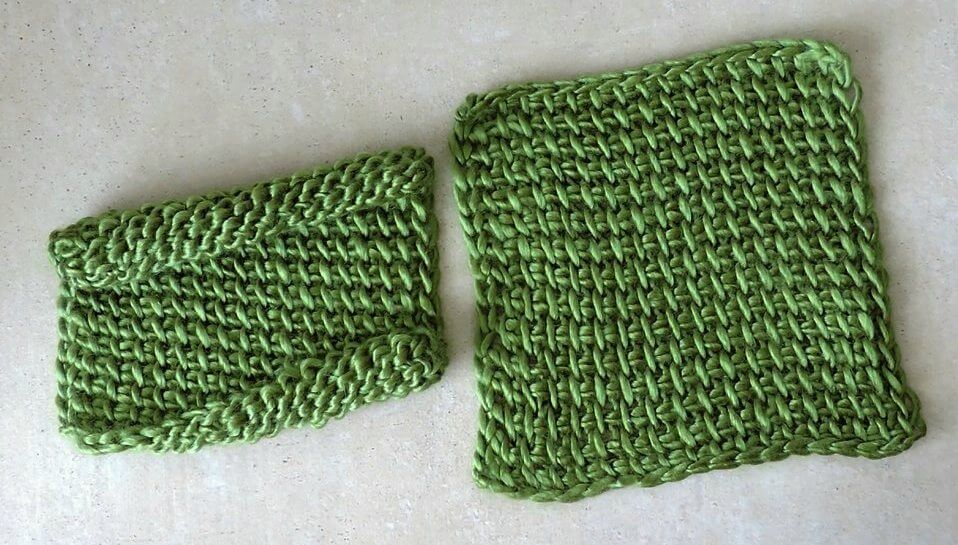
Video tutorial for the border for curling Tunisian crochet projects
If you would rather watch a video of the process of adding a non curling border to your Tunisian crochet blanket or another rectangular project, here it is.
Observations
Since this is an adaptable pattern, it will not tell you exactly how many stitches or rows to make.
But since in the video I show an example with 3 stitches per row, for the written instructions I will take a wider example, such as a border of 10 stitches for a blanket.
You will adapt these instructions to your project based on:
- the size of the project that needs a border;
- the thickness of your yarn;
- the size of your hook;
- how much yarn you have available for your border;
- how much curling there is;
- how the border will look in relation to the main part of your project.
You will be working on one side at a time, with the end of the row being attached to the side of the main project.
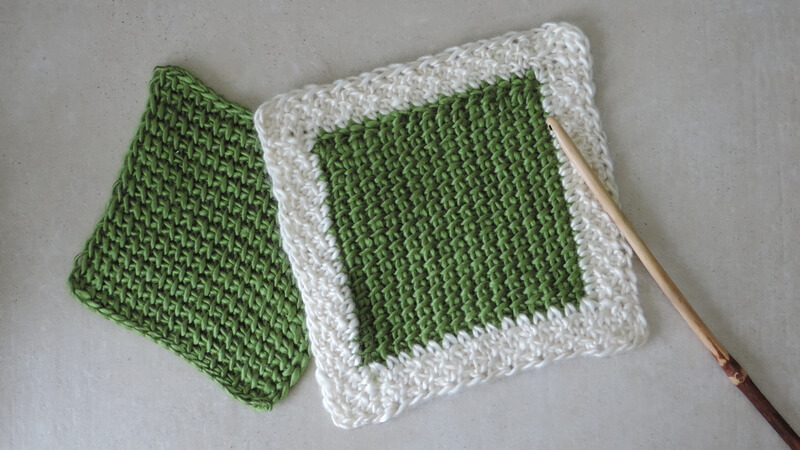
Notions
- Yarn – the same type of yarn that you used for the main body of your project. The length will vary depending on the size of your project and the width of your border.
- Your best bet is to use your original gauge swatch or make a swatch as wide as your border, weigh it and then calculate how much yarn you will need for a border based on the weight of your swatch.
- Hook – the same hook you used for the main body of your project. It can be a regular hook of the same size, it doesn’t have to be a Tunisian hook, since you can fit about 10-12 loops even on a short crochet hook.
- Tapestry needle and scissors for finishing off.
Abbreviations
- Ch – chain;
- Tps – Tunisian purl stitch;
- R – regular Tunisian return – Ch1, repeat [YO and pull through 2 loops on hook] until you are left with 1 loop on the hook;
- Rep – repeat;
- SRR – short row return – used for most rows in this pattern: repeat [YO and pull through 2 stitches on hook] until you are left with 1 loop on the hook;
- Tss – Tunisian simple stitch;
- YO – yarn over.
Instructions
Start on the lower right corner (or left if you’re a leftie) of your project.
Put a slip knot on your hook and pass the slip knot through the corner stitch to lock it.
Row 1. Ch 10. Pick up loops on your hook in the back bumps of the chains, put hook behind the two vertical bars of the edge of your project (in the same corner stitch) and through the vertical loop in the back, pull up a loop, SRR.
Row 2. Rep [1 Tps, 1 Tss] 5 times, pick up a loop behind the 3 loops of the next stitch on the edge of the project, SRR.
Row 3. Rep [1 Tss, 1 Tps] 5 times, pick up a loop behind the 3 loops of the next stitch on the edge of the project, SRR.
Repeat rows 2-3 until you reach the end of the side. Then pick one of 2 ways of turning the corner.
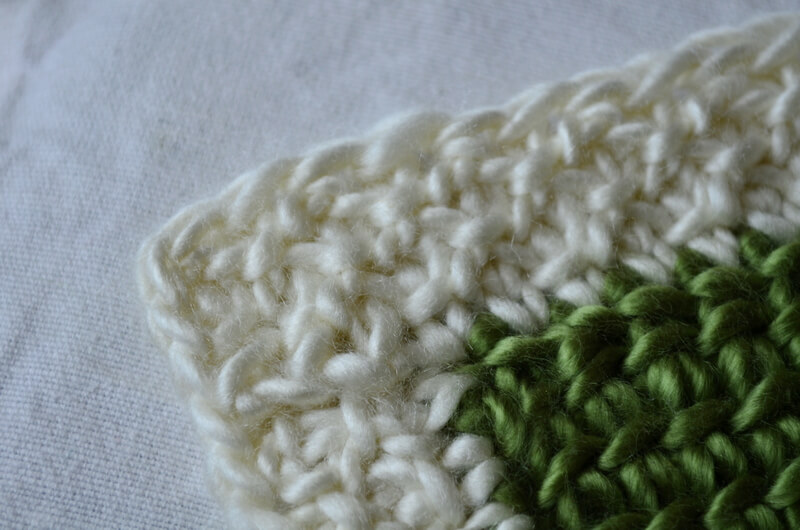
Turning the corner – method 1
Continue in pattern. Let’s say that a repeat of Row 2 is next.
Corner Row 1. Rep [1 Tps, 1 Tss] 5 times, pick up a loop in the corner stitch (same stitch as on the previous row), R.
Corner Row 2. Rep [1 Tss, 1 Tps] 5 times, pick up a loop behind the two vertical bars at the end of the row, R.
Corner Row 3. Rep [1 Tps, 1 Tss] 5 times, pick up a loop behind the two vertical bars at the end of the row, R.
Repeat rows 2-3 until you reach the corner row 10.
Stop and bind off the row (do not cut the yarn!).
To bind off, you work in pattern and slip each new stitch you pick up (see the video for extra details).
When you are finished, you are ready to start a new side.
Repeat Row 1 from the previous section, then continue with repeats of Rows 2-3.
When you reach the last corner, you just continue with repeats of Rows 2-3 until you work along the whole side, including the bottom of the border.
Then you bind off the last row, cut the yarn and weave in the ends.
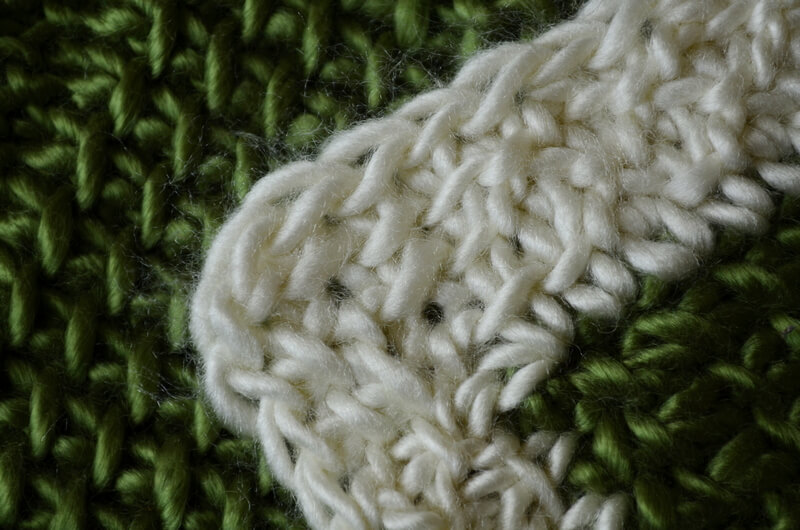
Turning the corner – method 2
This is a mitered corner method you may have already used in other projects (the 10 stitch blanket is a crowd favorite).
This method will work with various stitch combinations, but it’s much easier to explain with simple stitches, until you become familiar enough with the technique that you can branch out and try the honeycomb stitch with it, for example.
The mitered square made in simple stitches will not change the curl of your project, but if you are worried that it will, just pick the other method for turning the corner.
Stop when you reach the corner stitch on your project.
Corner Row 1. 10 Tss, SRR. This will cause one stitch to be lost at the end of the row, so it counts as a decrease.
Corner Row 2. 9 Tss, SRR.
Corner Row 3. 8 Tss, SRR.
Corner Row 4. 7 Tss, SRR.
Corner Row 5. 6 Tss, SRR.
Corner Row 6. 5 Tss, SRR.
Corner Row 7. 4 Tss, SRR.
Corner Row 8. 3 Tss, SRR.
Corner Row 9. 2 Tss, SRR.
Corner Row 10. 1 Tss, SRR.
Now you are left with one loop on your hook.
Now comes the fun part, building the second half of the corner square.
The video is a real help here, so please check it out.
Corner Row 11. Ch 1. Pick up a loop in the back bump of the chain. Find the decrease stitch from Corner Row 9 and pick up a loop in this diagonal. SRR.
Corner Row 12. 1 Tss, pick up a loop in the next horizontal space, pick up a loop in the diagonal stitch from Corner Row 8, SRR.
Corner Row 13. 2 Tss, pick up a loop in the next horizontal space, pick up a loop in the diagonal stitch from Corner Row 7, SRR.
Corner Row 14. 3 Tss, pick up a loop in the next horizontal space, pick up a loop in the diagonal stitch from Corner Row 6, SRR.
Corner Row 15. 4 Tss, pick up a loop in the next horizontal space, pick up a loop in the diagonal stitch from Corner Row 5, SRR.
Corner Row 16. 5 Tss, pick up a loop in the next horizontal space, pick up a loop in the diagonal stitch from Corner Row 4, SRR.
Corner Row 17. 6 Tss, pick up a loop in the next horizontal space, pick up a loop in the diagonal stitch from Corner Row 3, SRR.
Corner Row 18. 7 Tss, pick up a loop in the next horizontal space, pick up a loop in the diagonal stitch from Corner Row 2, SRR.
Corner Row 19. 8 Tss, pick up a loop in the next horizontal space, pick up a loop in the diagonal stitch from Corner Row 1, SRR.
Corner Row 20. 9 Tss, pick up a loop in the next horizontal space, pick up a loop in the corner stitch, SRR.
Now you should be back on your way to working on the side of the project you are adding your border to.
Continue with repeats of Rows 2-3 from the main instructions.
When you reach the last corner, continue with the provided instructions.
At the end, bind off the last row by putting slip stitches in each stitch.
You will need to sew up this seam, so leave a longer tail.
I’ve got a tutorial for such a seam in the free scrubby pattern, including photos and a video, so please check that out here if you want to know how to make an invisible seam in Tss.
Once you’ve sewn up the seam, weave in the ends and your project is finished.
Wrapping up
The border is finished and now your project has stopped curling. This is the magic of a non-curling border.
You can definitely make other borders as well, using any of the non-curling stitch patterns I mentioned in the previous article on the topic of removing curling from Tunisian crochet.
I’ve got another project planned, so I’ll be working on at least one lace edging pattern, if not many more. It all depends on what strikes my fancy and what you request.
If you want me to concentrate on publishing a lacy border for curling Tunisian crochet, let me know in the comments below or in an email.
I hope this article has been helpful to you. If you want to share your projects with me, you can send me an email or you can find me on social media, on Instagram here and on Facebook here.
I’m always happy to see your beautiful projects!
For more free patterns, check out the special section on the blog where these beauties are available.
See you soon with another project.
Keep safe and cozy!
Hugs,
Andrea

Thank you so much for the curl free border pattern. My first time to use it & must say that your directions were very clear & easy to follow. Thank you!
Thank you! Glad it was helpful!