Use this free dog bone amigurumi pattern to create a safe and chewy toy for your favorite furry friend or to donate to your local shelter.
Contents
About this pattern
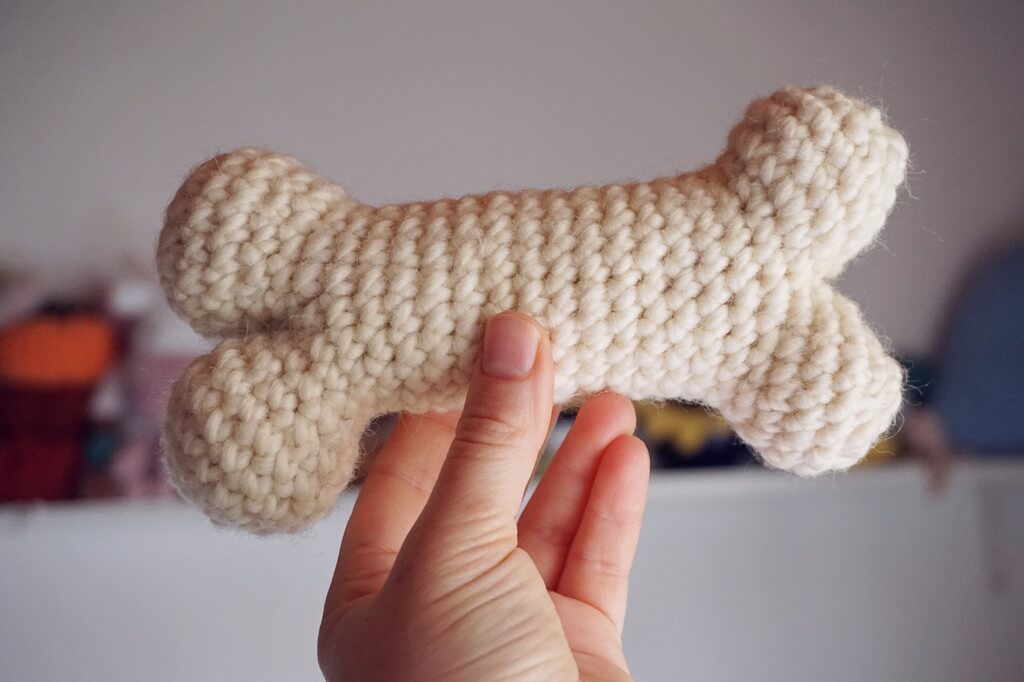
This dog bone amigurumi is the perfect toy for your dog, your friend’s dog or even a dog in your local shelter.
It’s very easy to make and also safe for being chewed on by dogs because of its construction. Felt it for extra security and safety for little sharp teeth.
It’s suitable for adult dogs of medium to large size, to be used under supervision, for throwing or tugging.
Once it gets dirty, just throw it in the washing machine and you’ll get it out good as new.
You are free to sell items created from this pattern. Attribution is appreciated.
About the Rescue dog blog hop
This pattern was inspired by the wonderful event hosted by Debbie Field of MadameStitch, who decided to organize a blog hop in support of rescue dogs.
Check out the rest of the posts in the blog hop, there are patterns for things for dogs, but also amazing stories from people who adopted rescue dogs. This has been my favorite blog hop to date.
I didn’t know what to contribute with at first, but then inspiration hit me while I was organizing my yarn.
I have a lot of felting wool and in a natural color it would work great as a felted toy.
I did some research first to see if wool is safe for dogs and apparently it is. They should not chew on potential string, though, so the whole toy is felted to lock in those fibers.
I set to work and came up with a pattern with two end variations. The first toy will probably go to my friend’s dog (we don’t have a dog yet, but we do love all of them).
I think I should make some of these to donate to our local shelter.
Where to get the PDF pattern
For only one day, on June 20th, you can get the pattern at 50% off as part of the blog hop (see above).
The rest of the time, you can use the buttons below to purchase a copy.
The PDF version for this pattern includes files for US terms and UK terms, as well as easy read files for both US terms and UK terms.
Here is where you will find the PDF pattern on different platforms.
Size and measurements
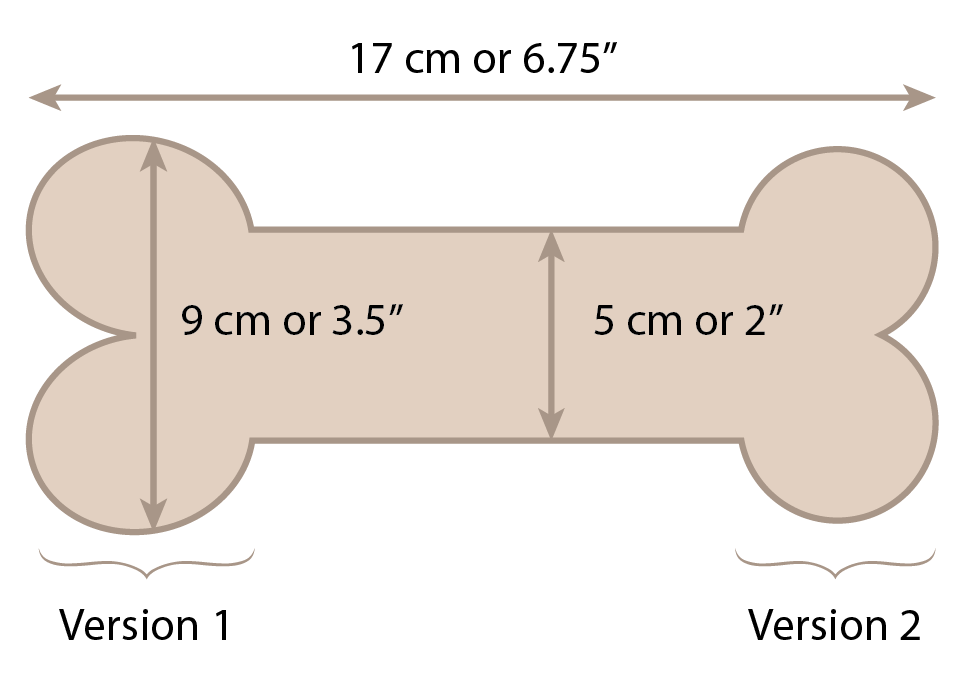
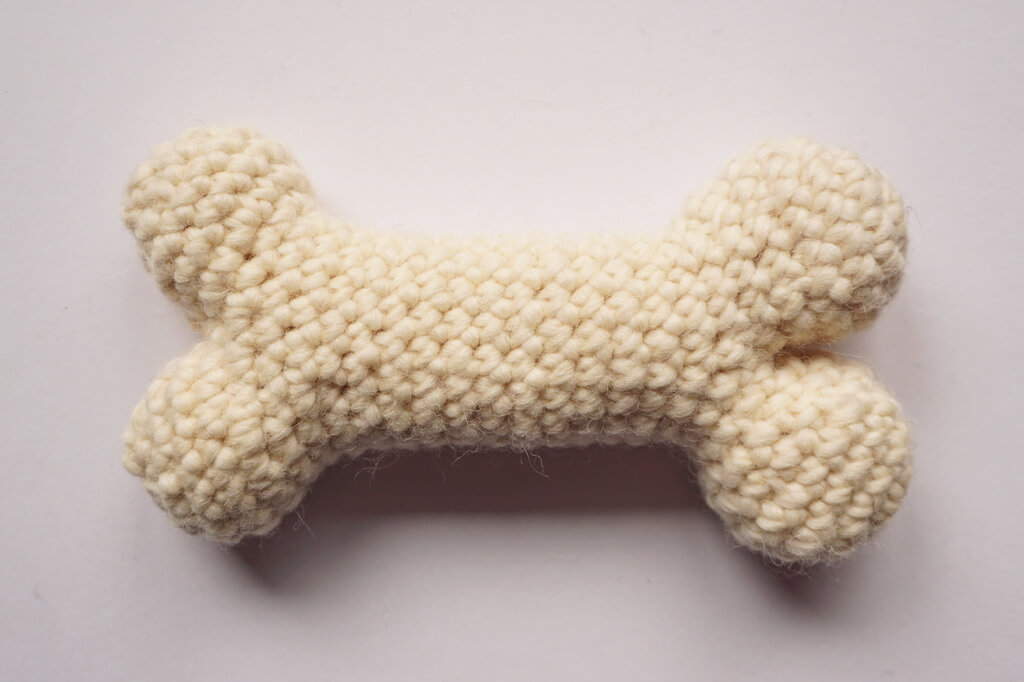
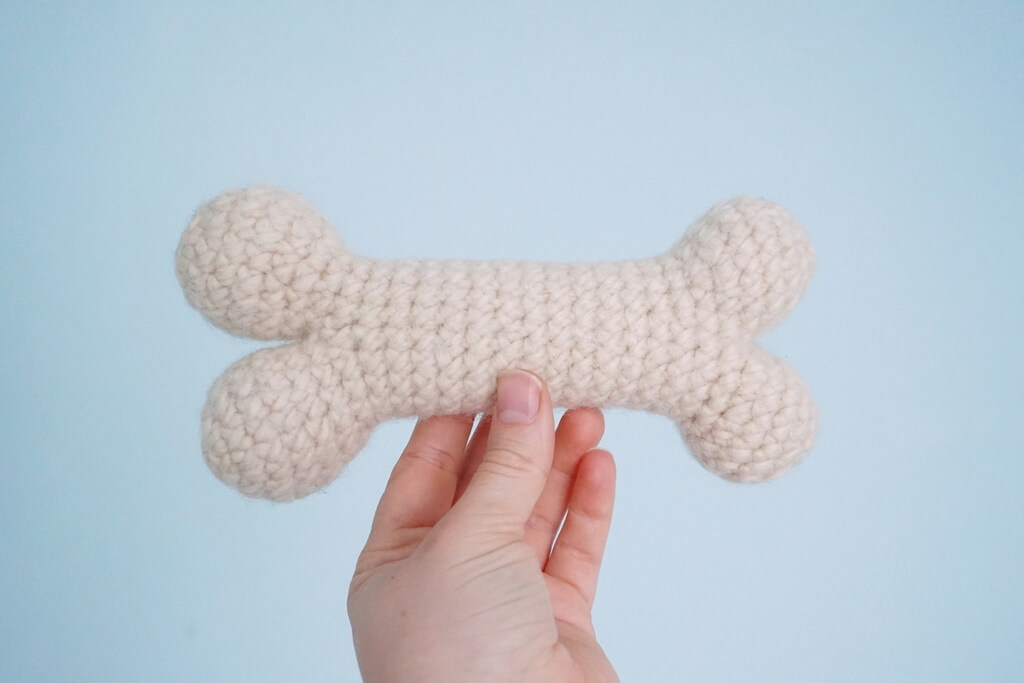
The original (unfelted) bone measures about 17 cm or 6.75″ long, 9 cm or 3.5″ wide at the ends (5 cm or 2″ in the middle part) and 4 cm or 1.5″ in thickness.
The felted bone measures less by about 1 cm or 0.4″ in each direction.
Skill level
Beginner – you only need to know increases and invisible decreases in amigurumi. You can use regular tension with felting wool.
Notions
- Yarn – roving-style size 5 felting wool at 60 meters per 50 grams: about 82 g for all the components or 50 g for the outer shell in a natural color (white, gray, shades of brown); you can substitute this for velvet yarn at 120 meters per 100 grams for a toy not destined for dogs;
- Hook – 6 mm hook for felting wool or 4.5-mm crochet hook for velvet yarn;
- Scissors and tapestry needle for weaving in ends;
- Optional – stuffing for amigurumi if choosing a different yarn, or natural color sheep’s wool for stuffing that can be felted;
- Stitch markers – at least one.
Gauge
12 Sc stitches per row and 14 rows should give you a 10 by 10 cm or 4” by 4” square.
Abbreviations
- BLO – back loop only;
- Ch – chain;
- Dec – Sc decrease through FLO: insert hook under the 2 front loops of the next 2 stitches, pull up a loop, YO and pull through 2 loops;
- FLO – front loop only;
- Inc – Sc increase: 2 Sc worked into the same stitch;
- MR – magic ring;
- Rep – repeat;
- Sc – single crochet;
- Sk – skip;
- Sp – space;
- St – stitch;
- YO – yarn-over.
Observations
- This pattern consists of multiple nesting components, to make it safe for dogs, as you will not need stuffing. If you want to make this toy for another purpose, not as a dog toy, skip to the last component and use stuffing to fill it out.
- This pattern uses felting wool so you can felt the toy and make it safer for dogs. If you want to make it for another purpose, choose the yarn that you like and only make the last component. In this case, use tight tension and the yarn-under/yarn-over technique for tighter stitches.
- For a dog toy with felting wool, you can use regular tension, as the toy will shrink when felted and the gaps should disappear.
- This pattern offers two options with regards to the ends of the bone, as shown in the sample and the sketch. Choose the design you prefer and follow those specific instructions.
- The toy is worked in the round in a spiral, where you don’t join the rounds, but continue with the next row on top of the previous one. Use a stitch marker to mark the beginning of the round.
- There are no instructions for placing the stitch marker in the text; just place the stitch marker either in the first or last stitch of each round – be consistent.
- If you make this bone to be used differently than a dog toy and use a different yarn than the one recommended, make sure you use a small enough hook size, so there is no space between the stitches that the stuffing can be seen through.
- Use the boxes to tick the finished rows when working repeating rows.
- Stitches in [square brackets] are repeated.
- Stitch counts are provided in (round brackets) at the end of the row.
Instructions
The PDF version of this pattern includes 3 more parts that you can create and nest, so as to not use stuffing for this toy. That will prevent stuffing from coming out if the toy gets damaged.
Stuff the toy well with wool or other natural, non-toxic fillers if you plan on using it with a dog.
This free version includes the instructions for the outer bone part with two styles of ending.
Bone – version 1
This is the main bone pattern. Start here if you want to make a regular toy, or keep the end fillers nearby for the dog toy.
This version has the bone ends longer and more separated.
Start with a magic ring. Work in a spiral.
Row 1. 6 Sc in MR. Pull on the tail to close the MR (6)
Row 2. 6 Inc (12)
Row 3. Rep [1 Sc, Inc] 6 times (18)
Rows 4-5. 18 Sc (18)
Stuff.
Row 6. Rep [1 Sc, Dec] 6 times (12)
Sl St, cut they yarn, pull the end through and weave in the end.
Rep rows 1-6 one more time, without cutting the yarn. Continue working in a spiral.
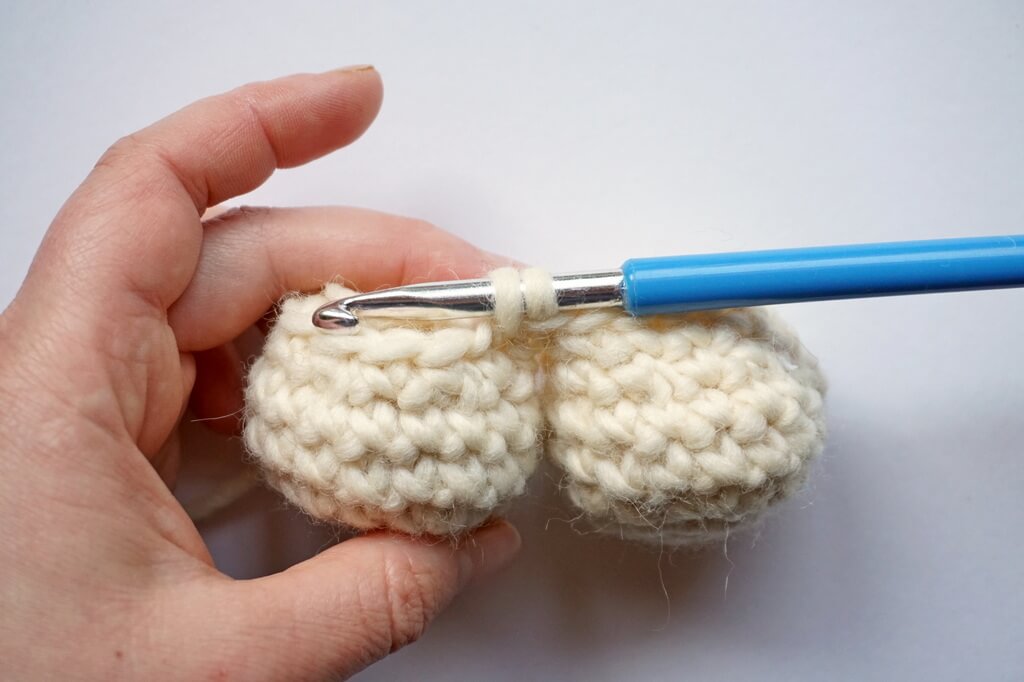
Row 7. 12 Sc, 12 Sc around the other component (24)
Row 8. Rep [2 Sc, Dec] 6 times (18)
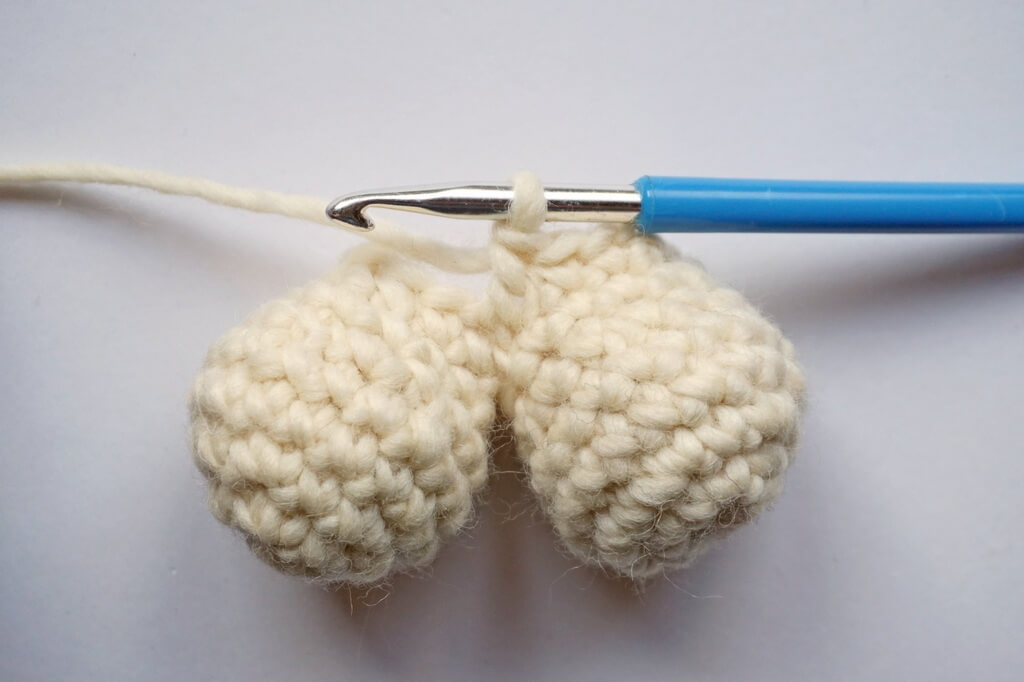
Row 9. 16 Sc, Dec (17)
Rows 10-21. 17 Sc (17)
Row 22. Inc, 16 Sc (18)
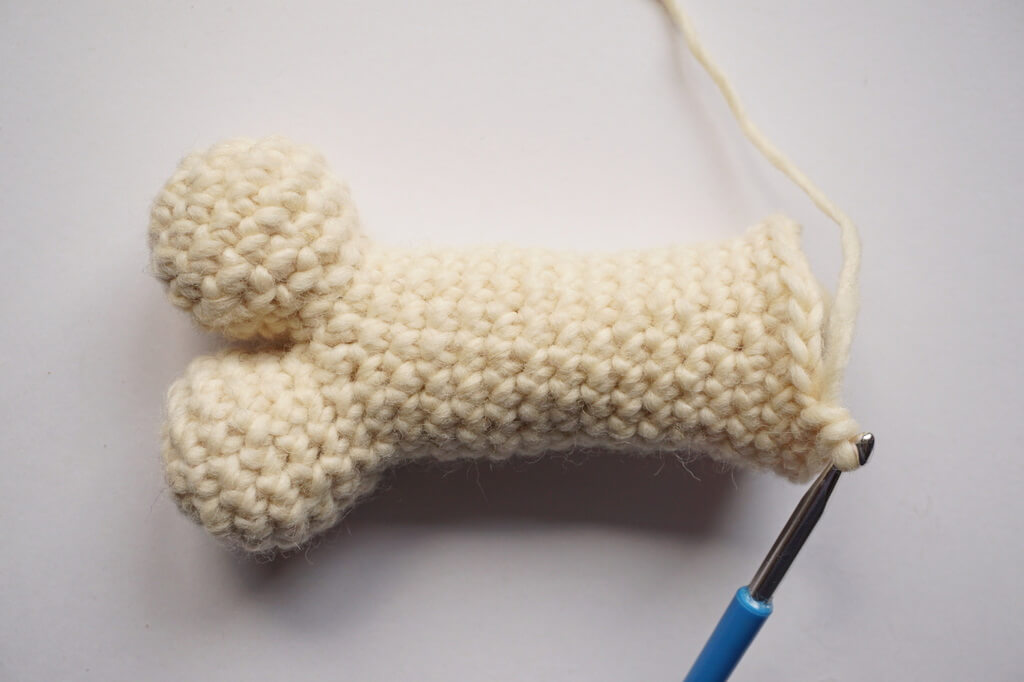
Row 23. Rep [2 Sc, Inc] 6 times (24)
Row 24. Rep [Inc, 1 Sc] 6 times, Sk 12 (18)
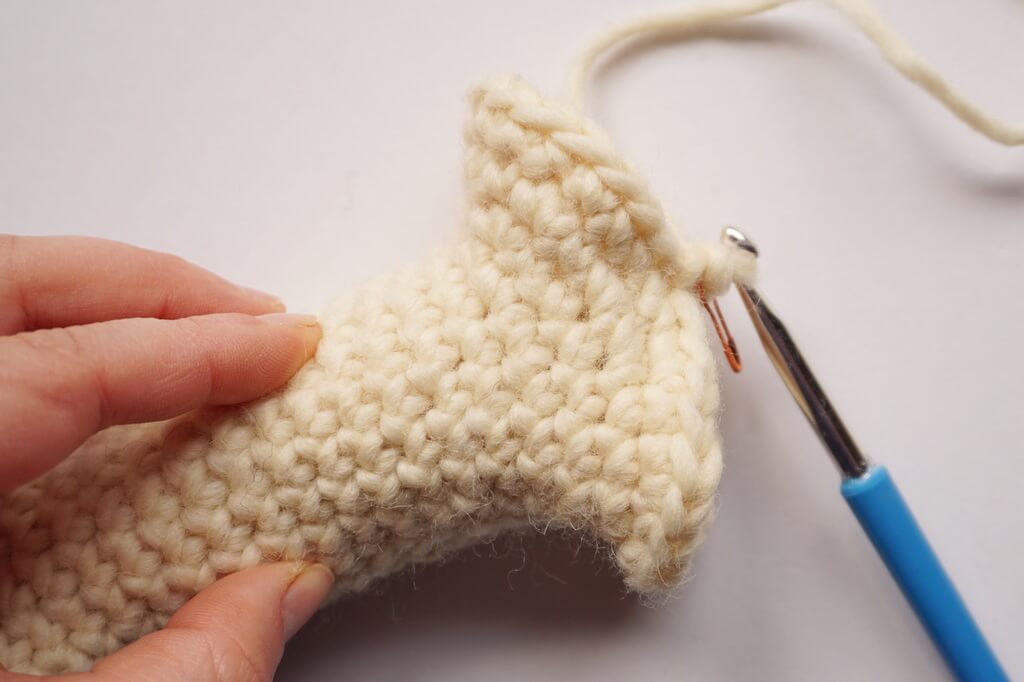
Continue working on one bump, then later on you will attach the second bump.
Rows 25-26. 18 Sc (18)
Stuff.
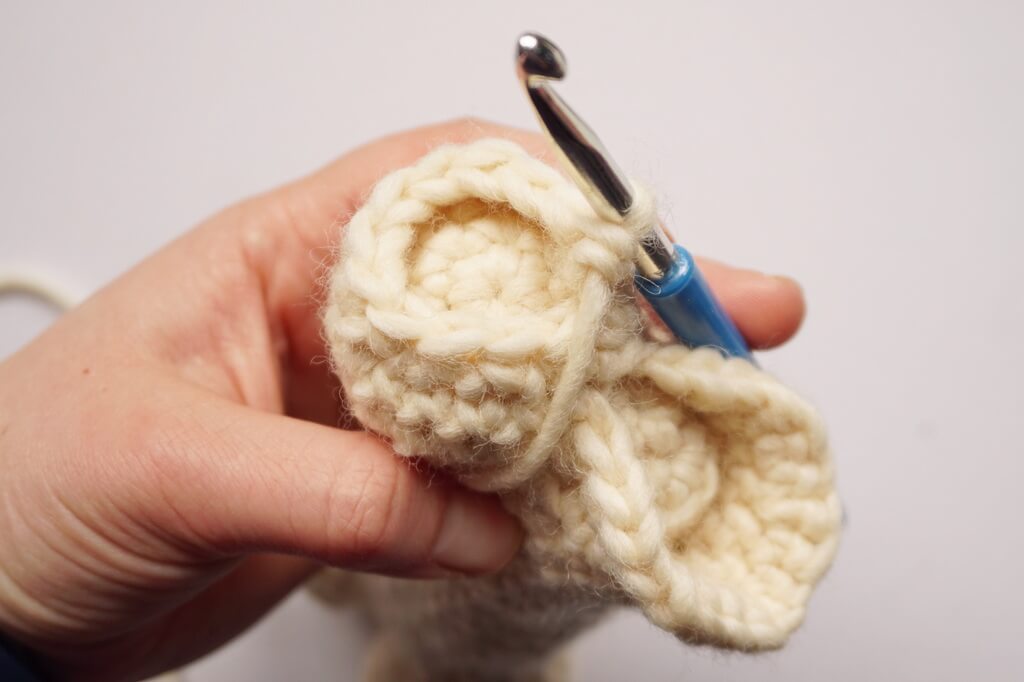
Row 27. Rep [1 Sc, Dec] 6 times (12)
Row 28. 6 Dec (6)
Sl St and use the tail to close the end of the bump, going in a spiral through the FLO of each St. Pull on the end to close the gap and weave in the end.
Continue on the unworked half of row 23, repeating rows 24-28.
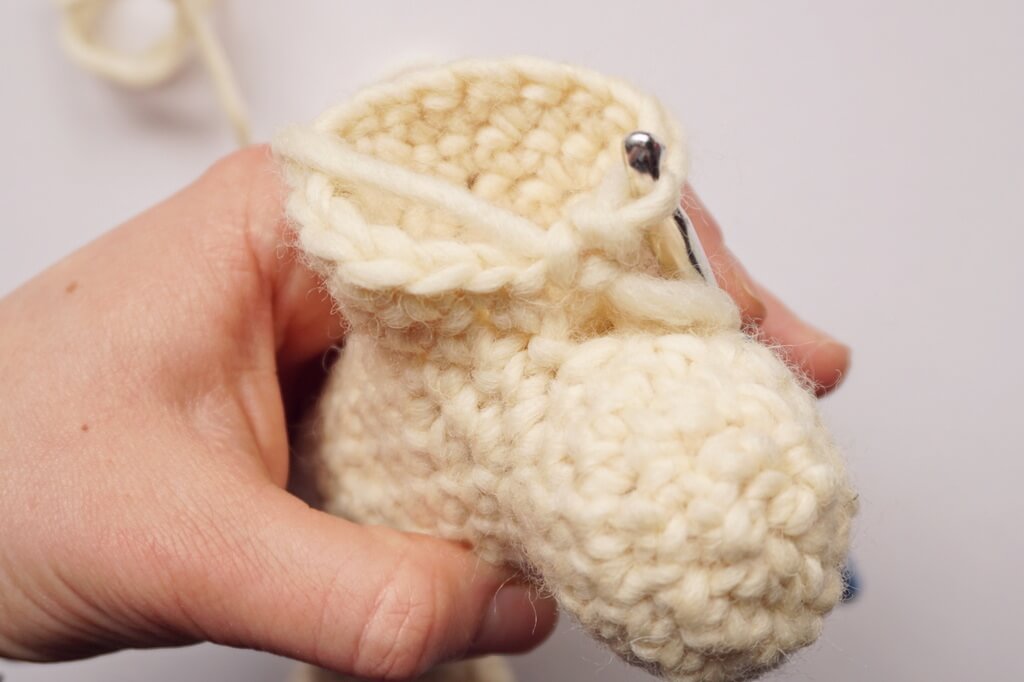
Sl St and use the tail to close the end of the second bump, going in a spiral through the FLO of each St. Pull on the end to close the gap and weave in the end.
Skip to finishing touches.
Dog bone amigurumi version 2
Row 1. 6 Sc in MR. Pull on the tail to close the MR (6)
Row 2. 6 Inc (12)
Row 3. Rep [1 Sc, Inc] 6 times (18)
Rows 4-5. 18 Sc (18)
Sl St, cut they yarn, pull the end through and weave in the end.
Rep rows 1-5 one more time, without cutting the yarn. Continue working in a spiral.
Row 6. 18 Sc, 18 Sc around the other component (36)
Insert two end fillers.
Row 7. Rep [1 Sc, Dec] 12 times (24)
Row 8. Rep [2 Sc, Dec] 6 times (18)
Row 9. 16 Sc, Dec (17)
Rows 10-21. 17 Sc (17)
Row 22. Inc, 16 Sc (18)
Row 23. Rep [2 Sc, Inc] 6 times (24)
Row 24. Rep [Inc, 1 Sc] 12 times (36)
Row 25. 18 Sc, Sk 18 (18)
Continue working on one bump, then later on you will attach the second bump.
Row 26. 18 Sc (18)
Insert one end filler.
Row 27. Rep [1 Sc, Dec] 6 times (12)
Row 28. 6 Dec (6)
Sl St and use the tail to close the end of the bump, going in a spiral through the FLO of each St. Pull on the end to close the gap and weave in the end.
Continue on the other half of row 24, repeating rows 25-28.
Sl St and use the tail to close the end of the second bump, going in a spiral through the FLO of each St. Pull on the end to close the gap and weave it in.
Finishing touches
Once the bone is complete, if you are making a dog toy, felt it with hot water and soap or detergent.
You can hand felt or machine felt the toy, either in a basin of hot water (40 degrees Celsius) with soap, plus agitation, or in the washing machine, along with a load of cottons at temperatures higher than 40 degrees.
Do not use the delicate cycle, unless you don’t want a felted toy.
When it gets dirty, you can wash it again easily in the washing machine.
If you make a toy for other uses out of different yarn, you can wash it by hand or in the washing machine on a delicate cycle.
Thank you for trying out this pattern and make sure to check out other patterns available on the blog and in the crochet pattern shop.
Hugs to you and any puppies you have nearby,
Andrea



thank you!