In this quick tutorial, I will explain and demonstrate an easy way to join granny squares using your hook and yarn. You can also follow along with the video. I used this method to make the Dear Peony baby blanket. To get written instructions and all the other parts of the pattern, please buy a PDF copy of this pattern.
What’s your favorite method of joining granny squares?
Do you sew them together? Crochet them together? Do you use a ladder stitch or a single crochet stitch? Do you join as you go?
I’ve tried all of these methods and I discovered that the sewing will not hold up to a heavy blanket and the crochet creates a raised edge around all the squares.
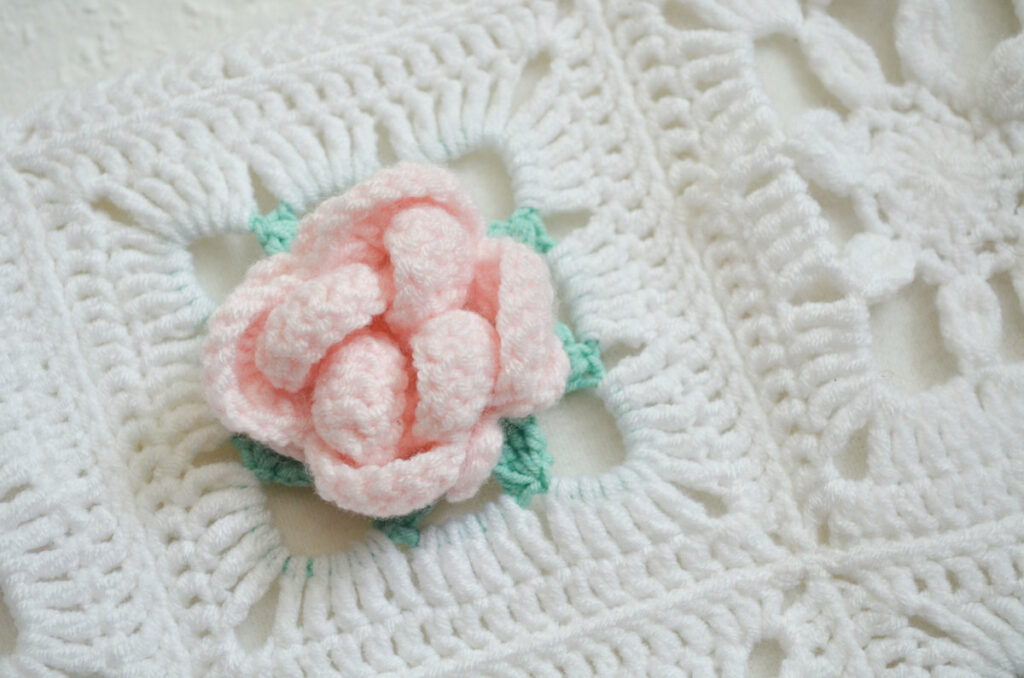
The method I want to show you will create a sturdy seam that’s not raised, but seems like it is a part of the fabric of the blanket.
Just look at the photo above. Do you see the little chains that create the seam? They are well hidden.
If you want to, you can use this method with colored yarn, to set your squares apart and create a grid, or you could make single crochet stitches instead of slip stitches if you want to add a bit more texture to the blanket.
But given how this blanket is already very textured and quite colorful, what with all the 3D flowers and the leaf edge, I decided that in this case the slip stitches in the same color as the background will be the best approach.
If you want instructions for the whole blanket I’m talking about, including the border, you can now get a PDF copy of this pattern from my shop.
You will find a PDF version of this pattern in my shop, on Ravelry (if Ravelry bothers you, but you want to use it, I came up with a workaround for the current themes that give people migraines), on Etsy, on Payhip and on Lovecrafts.
Notions
- Yarn – same type of yarn that you used for your project – same color or contrasting color; the length will depend on how many squares your blanket has.
- Hook: hook that works for your yarn.
- Tapestry needle.
- Scissors.

Stitches and other abbreviations
- Ch – chain;
- FLO – front loop only;
- Sl St – slip stitch;
- St – stitch;
- YO – yarn-over.
Observations
- You will be connecting all the squares that are on one column, then add on the next column.
- You will then connect the same squares on the other direction, as rows.
- Start with the longer side of the blanket – if you have a blanket made of 10 by 7 squares, connect 10 squares to another 10 squares first. This way, it will be easier to connect the rows with each other.
- Lay out your squares and block them before starting the join.
- Pick up pairs of squares and connect them. Do not break the yarn in between pairs of squares, you will only break the yarn at the end of each column or row.
- Take your time, this is a long process, but it’s worth every minute.
Instructions for an easy way to join granny square
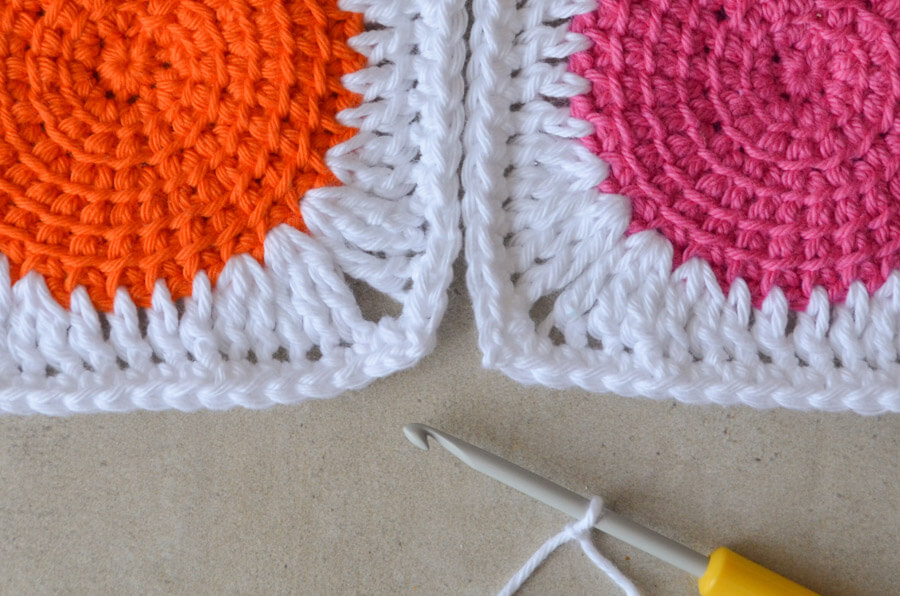
Start with a slip knot on the hook. Insert the hook into the corner space of the square on the right, insert the hook into the same space on the corner of the square on the left, pick up a loop.
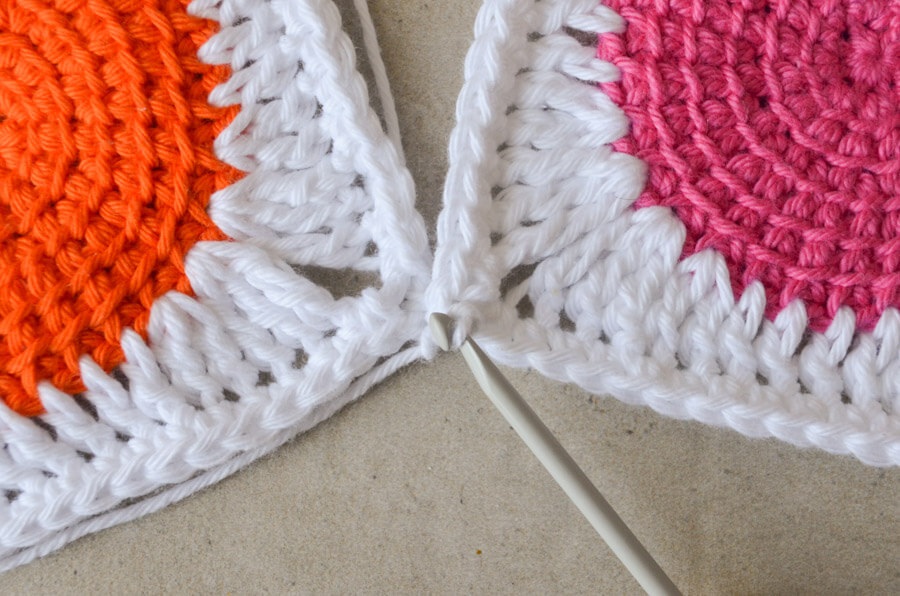
Insert the hook in FLO of the first stitch on the right.
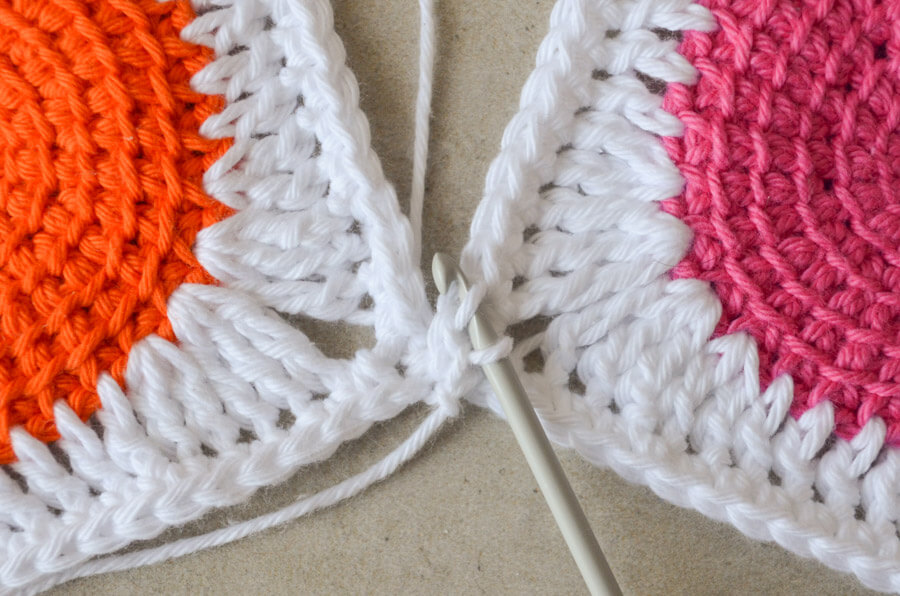
Insert the hook on the FLO of the first stitch on the left.
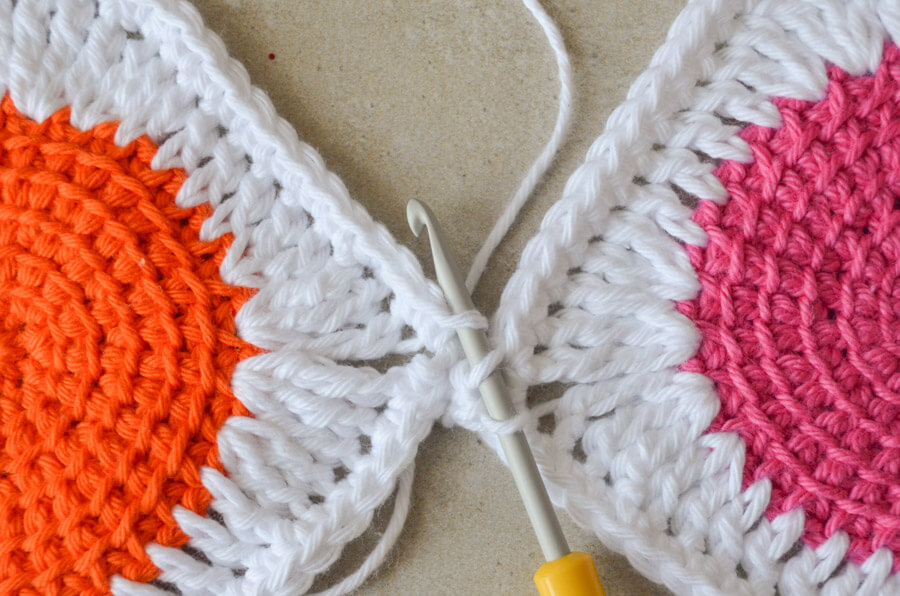
YO and pull through all 3 loops on the hook.
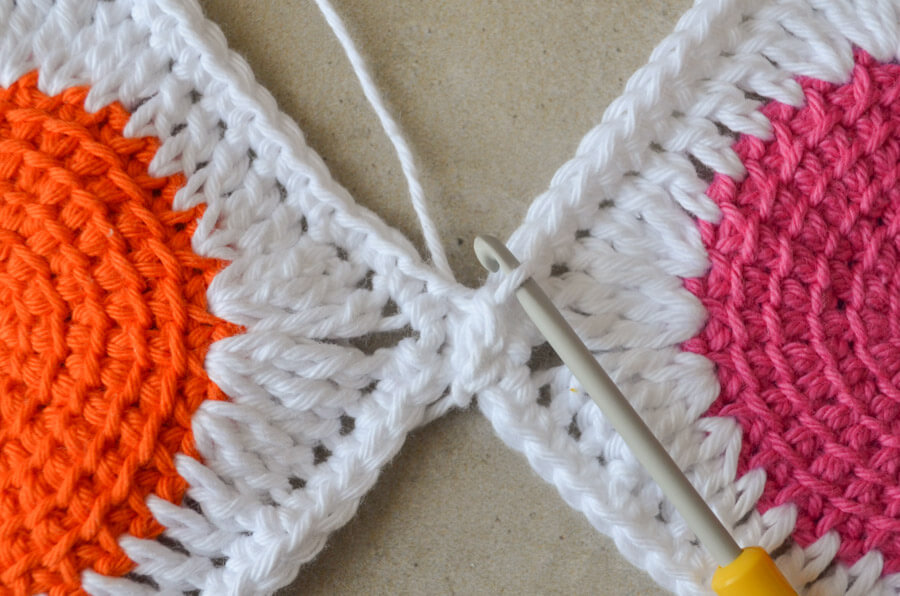
The first stitch is done. Repeat this process along the edges of the squares.
First insert the hook through the front loops of the next stitch on either side.
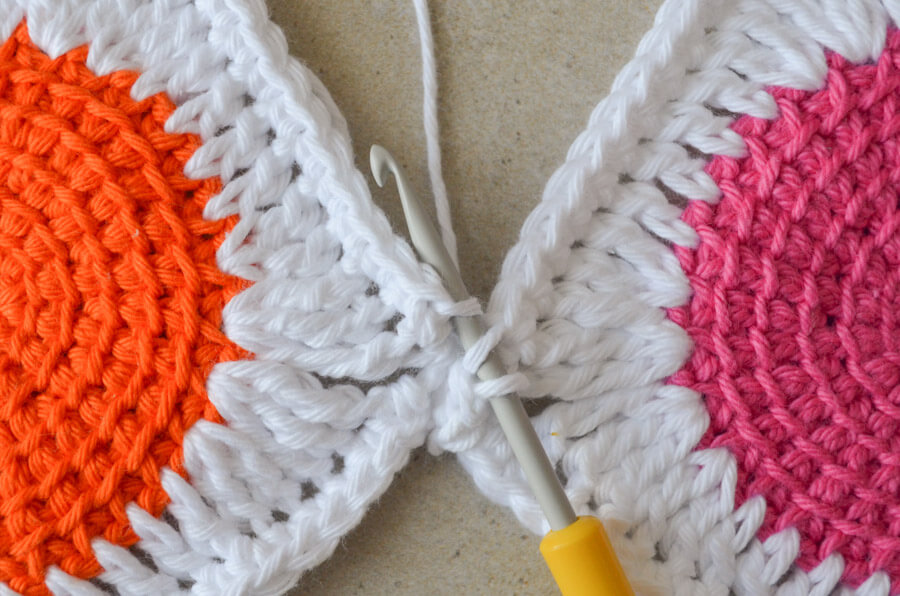
Then YO and pull through all 3 loops to complete the stitch.
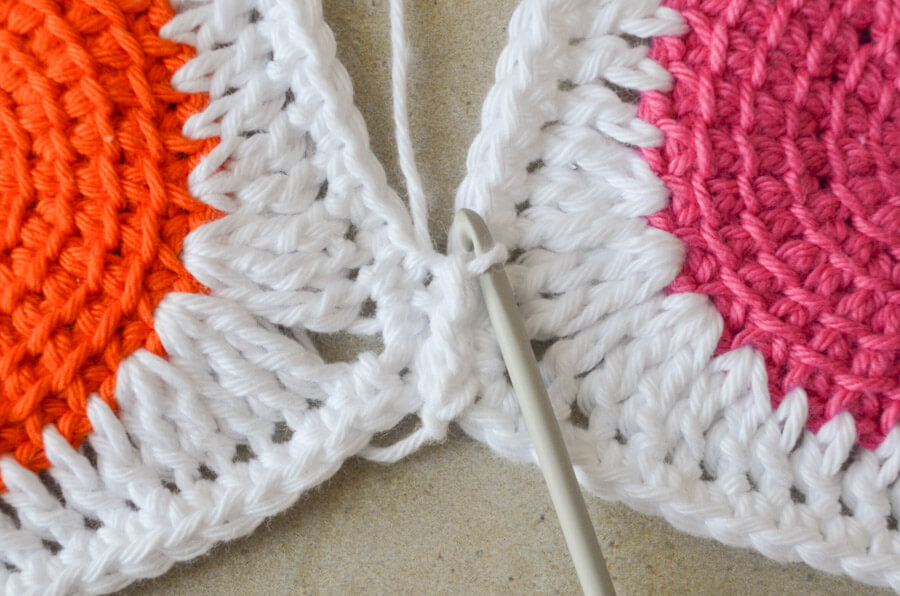
When you reach the corner, insert the hook through the Ch2 space on each side and make one more stitch.
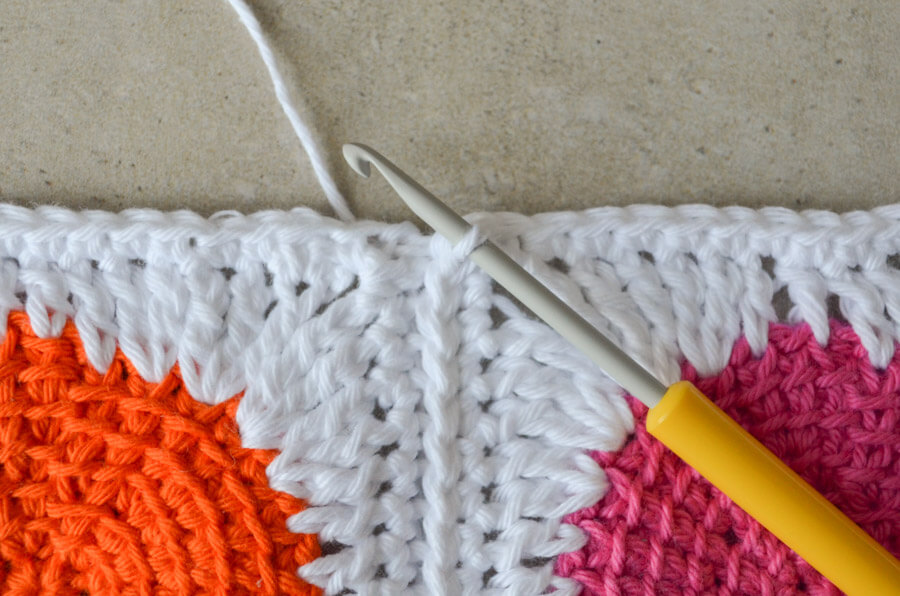
The you continue with the next two squares.
Insert the hook through the Ch2 space on each side and make one stitch, then work in the front loops on each side.
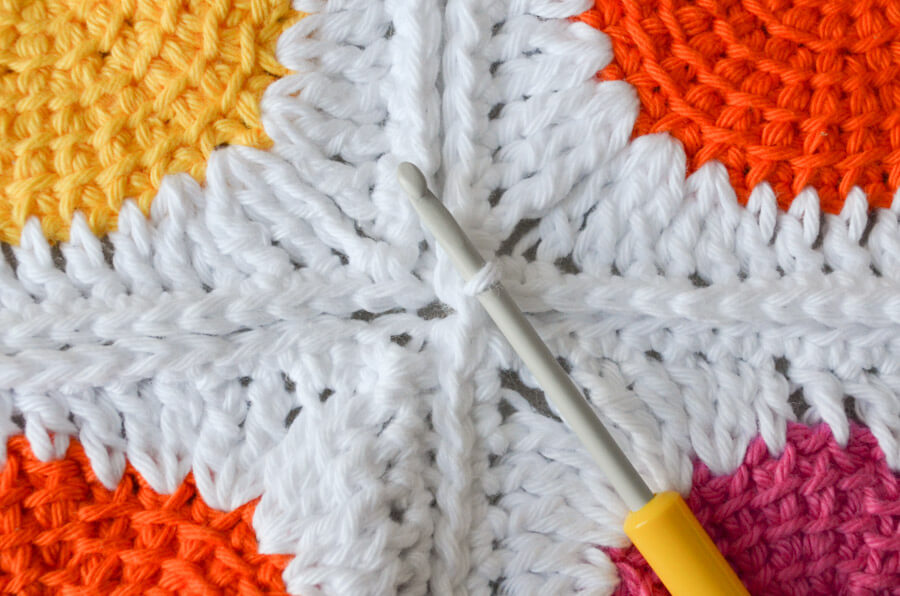
Continue like this with all the squares in the column.
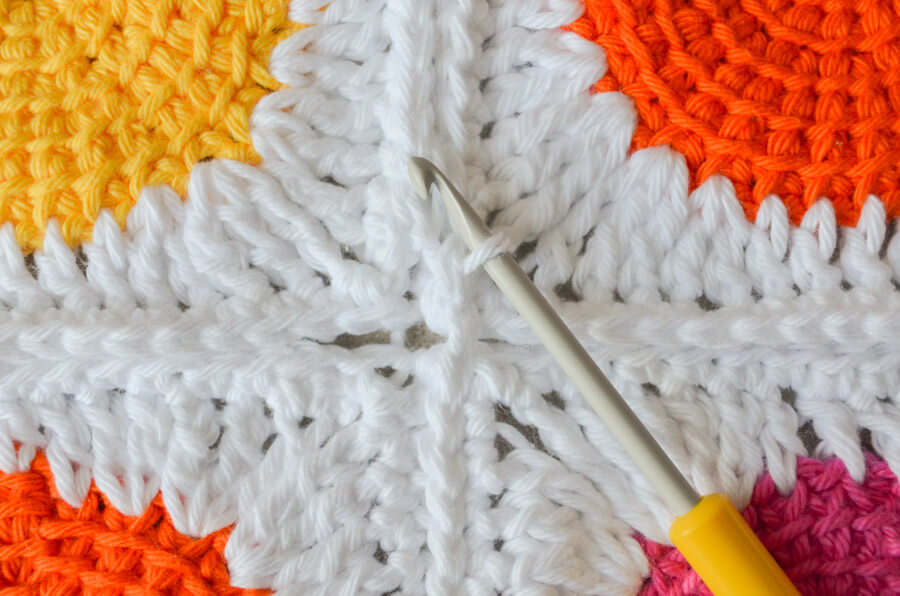
When you are done with the column, cut the yarn and attach another column to the two that you already have.
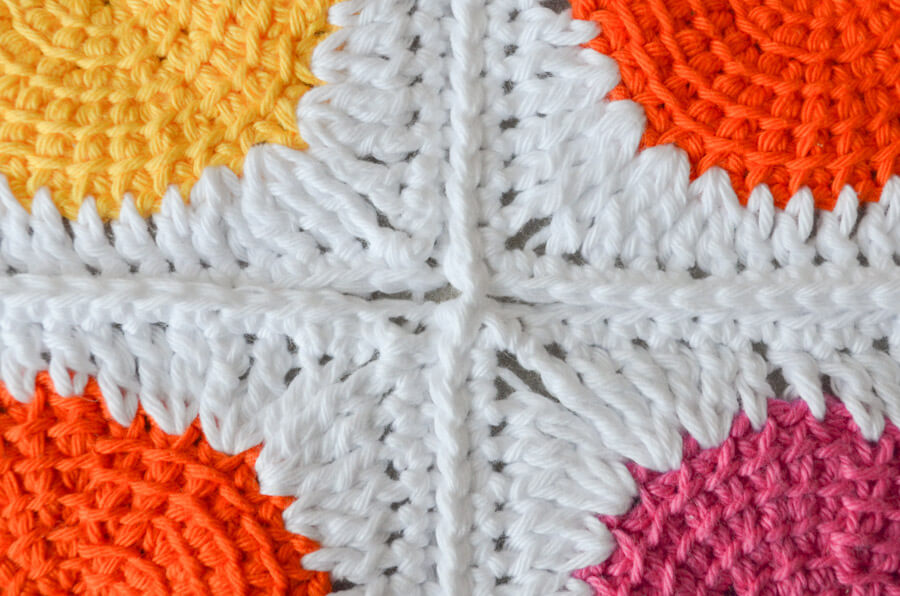
When you are finished with all the columns, you will start working on the rows.
This part is a little more difficult, as you need to always keep the working yarn at the back of the work.
Start like before, with a slip knot on the hook, working until you reach the other join.
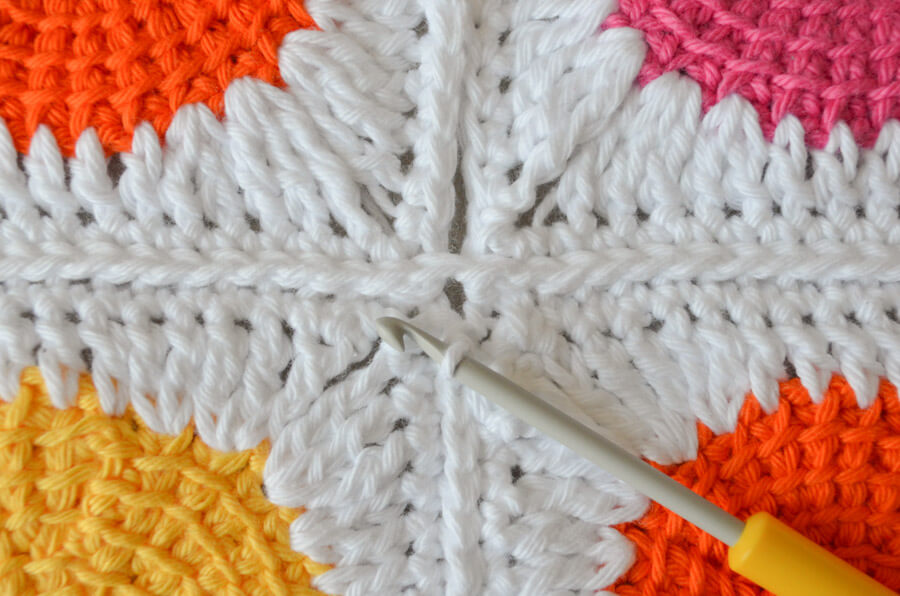
Work a Sl St into the Ch2 spaces before the join, then one into the Ch2 spaces after the join.
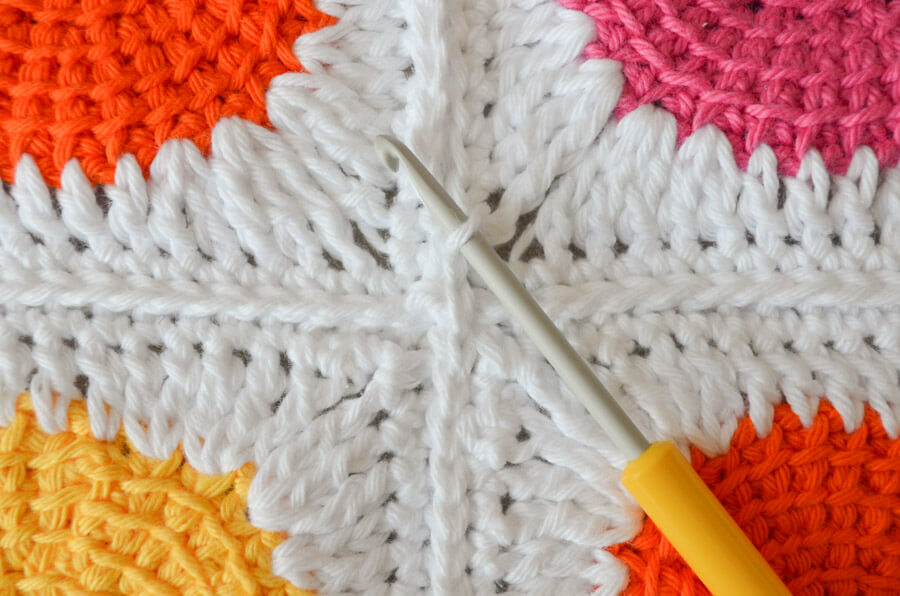
If you want to, you can make a chain, to release some tension, but it’s not really necessary.
When you are done with all the squares, cut off yarn and weave in the ends.
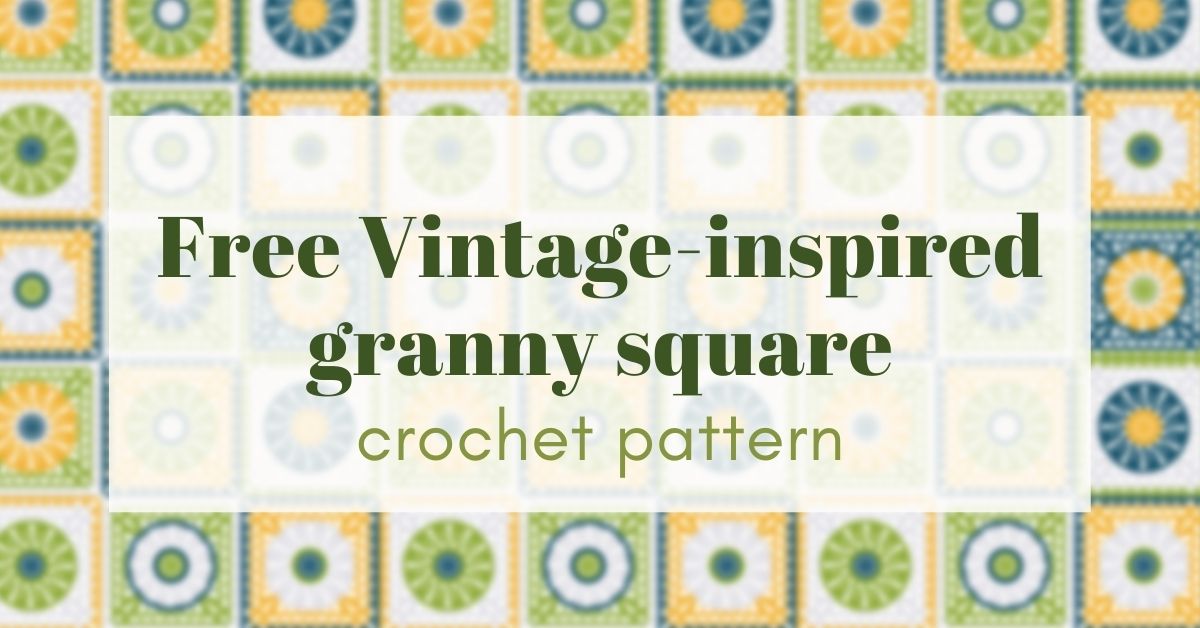
If you are interested in the pattern for the squares I used as examples above, please sign up below to my email updates and I’ll let you know when that pattern is done.
Video instructions for joining granny squares
If you prefer video instructions, I prepared a video for you.
Click on the thumbnail to go to YouTube and follow along with the tutorial.
If you need captions, click on the CC button.
Final thoughts
Please check out the other parts of this series of blog posts if you want to know how to make the squares (see below).
If you use Ravelry, you can add it to your project queue or make a project page and link it with the pattern page, so I can see what you make.
Keep close and sign up to my emails if you haven’t already (you’ll get a nice pattern too).
If you want more free patterns, check these out:
If you have crafty friends who’d like to know this technique, please send them a link to this tutorial, they will surely appreciate it.
Take care and I’ll see you soon.
Hugs,
Andrea

The abbreviations don’t include FLI that is in the directions, can you explain? Thank you!
Sorry, that was a typo, I fixed it.
It should have read FLO, as in front loop only. Thank you for pointing it out!