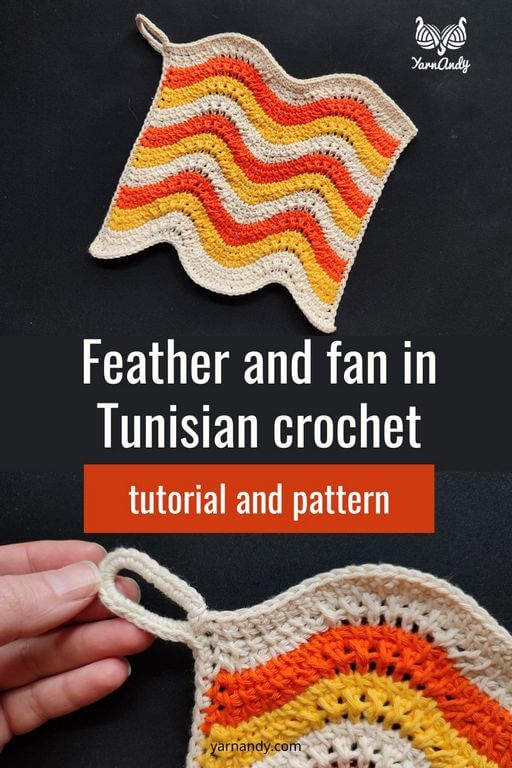
Use this feather and fan Tunisian crochet pattern to make a pretty and colorful washcloth and learn how to add waves to a piece of fabric using increases and decreases.
This project is perfect for using up scraps of cotton yarn.
This is as much a stash busting project as it is a learning opportunity, giving you the theoretical basis for making any kind of feather and fan variation, and also a practical little object that you can use to brighten your kitchen.
Or someone else’s kitchen, if you’re giving it away.
Contents
Color choices for your washcloth
If making a gift, I recommend that you make a set in colors that go with the recipient’s kitchen and personal style.
For example, if they are more into cottage core or natural wood and natural colors, go with a colorful palette including yellows, greens, oranges, dark reds.
If they are a minimalist, go with beige and white and gray, maybe a navy or a petrol blue. If they are more goth or alternative leaning, go with black and white and neon colors.
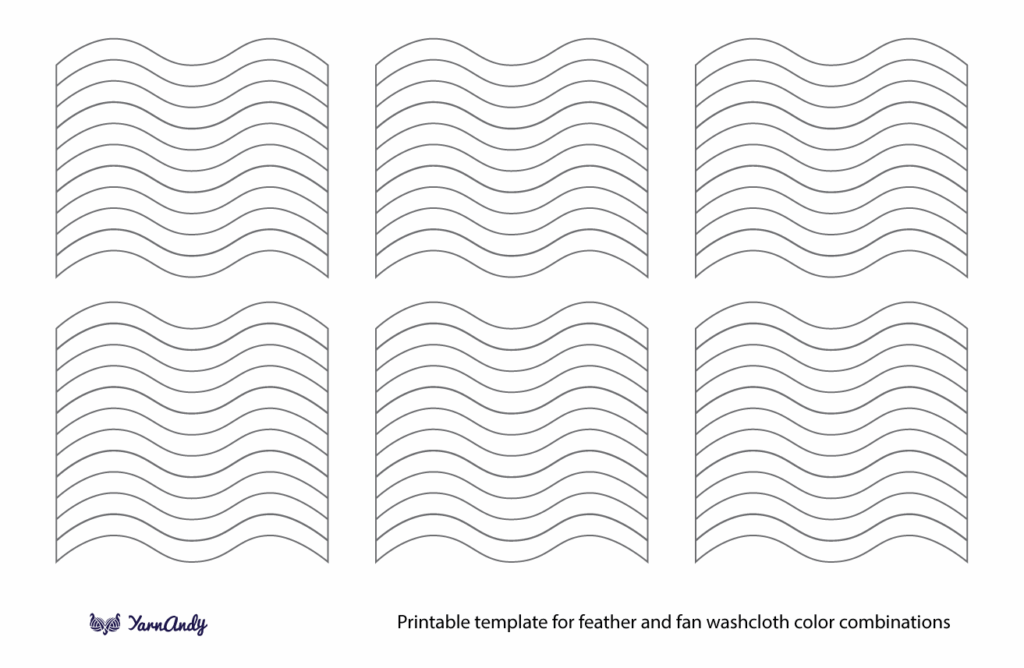
Feather and fan patterns are also great for self striping and ombré yarn with shorter gradients, as they show off the color progression in a fun shape.
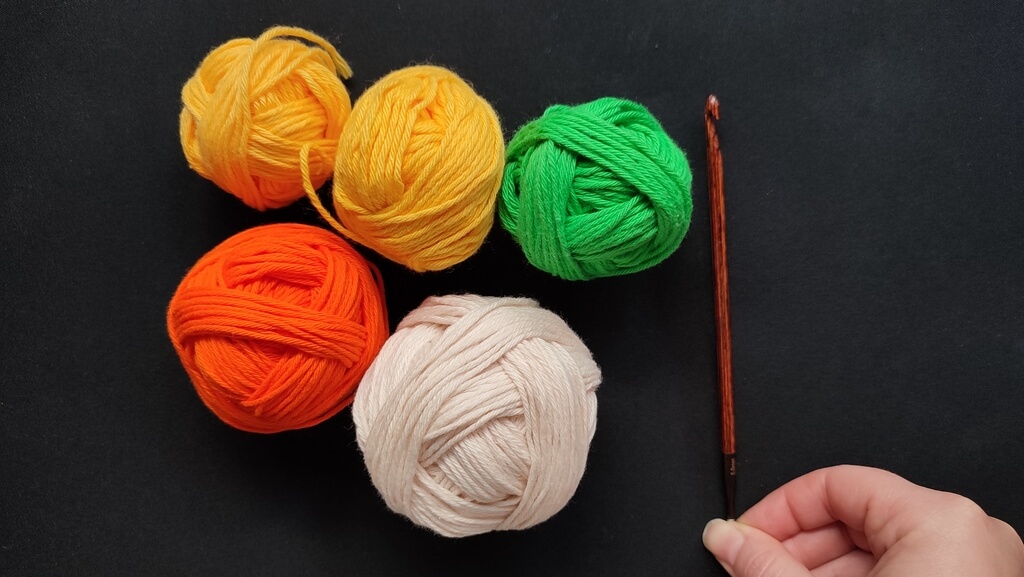
I’ll be using a fun and colorful mix of yellow, green and orange, with thin beige stripes separating the colors, just to use up some leftovers.
I played with the layout of the colors a bit to see what is possible and what i like.
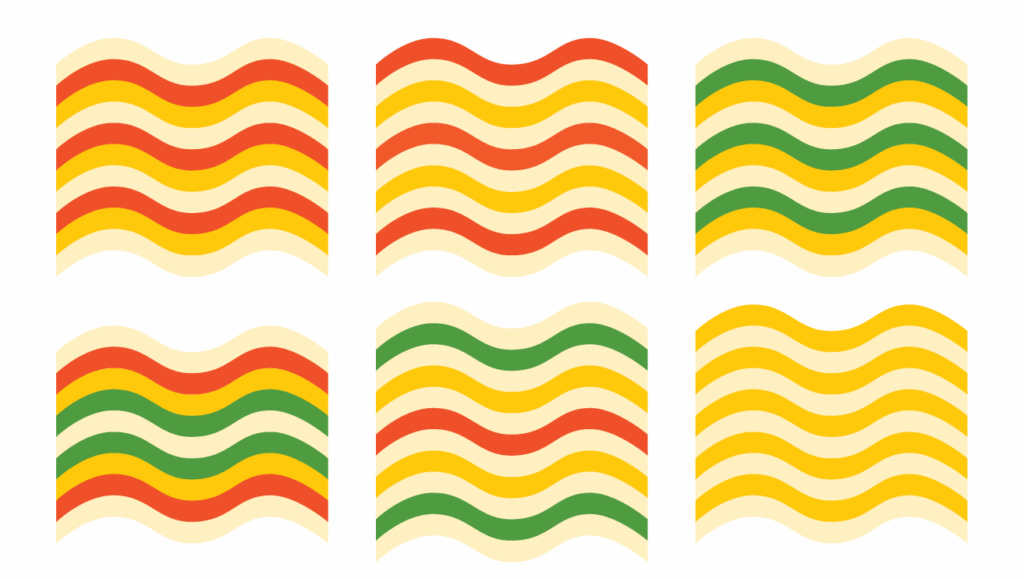
For the video tutorial I think I’ll use the one in the lower right corner, showing how to carry the yarn along the edge.
Materials for making a Tunisian crochet feather and fan washcloth
You will need 100% cotton yarn in sport or DK weight, at about 125-100 meters per 50 g.
There are cheaper options for cotton yarn specifically for dishcloths, or you could use some higher quality mercerized cotton for a longer lasting cloth.
You can use multiple colors and work stripes, or just one colorway. You will need between 50-100 g of yarn per dishcloth, depending on the weight of the yarn and your gauge.
To make this dishcloth you’ll need a Tunisian crochet hook, either straight or with a cable. A 5 mm or 5.5 mm or 6 mm hook will work best for this weight of yarn.
You’ll also need a tapestry needle to finish off the washcloth and a smaller regular crochet hook to make the loop at the end (3 mm or 3.5 mm).
Measurements, gauge and skill level
Your finished washcloth, if using the same gauge as in the pattern, should measure around cm by cm, or ” by “.
The starting width of the project will be different from the final width, since the shaping using the increases and decreases narrows the fabric and increases the height when creating the waves.
Gauge is not essential in this project, as you’re working with scraps. My gauge when making the washcloth is 18 Tss by 18 rows for a 10 cm by 10 cm square.
This is a beginner project, just not for absolute beginners. You will be making simple increases and decreases to create the shape.
Abbreviations
- Ch – chain;
- Ls – last stitch of the forward pass: insert the hook behind the 2 vertical bars at the end of the row and draw up a loop;
- R – regular crochet return pass: Ch 1, Rep [YO and pull through 2 loops on the hook] across, until 1 loop is left on the hook;
- Rep – repeat;
- Sc – single crochet (double crochet in UK terms);
- Sl St – slip stitch;
- St – stitch;
- Tss – Tunisian simple stitch;
- Tks – Tunisian knit stitch;
- Tss2Tog – decrease: insert the hook behind the vertical bars of the next 2 stitches and draw up a loop;
- YO – yarn over.
Instructions for making a feather and fan washcloth
The pattern repeat consists of a multiple of 25, plus 1 first stitch and 1 last stitch.
If you want to use this pattern for a wider or narrower project, add or remove a multiple of 25 stitches to the starting chain or foundation row.
Start with the first color and a slip knot on the hook.
Row 1. Chain 51 or cast on 52 loops using your favorite method to cast on, R
Repeats are shown in square brackets, and nested repeats in round brackets.
Row 2. Rep [4 Tss2Tog, 1 Tss, Rep (YO, 1 Tks) 7 times, YO, 1 Tss, 4 Tss2Tog] 2 times, Ls, R
You can place a stitch marker between the repeats to help you see them easier.
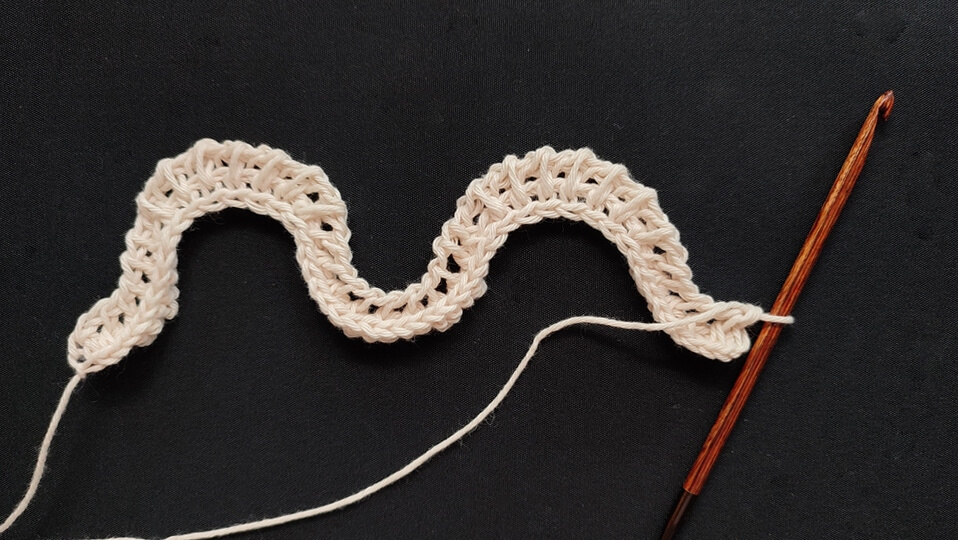
Row 3. Tss across, Ls, R
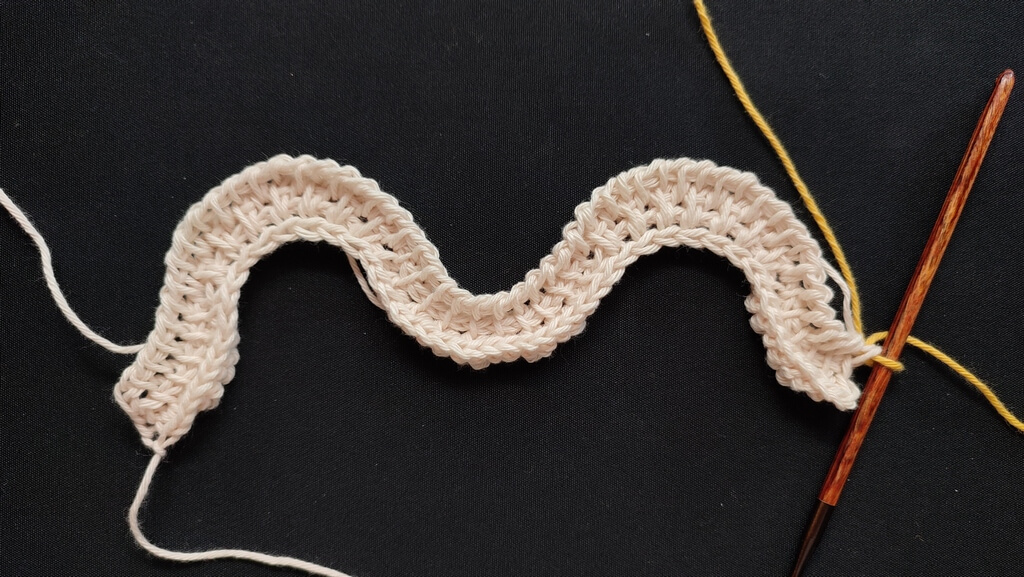
When you encounter an eyelet, you insert the hook inside the eyelet and pick up a loop to make a Tss. More info here about making stitches in eyelets.
If stash busting, change color now, while making the last “YO and pull through 2 loops” of the return pass.
Keep changing the color every 3 rows or a multiple of 3 rows, for a consistent stripe pattern.
You can carry the yarn up the side if reusing, or you can cut it, leaving a tail that will be later woven in.
Row 4. Tss across, Ls, R
Row 5. Rep [4 Tss2Tog, 1 Tss, Rep (YO, 1 Tks) 7 times, YO, 1 Tss, 4 Tss2Tog] 2 times, Ls, R
Row 6. Tss across, Ls, R
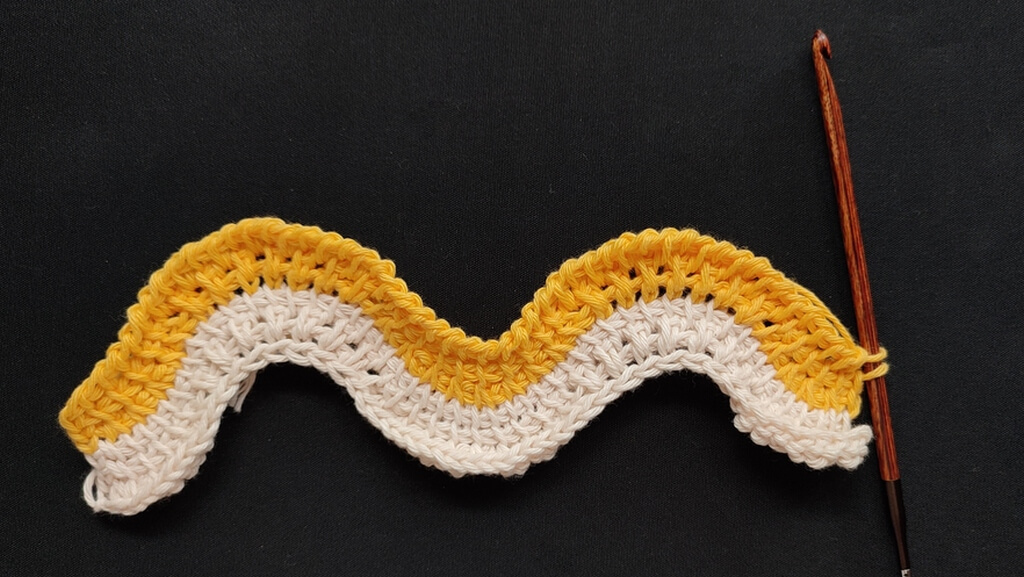
Change color and keep repeating rows 4-6 until you make 30 rows in total or reach the desired length of the washcloth.
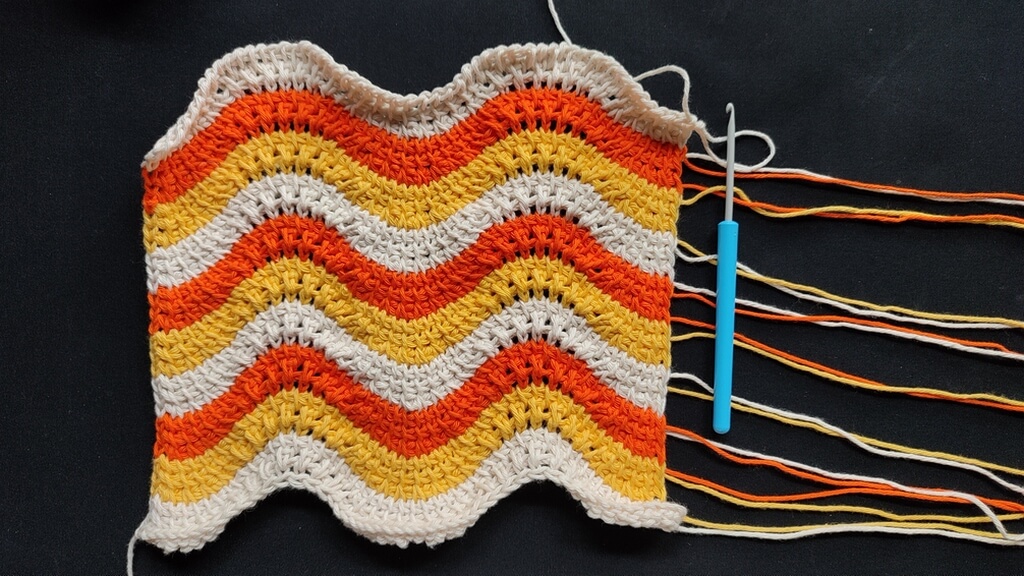
Do not cut off the last color of yarn. Switch to the smaller hook and bind off, making a single crochet stitch in each stitch along the top of the washcloth, the sides, and the bottom.
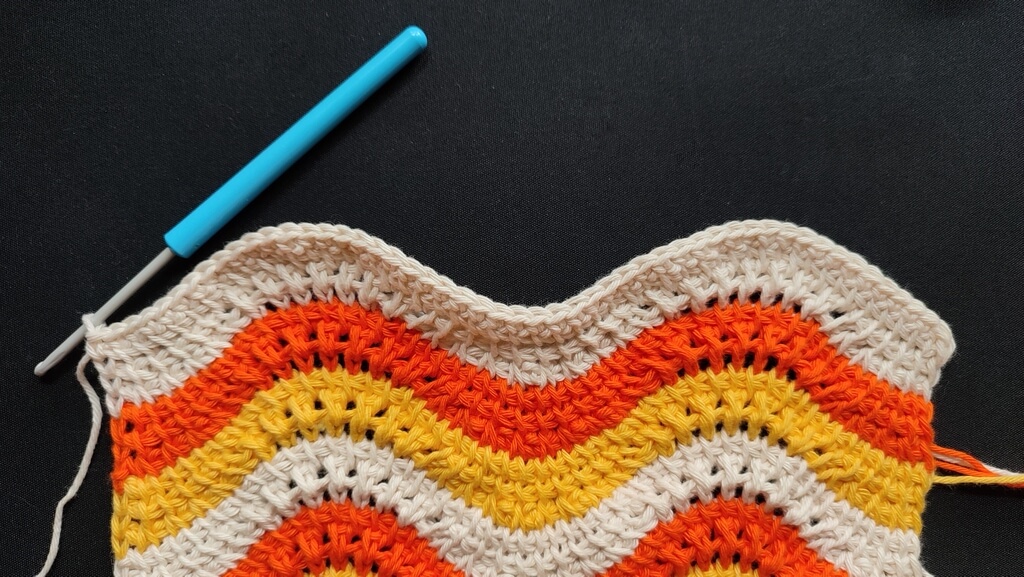
When you reach a corner, place a {Sc, Ch 1, Sc} cluster in the corner stitch.
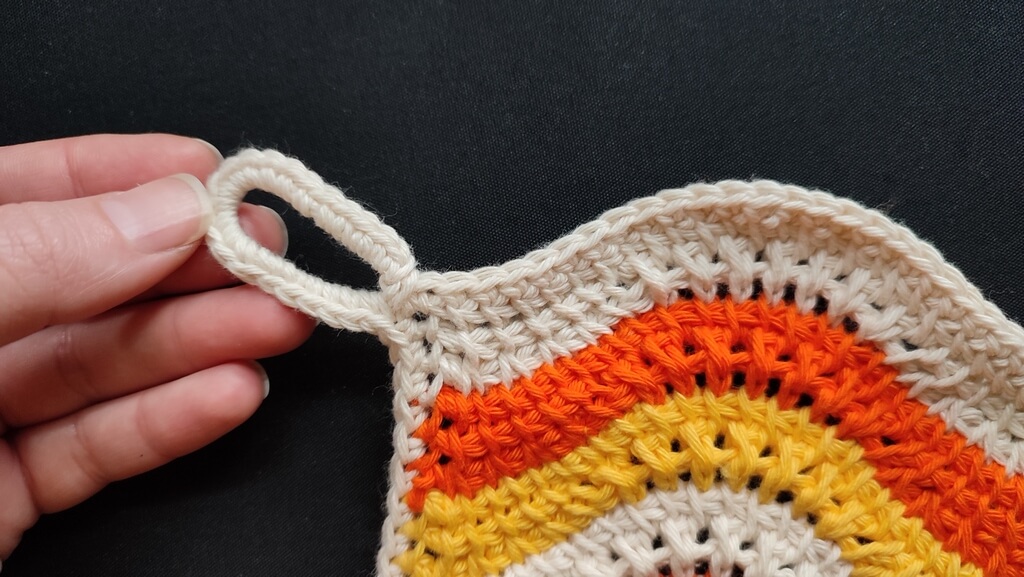
To add a loop, in one corner chain 16, Sl St to the base of the chain and make 20-24 Sc in the chain loop, Sl St to the base of the chain again and continue with the Sc along the next edge.
Changing the feather and fan pattern
Maybe you don’t want a 25-stitch repeat. Maybe you want a wider and deeper wave, or you want a shallower and narrower wave.
You can change that in several ways.
I played with the Stitch Maps software a bit to show you some examples of these changes.
There are links to the various maps I made and you can also play with them or try the patterns if you knit.
Modifying the amplitude
First, add or remove some of the plain rows (those without increases or decreases). Adding more rows between the rows with increases will make the waves shallower.
This will not change the number of stitches in the repeat. In physics, this is known as the amplitude of the wave.
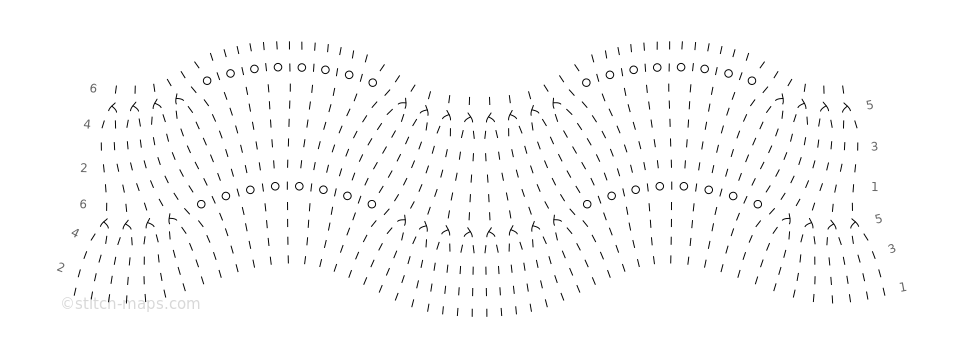
In the example below, we have the equivalent to the 25-stitch repeat, but represented with knitting symbols. Between the shaping rows, we have 3 plain rows.

In the example below, I only added two rows of plain stitches (what in Tunisian crochet would be one extra row).
The pattern repeat still consists of 25 stitches, but now the wave is much shallower.
Modifying the wavelength by number of shaping stitches
If you want to change the width of the wave (the wavelength, as it were), you will need to change the number of increases and decreases per repeat.
You can make 7 increases and 7 decreases per repeat, which will result in 22 stitches per repeat.
Or you can make 6 increases and 6 decreases, which will result in 19 stitches per repeat.
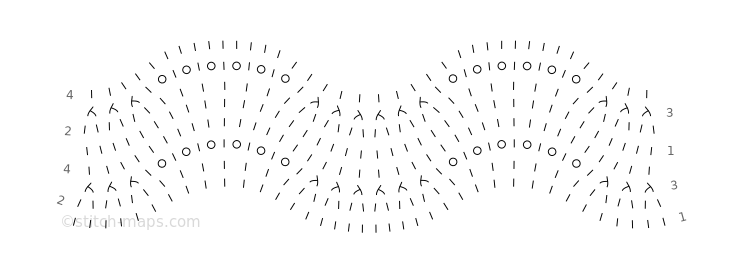
If you want a wider wave, at 10 increases and 10 decreases per repeat you will have 31 stitches.

Modifying the wavelength by number of plain stitches
You can also add or remove the stitches that separate the increases and decreases.
I chose to have 2 Tss in this pattern, but you can remove those completely or add more, either between the sections, or within them.
For example, instead of 1 Tks between the YO, you can have 2 in one spot. You need to mirror that in the decrease, for a symmetrical wave.
At the end of the repeat (the middle of the section with decreases) you will add an extra stitch.
The example below is a knit equivalent that shows you how the stitch pattern widens when you add a stitch between groups of increases and decreases.

You can even space out the decreases and increases for a very long and shallow stitch pattern, like the one below with 40 stitches per repeat.

Increasing or decreasing the shaping stitches
You can also increase or decrease the feather and fan shape itself by skipping decreases or increases, respectively.
For example, if you want to work a bottom up A-line shape, you can start with more stitches and for one pattern repeat skip two of the increases.
Then skip two more increases, keeping in mind that you still have some stitches that need to be made, as they no longer belong to the increases/decreases.
This is what it will look like, with the rows at the top becoming shorter.
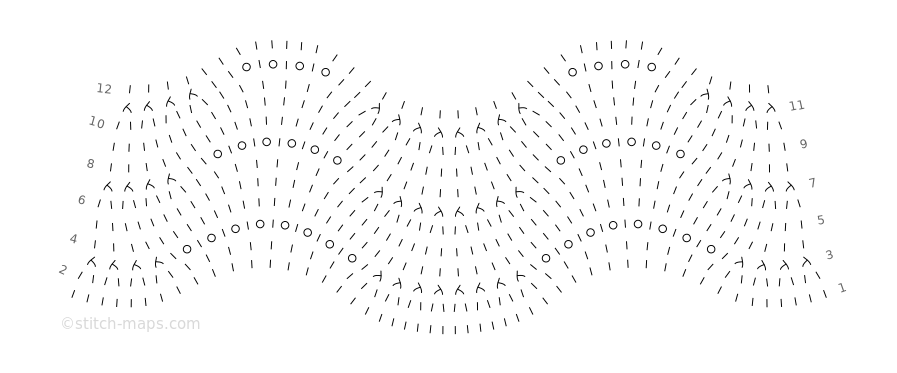
The development of this type of pattern is best left for later, when you have more experience, as it can get complicated fast.
Other shaping resources for Tunisian crochet
If you enjoyed this tutorial and want to learn more about Tunisian crochet and shaping, check out these resources:
- Shawl shapes in Tunisian crochet
- The most elastic Tunisian crochet ribbing
- Tunisian crochet in the round
Or you could try other free Tunisian crochet patterns to learn new techniques.
