In this article, you’ll find detailed instructions on how to make a gorgeous lacy edging crochet pattern, plus videos. If you want to know how to make a standalone border or want charts, check out the PDF pattern here.
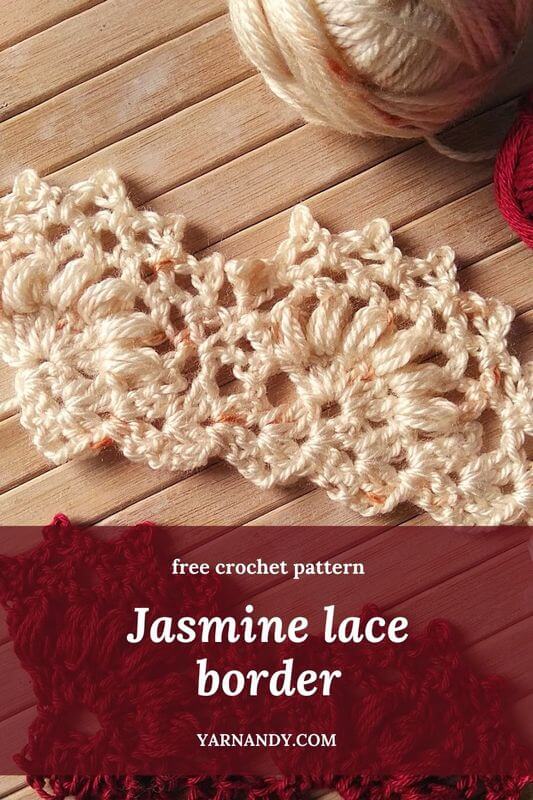
About the Jasmine lacy edging crochet pattern
You have a simple project that needs a border to make it go “wow” and you are looking at all the lacy borders out there.
What do most of them have in common? They are worked one row at a time, around the whole object.
What if you just want to add a border to certain sides? What if you want to build up the border sideways?
There are not many patterns for build-as-you-go borders. I don’t know why, but I found at least an interesting one a few years ago.
It was a scanned image of a chart from a book.
This image had been added by someone to the internet and it lived for a long while on Pinterest.
I wish I knew what book it came from, but it was cropped and there was no information regarding sources (this is why you shouldn’t upload to Pinterest stuff that you don’t have the right to upload, nor the source to cite).
I used it to make an edging to a simple shawl that I’d knit. It got lots of compliments and love and, most of all, questions about the border.
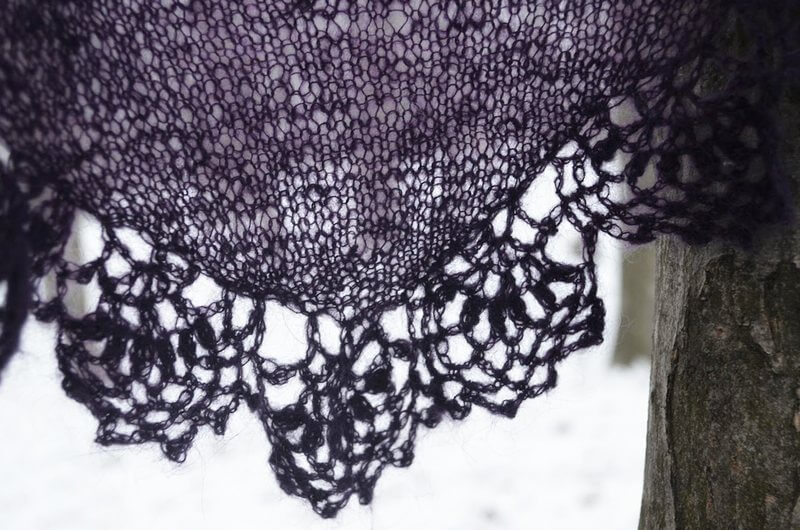
Sadly, I couldn’t share the pattern because 1. it doesn’t belong to me and 2. I had no idea where it came from.
So I came up with my own version of a lacy edging similar from afar to this edging.
My version is only inspired, but doesn’t copy the original.
It consists of 4 rows per motif instead of 6, uses puff stitches, not bobbles, includes extended stitches and the motifs attach to each other to create a continuous tape, as opposed to the original, where the motifs were independent.
I hope you can see the differences and appreciate this new pattern.
A PDF version of this pattern is available in the shop and it includes charts for both the border and a standalone tape that you can work up and attach to any project at a later time.
The reason I don’t add my charts to the free versions of patterns that I post on the blog is because I don’t want them to have the same fate as the pattern I was inspired by. If you buy the PDF version of this pattern, please respect my work and don’t post the charts on Pinterest.
Observations
- This pattern is written using US terms. For UK terms, please buy the PDF.
- This border is created of individual motifs that are worked in rows, back and forth.
- For details regarding stitch placement, please consult the charts on page 7.
- Instructions in [square brackets] are repeated the number of times mentioned after the brackets.
- Instructions in {curly brackets} are worked in the same stitch or space.
- For a more visual demonstration of stitch placement, check out the video or the diagrams available in the PDF version of the pattern.
Gauge
This pattern can be worked with any yarn and hook combination while using loose tension. For lace-weight yarn worked with a 4 mm hook, you will need 18 Dc stitches and 9 rows to make a 10 cm by 10 cm square (4” by 4”).
Size
The length of the lacy crochet border will depend on what you need it for. Work until you are satisfied with the length.
You can cram more motifs in the same length, making the border more ruffled, or you can spread out the motifs, to make the lace more prominent.
When working with lace-weight yarn, the length of a motif is about 8 cm or 3.5″. The height of a motif is about 5 cm or 2″ at the highest point.
When using thicker yarn with a larger hook, the motifs will be longer and taller.
If you use the same hook, chances are that the motifs will have the same size, but they will look less lacy.
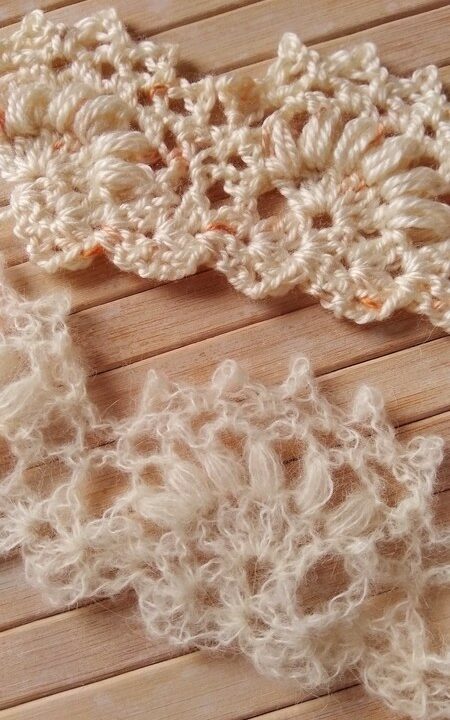
Materials to make this lacy crochet border
For a lacy edge, use lace-weight yarn. For a thicker edge, you can use any other yarn.
Yarn lengths will vary depending on the length of the border.
For a single motif in lace-weight yarn you will need about 3-4 meters of yarn. For thicker yarns, you will need more per motif.
For lace-weight yarn, use a 3- or 3.5-mm hook for an airy border.
For other yarns, use the hook recommended for your yarn.
Abbreviations
- Ch – chain;
- Dc – double crochet stitch;
- EDc – extended double crochet stitch: YO, pull up a loop, YO, pull through one loop on hook, repeat [YO and pull through 2 loops on hook] 2 times;
- MR – magic ring;
- Pc – picot – Ch3, Sl St into back bump of first Ch;
- Puff – puff stitch – repeat [YO and insert hook into the St, pull up a loop] 4 times, YO and pull through all 9 loops on hook, Ch1 and pull on the chain to close the top of the puff;
- Sc – single crochet stitch;
- Sk – skip;
- Sl St – slip stitch;
- Sp – space – might be used to denote a chain space or a space on the edge of the object you are adding the border to;
- St – stitch;
- YO – yarn-over.
Videos for the lacy edging crochet pattern
This pattern comes with a video in which I show you how to make the edging while working along the edge of a project. I show you how to make the first motif and the repeating motif.
There are two videos, for right-handed and left-handed crocheters, and both come with captions.
Right-handed video
Left-handed video
Lacy crochet border instructions
This border is made along the edge of a previously made object.
You will decide on the distance between the points where the motif is attached to the base (denoted Sp in the instructions), but I recommend leaving about the height of a Dc stitch between these points.
The first motif will not be connected to anything, it will be made individually. All subsequent motifs are connected to each other.
Start with a slip knot on your hook.
R1. Sc into the first edge Sp, Ch3, Sc into next edge Sp, turn
R2. 6EDc into the first Ch3 Sp, turn
R3. Ch2, Puff into first St, repeat [Ch2, Puff in next St] 5 times, Ch2, Sc into next edge Sp, turn
R4. Ch3, Sk a Ch2 Sp, Sc in next Ch2 Sp, repeat [Ch3, Sc in next Ch2 Sp] 5 times, turn
R5. Ch1, Pc, Ch1, Sc into first Ch3 Sp, repeat [Ch1, Pc, Ch1, Sc into next Ch3 Sp] 5 times, Ch1, Pc, Ch1, Sc into next edge Sp, repeat [Ch3, Sc into next edge Sp] 2 times, turn
The first motif is finished and now comes the pattern for the second and all subsequent motifs.
R6. 6EDc into the first Ch3 Sp, Sl St into first Pc on the previous motif, Ch2, Sl St into the second Pc on the previous motif turn
R7. Puff into first St, repeat [Ch2, Puff in next St] 5 times, Ch2, Sc into next edge Sp, turn
R8. Ch3, Sk a Ch2 Sp, Sc in next Ch2 Sp, repeat [Ch3, Sc in next Ch2 Sp] 4 times, Ch3, Sl St into second Pc of the previous motif, turn
R9. Ch1, Pc, Ch1, Sc into first Ch2 Sp, repeat [ Ch1, Pc, Ch1, Sc into next Ch3 Sp] 5 times, Ch1, Pc, Ch1, Sc into next edge Sp, repeat [Ch3, Sc into next edge Sp] 2 times, turn
Continue making motifs by repeating rows 6-9 until you reach the end of your edge.
You can easily work around corners by decreasing the distance between the edge spaces when you reach a corner.
When you reach the last motif, only work R9 until you finish the last Pc.
Cut the yarn and weave in the ends.
If you want to make the standalone border or if you would rather like to work from charts, they are all available in the PDF version of this pattern.
Final remarks
If you want to try out other free patterns, check them out below.
If you want to know when I publish more patterns, please sign up to my email updates by clicking on the image below.
Thank you so much for being here with me!
I’ll see you soon with more patterns and articles with tips and tricks.
Hugs,
Andrea




i am working on the stand-alone border version of this pattern and i found that the first “flower” jutted off at sort of a 45 degree angle from the foundation. i suspect if you intend to join the strip of lace into a round after finishing it, this is ideal to sew them together seamlessly. however, i am making my lace to attach to the hem of a cardigan that doesn’t close, and i wanted the starting end of the lace to be even, so i did the following modifications:
instead of doing 2 rows of foundation stitch and then continuing on into the extended double crochets of the first flower, do 6 rows of foundation stitches and then start the EDC.
at the end of the row of EDC, join with a slip stitch to the 2ch space of the 2nd row of the foundation.
again at the end of the row that goes (3chain, 1sc), join with a slip stitch to the 2ch space of the 1st row of foundation.
turn and start your picot, and you will be able to continue following the pattern as written.
this brings that nice scalloped foundation all the way to the far edge of the first flower.
at any rate, this is a lovely pattern and still very simple. i’ve never done lace before and i had no problem picking it up.
Dear Madison,
Thank you for the detailed account of your modification! I will take this info into account for future border patterns.
For the project that I used this border on, the 45 degree angle was perfect, as it continued the shape of the shawl, but I understand why that might not be desirable to everyone on the standalone tape.
And yes, if you use it around a blanket, you can seam it up invisibly.