Use sock yarn and this size-inclusive Tunisian crochet sweater pattern to make yourself a cute and comfortable seamed sweater that you will want to wear every day during the cold season.
If you’re new to Tunisian crochet and want to make a well fitting Tunisian crochet sweater for yourself or a loved one, but don’t know where to start, this pattern is for you.
Ever since learning how to make the Tunisian simple stitch many years ago, I’ve wanted to use this easy beginner stitch to make sweaters that fit, with neckline shaping for extra comfort.
Using a mix of sock yarn, which has great durability, with a comfortable 5 mm hook and relaxed tension, I created this Tunisian crochet sweater pattern that can be made and worn by anyone.
Add some short row bust shaping for a large bust, to make it fit even better.
Contents
About this Tunisian crochet sweater pattern
This is a beginner Tunisian crochet pattern for a long sleeved sweater that uses 2 stitches throughout.
It is worked bottom-up for the body, in a front and back panel, with top-down sleeves. There is no waist shaping.
All the pieces are seamed and the neckband is added after seaming the body. The cuffs for both sleeves and body are included in the instructions.
The shape is that of a modified drop-shoulder sweater (see schematic below).
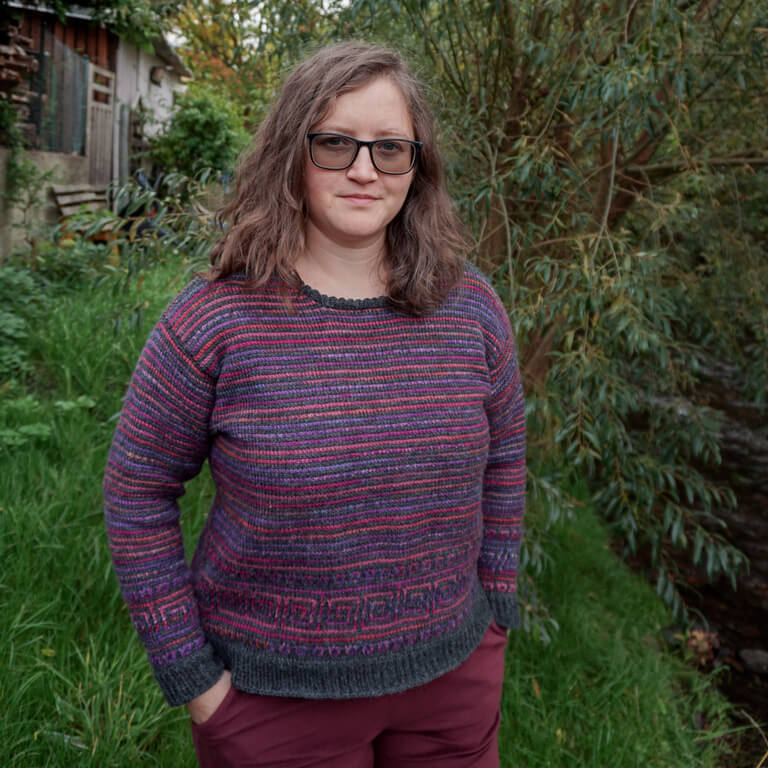
The sleeves are worked flat, without shaping at the top. The pattern is written out for all 12 sizes and includes ease.
You will choose a size based on the finished garment measurements and follow only the instructions for that size.
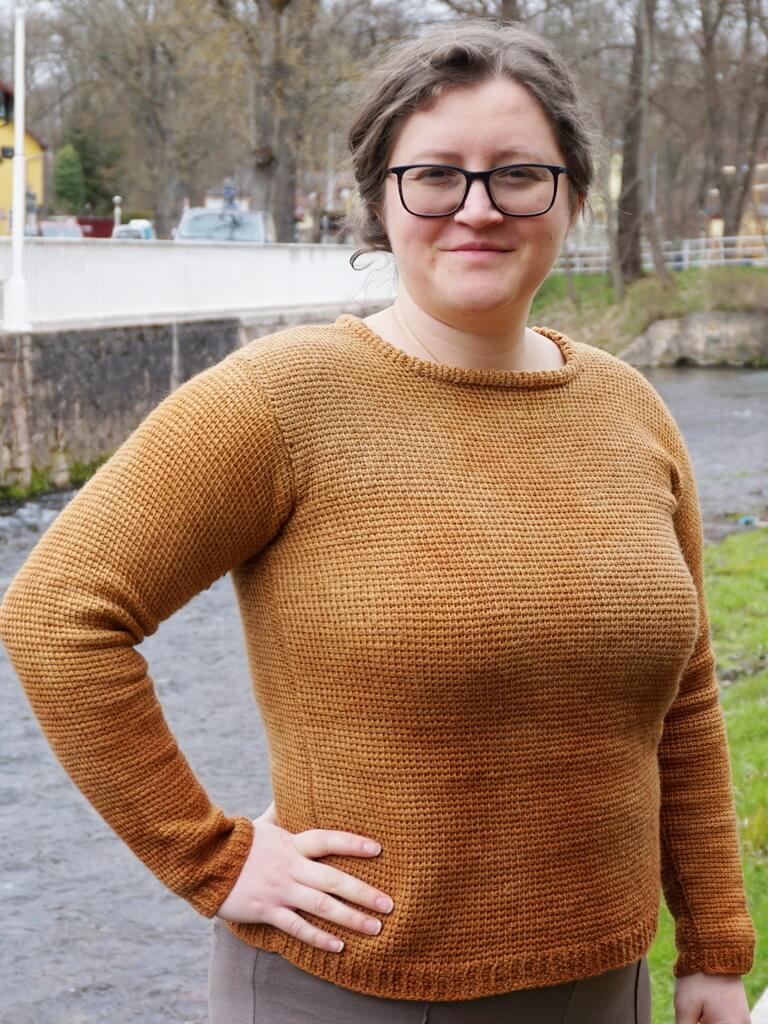
You can also modify the pattern to suit your body shape by choosing to work from the instructions for different sizes for the lower body and the top part, with the armscye shaping.
If you buy the PDF version, you also get a guide for customizing the fit of garments that will help you get the perfect fit for your sweater.
You can also use the guide for any other garment patterns that you want to make later on.
Why is this Tunisian crochet sweater pattern free?
The version on the blog includes all sizes and it was created so that you can return to it and use it as a resource over the years.
You can use the stitch counts in any stitch pattern to create sweaters for yourself and other people in your life.
Since the shaping is easily modified, you can make this sweater for many people of different shapes and sizes.
Use the attached guide to make the fit perfect for each person.
Use the images below to save this pattern to one of your Pinterest boards.
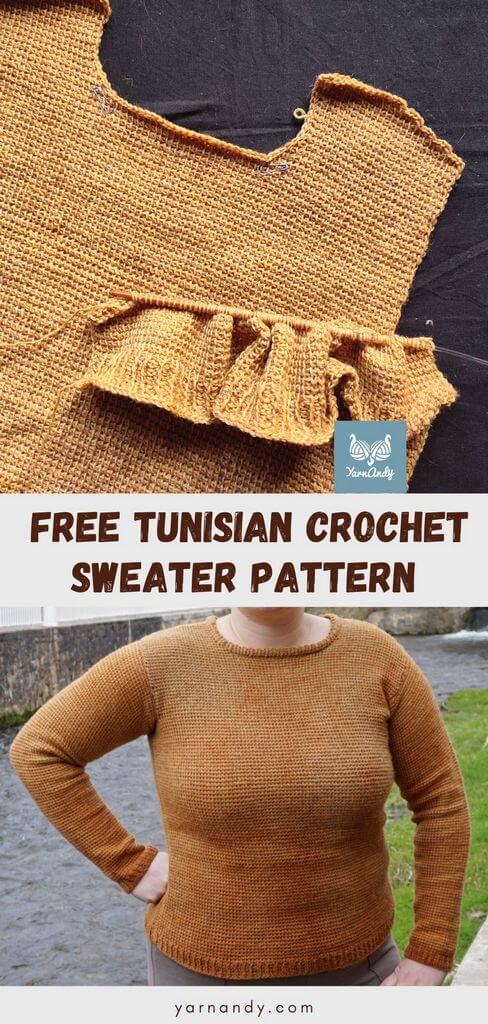
Printable pattern with individual sizes
This pattern is also available in PDF form.
If you want to buy the PDF version, here are the different platforms where you can do so:
There are 5 files included in your purchase.
- All the instructions (print-friendly), schematics and photo tutorials.
- Easy read or low vision version with all the text in a large font.
- Each size individually written out, with a table of measurements for each size.
- An easy read version with individual sizes written out.
- A universal guide for improving the fit of your garments.
Inspiration for this Tunisian crochet sweater design
After playing around with different types of stitch patterns in Tunisian crochet and trying my hand at designing some wearables with those stitches, I realized I needed to start with something basic.
I wanted a comfortable, thin fabric, with a simple construction, so I could use up some sock yarn that I’d hand dyed with mushrooms.
This was right after I’d made a sweater using the sun motif that became the sun square pattern that’s also free on the blog.
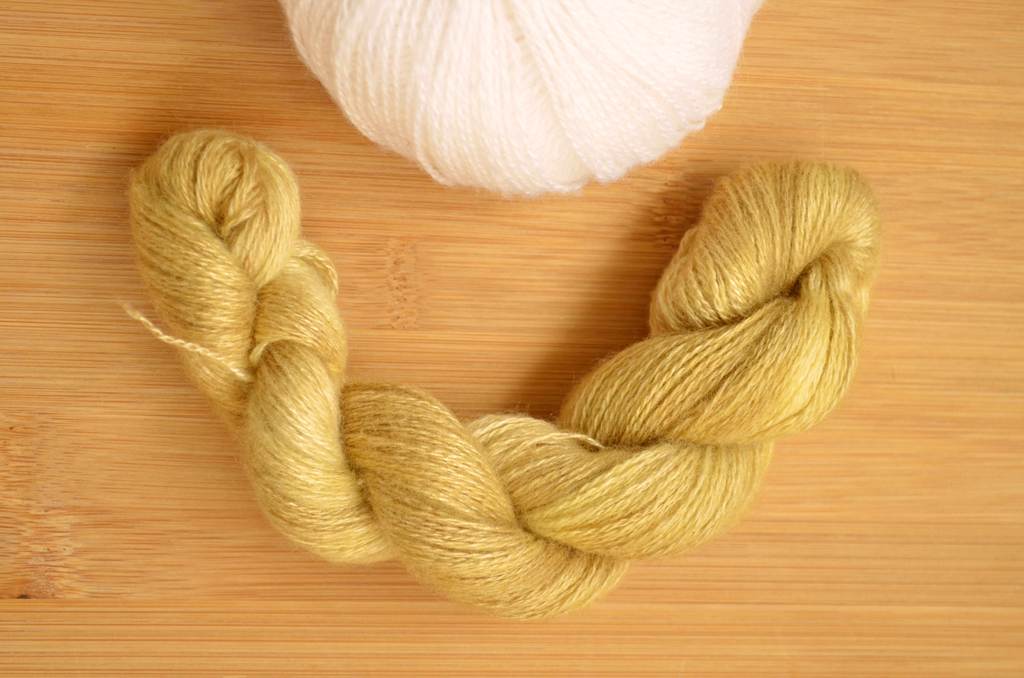
I wanted something simple that I could turn into a size-inclusive pattern.
There aren’t a lot of those around, but once we have a few, more people should be able to get around and get creative with different stitch patterns and construction methods.
So given how I wanted a blueprint-style pattern and it was made with a yarn dyed with mushrooms, I decided on a cute name that marries these two concepts.
A spore print is what a mushroom leaves behind if you allow it to deposit its spores on a hard surface.
Usually the spores are scattered by the wind, but if you cut a mushroom and lay it on a piece of paper, you’ll be able to see the negative of the gills on the paper (use colored paper for white spores).
A blueprint is a technical drawing of a design, easy to follow along with to construct something. Usually buildings, but in this case a Tunisian crochet sweater.
Tester projects
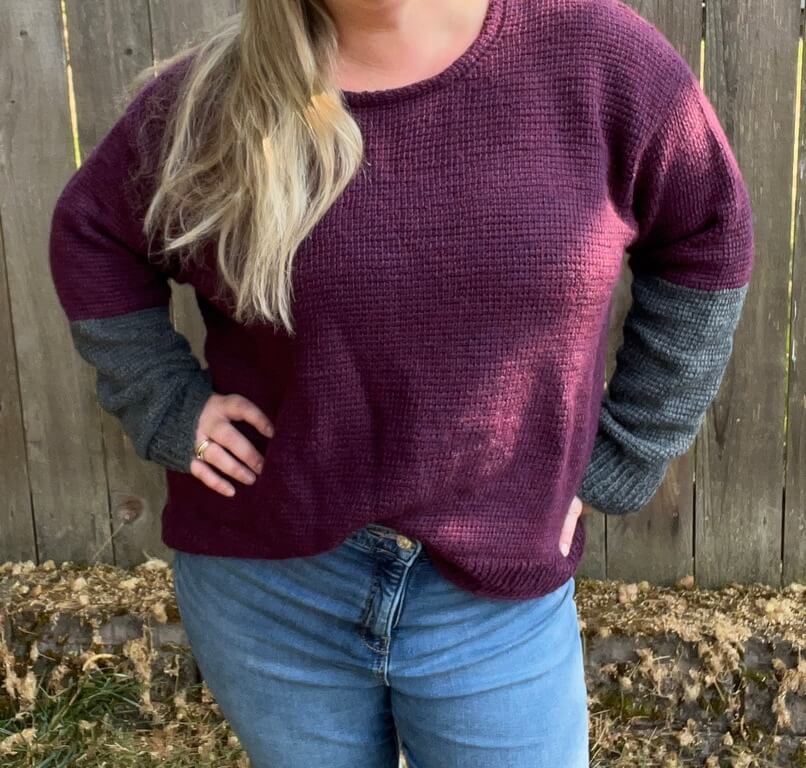
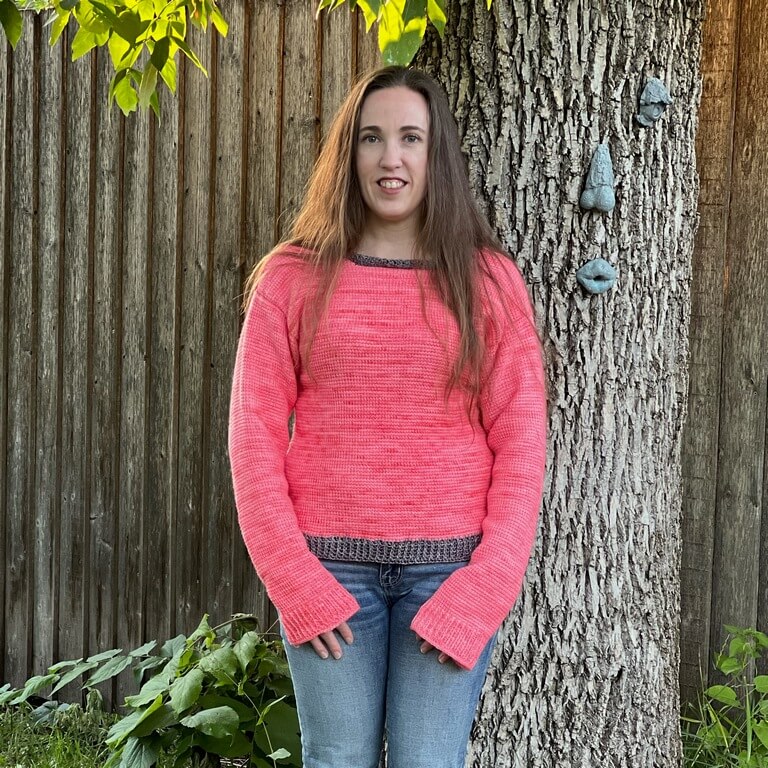
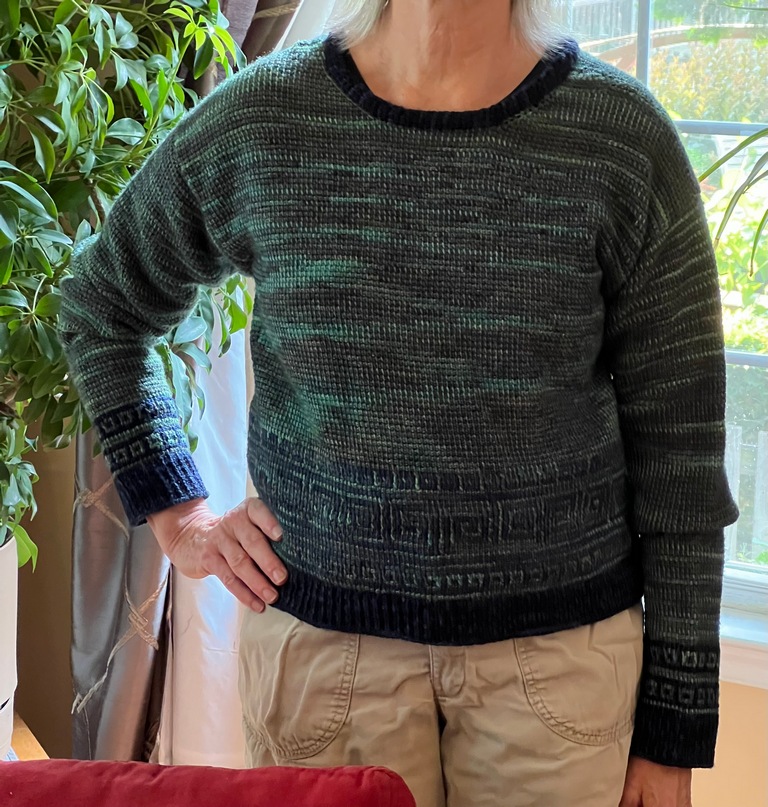
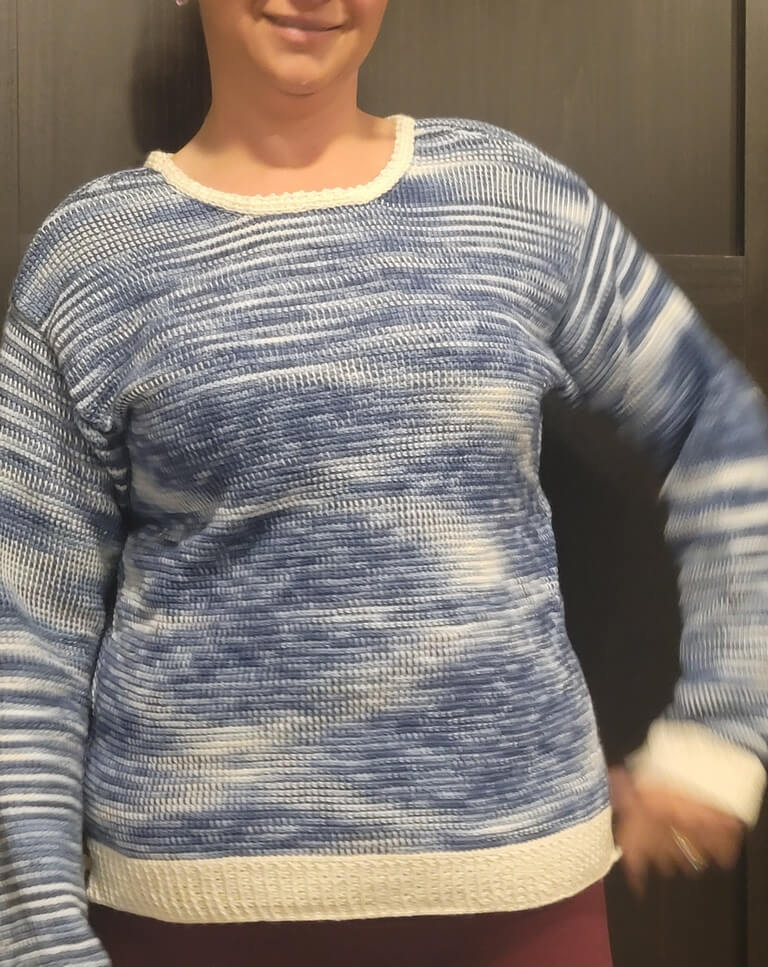
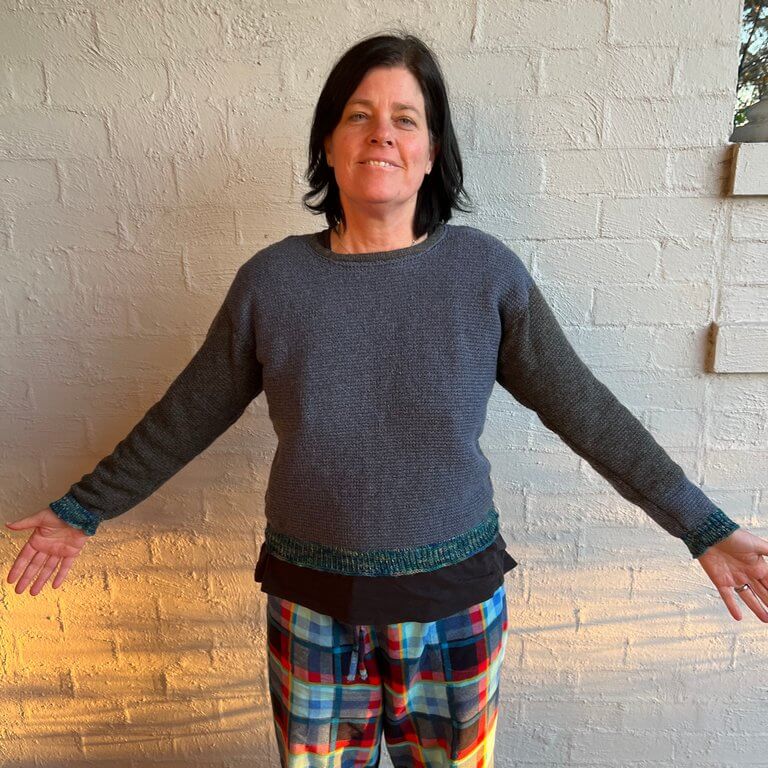
Here are completed projects from testers, in no particular order. Sizes 1-5 and 7 from the pattern are represented.
From top to bottom and left to right, the projects belong to: Ellie, Sandhya, Amber, Tracy, Karyn, Rachel, Addie and Kim.



Pattern notes or observations
This is a Tunisian crochet pattern worked flat, which means you always work on the right side of the fabric (the side that will be towards the outside), except when seaming.
The pattern is built in panels that you create individually and then seam.
This sweater pattern is written for all sizes at the same time. A separate file is available with individual instructions for each size.
You should choose the size based on the high hip measurement and armscye measurement. If your bust and armscye measurements belong to another size, you can customize the shaping from the high hip to the bust, using the attached guide.
The garment measurements include ease. There are 10 cm or 4″ of ease at bust and hip, 4 cm or 1.5″ for the armhole and 9 cm 3.75″ at the wrist. Choose a size that has an amount of ease from your body measurements that is comfortable for you (more ease for a loose fit, less ease for a closer fit).
You can start with any of the parts of this pattern, as they will all be seamed together.
If you don’t want to make a separate swatch, you can start with a sleeve and use that as a gauge swatch. Keep in mind that you may have to start over if the gauge doesn’t match.
Choose the sleeve construction to fit with your color choices. For a gradient or a fade, use the bottom-up construction and check the length as you go. If the sleeves in the instructions are too long, only skip plain rows, not increase rows.
For any other color choice (uni, stripes, color blocks), use the top-down construction, as checking the fit is easier. If the sleeves in the instructions are too long, only skip plain rows, not decrease rows.
Change color only at the beginning or end of a row (before the return pass) to prevent issues with stitches gaping where you add new yarn.
Weave in the ends by going back and forth through the fabric across or along the back bumps of the return pass, on the wrong side of the fabric.
You can choose between seaming using the smaller hook or the tapestry needle. In either case, always pick up loops from the return pass when seaming.
Repeats are shown in [square brackets]. Some repeats are nested.
At the end of specific rows, you will have loop counts for the row after the — symbol. These include the first and last loop on your hook before the return pass.
If no loop count is mentioned after a row, use the last loop count given.
After finishing the sweater, wash it and lay it flat to dry before wearing.
Skill level to crochet this sweater
Beginner – you will work mainly with the Tunisian simple stitch. Tunisian purl stitches and eyelets are used for the cuffs and neckline. Shaping is achieved with working stitches together or increases between existing stitches.
Experienced beginner if you want to make the mosaic details on the sleeves and bottom of the body.
Measurements for a well-fitting sweater
The pattern comes with 12 fully written sizes. You can easily customize the length of the body and the sleeves by adding or skipping rows.
The measurements in the tables below are garment measurements and they should all be larger than your body measurements at the same points.
Otherwise, the sweater will not fit or will feel constricting at those points which are larger than in the table.
Take your measurements at the mentioned points or use this form as a guide and note measurements A*, B, E, G, H, I, K, N, Q and compare them to the ones in the tables below.
*A2 is a modified neckline measurement used in the pattern, A is your neck circumference.

In the pattern, you will find the instructions for all sizes written in the following style: Size 1, 2, 3 (4, 5, 6) [7, 8, 9] {10, 11, 12}.
Highlight the counts for your size or use the colored guides for your size.
Measurements
Garment measurements include ease.
Measurements in cm.
| Garment measurements (cm) | ||||||||||||
| Size | 1 | 2 | 3 | 4 | 5 | 6 | 7 | 8 | 9 | 10 | 11 | 12 |
| A2. Neckline circumference | 52 | 53 | 55 | 56 | 57 | 58 | 60 | 61 | 62 | 63 | 64 | 66.5 |
| B. Armscye | 39 | 41 | 44 | 47 | 50 | 54 | 54 | 57 | 61 | 64 | 68 | 71 |
| E. Wrist | 22.5 | 23 | 23 | 23.5 | 24 | 24 | 24.5 | 25 | 25 | 25.5 | 26 | 26.5 |
| G. Shoulder length | 11 | 12 | 12 | 12 | 13 | 13 | 13 | 14 | 14 | 14 | 15 | 15 |
| H. Shoulder width | 44 | 46 | 48 | 49 | 50 | 51 | 53 | 54 | 55 | 56 | 58 | 60 |
| I. Arm length | 50 | 51 | 52 | 54 | 55 | 55 | 55 | 55 | 56 | 56 | 56 | 56 |
| K. Bust circumference | 88 | 96 | 105 | 113 | 121 | 130 | 138 | 147 | 155 | 163 | 172 | 180 |
| N. High hip circumference | 81 | 91 | 101 | 112 | 122 | 132 | 142 | 152 | 162 | 173 | 183 | 193 |
| Q. Back length to high hip | 45 | 47 | 48 | 50 | 52 | 52 | 54 | 57 | 58 | 60 | 63 | 65 |
Measurements in inches.
| Garment measurements (“) | ||||||||||||
| Size | 1 | 2 | 3 | 4 | 5 | 6 | 7 | 8 | 9 | 10 | 11 | 12 |
| A2. Neckline circumference | 20.8 | 21.3 | 22.0 | 22.5 | 22.8 | 23.3 | 24 | 24.5 | 24.8 | 25.3 | 25.5 | 26.5 |
| B. Armscye | 15.5 | 16.5 | 17.5 | 18.8 | 20 | 21.5 | 21.5 | 22.8 | 24.5 | 25.5 | 27.3 | 28.5 |
| E. Wrist | 9 | 9.25 | 9.25 | 9.5 | 9.5 | 9.5 | 9.75 | 10 | 10 | 10.3 | 10.5 | 10.5 |
| G. Shoulder length | 4.5 | 4.75 | 4.75 | 4.75 | 5.25 | 5.25 | 5.25 | 5.5 | 5.5 | 5.5 | 6 | 6 |
| H. Shoulder width | 17.5 | 18.5 | 19.3 | 19.5 | 20 | 20.5 | 21.3 | 21.5 | 22 | 22.5 | 23.3 | 24 |
| I. Arm length | 20 | 20.5 | 20.8 | 21.5 | 22 | 22 | 22 | 22 | 22.5 | 22.5 | 22.5 | 22.5 |
| K. Bust circumference | 35.3 | 38.5 | 42 | 45.3 | 48.5 | 52 | 55.3 | 58.8 | 62 | 65.3 | 68.8 | 72 |
| N. High hip circumference | 32.5 | 36.5 | 40.5 | 44.8 | 48.8 | 52.8 | 56.8 | 60.8 | 64.8 | 69.3 | 73.3 | 77.3 |
| Q. Back length to high hip | 18 | 18.8 | 19.3 | 20 | 20.8 | 20.8 | 21.5 | 22.8 | 23.3 | 24 | 25.3 | 26 |
Gauge swatch
Gauge for this pattern is essential and you should check gauge in your panels as you work them, not just in the gauge swatch. Gauge is the most important aspect in getting a garment that fits, along with choosing the right size.
To find the correct hook size for your chosen yarn and for your natural tension, make a gauge swatch by following these instructions.
Row 1. Ch 30, pick up 30 loops in the back bumps of the chains, R
Row 2. 29 Tss, Ls, R
Repeat Row 2 28 more times for a total of 30 rows.
Block the swatch by washing it and laying it flat to dry.
You can pin it if you want to, but the recommended yarn has bounce that will make the swatch return to its natural size after washing and removing the pins.
Measure a 10 by 10 cm (4″ by 4″) square in the middle of the swatch and count the stitches and rows.
21 stitches by 20 rows should measure 10 by 10 cm (4″ by 4″).
If you get fewer stitches and rows, go down a hook size (0.5 mm), if available, and make another swatch.
If you get more stitches and rows, go up a hook size (0.5 mm), if available, and make another swatch.
Repeat the swatching process until you reach the recommended gauge. Make a note of the hook size used.
Notions
- Yarn: size 2 or sock weight yarn at 420 meters per 100 grams (see below for length requirements per size);
- Hook -Tunisian crochet hook with cable or straight, 5 mm or hook size that gets you gauge; 3.5 mm regular crochet hook for seams;
- Tapestry needle, scissors, tape measure;
- Stitch markers;
- Tools for blocking (iron with steam or other steamer), blocking mats and pins.
Total length of required yarn per size, without extras and with fitted sleeves:
- In meters – 1010, 1140, 1220 (1390, 1560, 1640) [1770, 1940, 2060] {2190, 2400, 2570};
- In yards – 1100, 1250, 1330 (1520, 1710, 1790) [1940, 2120, 2250] {2400, 2620, 2810}.
In skeins/balls of yarn, this translates to:
- 5, 6, 6 (7, 8, 8) [9, 10, 10] {11, 12, 13} 50 g balls or
- 3, 3, 3 (4, 4, 4) [5, 5, 5] {6, 6, 7} 100 g skeins.
Sample 1 (yellow) made in 380 g Gründl Hot Socks yarn – 75% superwash wool, 25% polyamide, hand dyed from white.
Sample 2 (mosaic) made in 406 g Gründl Hot Socks yarn in 2 colors, hand dyed and 05.
Abbreviations
- Ch – Chain;
- Ls – last stitch: insert hook behind the two vertical bars at the end of the row, YO and pull up a loop;
- M1A – increase after last St – insert hook into front loop of R chain after the last St made on the current row, YO and draw up a loop;
- M1B – increase before next St – insert hook into front loop of R chain before the next St on the previous row, YO and draw up a loop;
- R – regular return pass: Ch1, Rep [YO and pull through 2 loops on hook] until 1 loop remains;
- Rep – repeat;
- Sl St – slip stitch;
- SRR – short row return pass: Rep [YO and pull through 2 loops on hook] until 1 loop remains;
- St(s) – stitch(es);
- Tps – Tunisian purl stitch: YU, insert the hook under the vertical bar of the next St, YO and pull up a loop;
- Tss – Tunisian simple stitch: insert hook under the vertical bar of the next St, YO and pull up a loop;
- Tss2Tog – decrease or Tunisian simple stitch 2 together: insert the hook under the front vertical bars of the next 2 Sts, YO and pull up a loop;
- YO – yarn over;
- YU – yarn under.
Video tutorials for Tunisian crochet
This Tunisian crochet jumper pattern includes the following video tutorials that demonstrate different Tunisian crochet techniques:
Foundations in Tunisian crochet with left handed version;
Foundation row in Tunisian crochet.
Right handed version.
Left handed version.
Tunisian simple stitch with left handed version;
Right handed version.
Left handed version.
Tunisian purl stitch with left handed version;
Right handed version.
Left handed version.
Right handed version.
Left handed version.
Adding the neck cuff with left handed version;
Right handed version.
Left handed version.
Fixing the length and seaming Tss with left handed version.
Right handed version.
Left handed version.
Instructions
Front
Front – edging
Row 1 all sizes. Chain 95, 103, 113 (121, 131, 139) [153, 163, 173] {185, 195, 205} and pick up 95, 103, 113 (121, 131, 139) [153, 163, 173] {185, 195, 205} loops in back bumps of chains, R — 96, 104, 114 (122, 132, 140) [154, 164, 174] {186, 196, 206} loops
Row 2 all sizes. Rep [Tss, Tps] until the end of the row, Ls, R — 96, 104, 114 (122, 132, 140) [154, 164, 174] {186, 196, 206} loops
Rows 3 – 9, 9, 9 (9, 10, 10) [10, 10, 11] {11, 11, 11}. Repeat Row 2 another 7, 7, 7 (7, 8, 8) [8, 8, 9] {9, 9, 9} times.
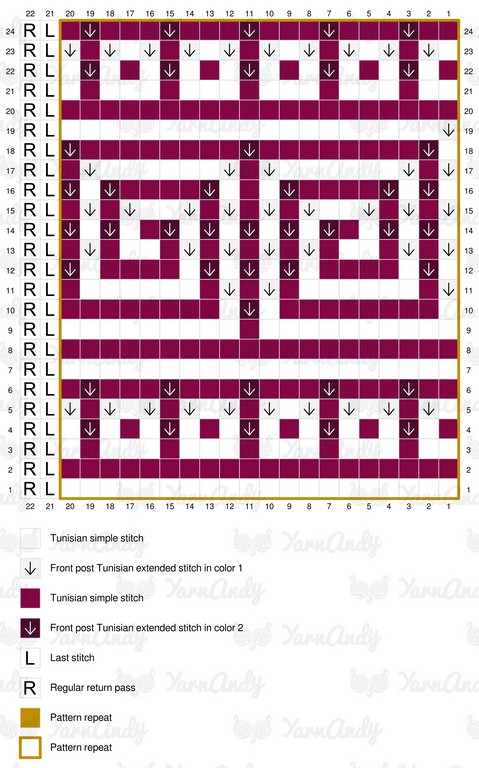
Mosaic details
If you want to add the mosaic detailing to the sleeves and body, you can do so after you make the bottom edging. Ideally you’ll be working the sleeves bottom-up in this case.
Here is how to read the chart below.
You can center the pattern repeat in the panel, or start from one edge and repeat it until you run out of stitches.
Front – lower body

Row 10, 10, 10 (10, 11, 11) [11, 11, 12] {12, 12, 12}. Tss across, Ls, R — 96, 104, 114 (122, 132, 140) [154, 164, 174] {186, 196, 206} loops
Only sizes 1-6
Rows 11, 11, 11 (11, 12, 12) – 56, 58, 60 (64, 69, 66). Repeat Row 10, 10, 10 (10, 11, 11) another 46, 48, 50 (54, 57, 55) times OR until the piece measures 28, 29, 30 (32, 34, 33) cm– 96, 104, 114 (122, 132, 140) loops
Custom sizing:
If desired, add more rows to make the front longer or remove some rows to make it shorter.
Note your changes, so you can mirror them on the back piece.
Only sizes 7-12
Plain row. Tss across, Ls, R
Decrease row. Tss2Tog, Tss until 2 Sts are left, Tss2Tog, Ls, R — 2 fewer loops than on the previous row
Rows [12, 12, 13] {13, 13, 13} – [68, 68, 68] {66, 72, 75}. Repeat [[19, 19, 14] {9, 10, 9} Plain rows, 1 Decrease row] for a total of [3, 3, 4] {6, 6, 7} times — [148, 158, 166] {174, 184, 192} loops
Rows [69, 69, 69] {67, 73, 76} – [70, 70, 70] {72, 76, 78}. Make [2, 2, 2] {6, 4, 3} Plain rows
OR decrease evenly until the piece measures [35, 35, 35] {36, 38, 39} cm in height and [69, 73.5, 77.5] {81.5, 86, 90} cm in width.
Custom sizing:
If desired, add more plain rows to make the front longer or remove some plain rows to make it shorter.
Distribute the added/removed rows evenly between the decrease rows.
Note your changes, so you can mirror them on the back piece.
Front – armhole shaping

Excepting size 1, for this section the following rows are shorter than the previous rows.
You will bind off at the beginning of the last worked row and not work into the stitches at the end of the last worked row.
All subsequent rows will have a smaller loop count than in the previous section.
Row 57, 59, 61 (65, 69, 67) [71, 71, 71] {73, 77, 79}. Bind off 0, 2, 4 (8, 11, 15) [19, 23, 27] {32, 36, 38} Sts, 95, 99, 105 (105, 107, 109) [109, 111, 111] {109, 111, 115} Tss (last Tss will count as Ls only in this row), R — 96, 100, 106 (106, 108, 110) [110, 112, 112] {110, 112, 116} loops
Use slip stitches to bind off.
Rows 58, 60, 62 (66, 70, 68) [72, 72, 72] {74, 78, 80} – 83, 87, 89 (93, 95, 95) [99, 105, 107] {111, 117, 121}. Tss across, Ls, R — 96, 100, 106 (106, 108, 110) [110, 112, 112] {110, 112, 116} loops
OR until you reach an armhole height of 13, 14, 14 (14, 13, 14) [14, 17, 18] {19, 20, 21} cm.
Front – neck shaping
Side 1 (right for right-handed, left for left-handed)

Row 1 all sizes. 38, 40, 43 (42, 43, 44) [44, 44, 44] {43, 44, 45} Tss (last Tss will count as Ls only in this row), R — 39, 41, 44 (43, 44, 45) [45, 45, 45] {44, 45, 46} loops
Rows 2 – 8, 8, 9 (9, 9, 10) [10, 10, 10] {11, 11, 11}. Tss until 2 Sts are left, Tss2Tog, Ls, R OR decrease evenly at the end of the rowuntil there are 30, 32, 34 (33, 34, 34) [34, 34, 34] {32, 33, 34} stitches per row — 32, 34, 36 (35, 36, 36) [36, 36, 36] {34, 35, 36} loops
Make the following 3, 3, 2 (2, 4, 3) [3, 3, 3] {2, 2, 2} row(s) as follows: Tss across, Ls, R — 32, 34, 36 (35, 36, 36) [36, 36, 36] {34, 35, 36} loops
Rows 12, 12, 12 (12, 14, 14) [14, 14, 14] {14, 14, 14} – 16, 16, 16 (16, 18, 18) [18, 18, 18] {18, 18, 18}. Bind off 5 Sts by making a Sl St in each St as if you were making a Tss, Tss across, Ls, R
Row 17, 17, 17 (17, 19, 19) [19, 19, 19] {19, 19, 19}. Tss across, Ls, R
Bind off using slip stitches until you reach the Ls. Ch1 and Sl St along all the Ls of the neckline until you reach the main body.
Bind off 19, 19, 19 (21, 21, 21) [21, 23, 23] {23, 23, 25} Sts.
Use slip stitches to bind off.
Do not cut yarn, but continue with Side 2.
Side 2 (left for right-handed, right for left-handed)

Row 1 all sizes. 37, 39, 42 (41, 42, 43) [43, 43, 43] {42, 43, 44} Tss, Ls, R — 39, 41, 44 (43, 44, 45) [45, 45, 45] {44, 45, 46} loops
Rows 2 – 8, 8, 9 (9, 9, 10) [10, 10, 10] {11, 11, 11}. Tss2Tog, Tss across, Ls, R OR decrease evenly at the beginning of the rowuntil there are 30, 32, 34 (33, 34, 34) [34, 34, 34] {32, 33, 34} stitches per row — 32, 34, 36 (35, 36, 36) [36, 36, 36] {34, 35, 36} loops
Make the following 3, 3, 2 (2, 4, 3) [3, 3, 3] {2, 2, 2} row(s) as follows: Tss across, Ls, R — 32, 34, 36 (35, 36, 36) [36, 36, 36] {34, 35, 36} loops
Rows 12, 12, 12 (12, 14, 14) [14, 14, 14] {14, 14, 14} – 16, 16, 16 (16, 18, 18) [18, 18, 18] {18, 18, 18}. Tss across until 4 Sts are left to make (not including the Ls), SRR
Row 17, 17, 17 (17, 19, 19) [19, 19, 19] {19, 19, 19}. Tss across, Ls, R
Bind off along all the short rows until you reach the Ls on Row 10, 10, 10 (10, 12, 12) [12, 12, 12] {12, 12, 12}. Use slip stitches to bind off.
Cut off the yarn and weave in the ends, leaving one long tail for seaming. The front piece is finished.
Continue with the back piece.
Back
Back – edging
Row 1 all sizes. Chain 95, 103, 113 (121, 131, 139) [153, 163, 173] {185, 195, 205} and pick up 95, 103, 113 (121, 131, 139) [153, 163, 173] {185, 195, 205} loops in back bumps of chains, R — 96, 104, 114 (122, 132, 140) [154, 164, 174] {186, 196, 206} loops
Row 2 all sizes. Rep [Tss, Tps] until the end of the row, Ls, R — 96, 104, 114 (122, 132, 140) [154, 164, 174] {186, 196, 206} loops
Rows 3 – 9, 9, 9 (9, 10, 10) [10, 10, 11] {11, 11, 11}. Repeat Row 2 another 7, 7, 7 (7, 8, 8) [8, 8, 9] {9, 9, 9} times.
Back – lower body

Row 10, 10, 10 (10, 11, 11) [11, 11, 12] {12, 12, 12}. Tss across, Ls, R — 96, 104, 114 (122, 132, 140) [154, 164, 174] {186, 196, 206} loops
Only sizes 1-6
Rows 11, 11, 11 (11, 12, 12) – 56, 58, 60 (64, 69, 66). Repeat Row 10, 10, 10 (10, 11, 11) another 46, 48, 50 (54, 57, 55) times OR until the piece measures 28, 29, 30 (32, 34, 33) cm– 96, 104, 114 (122, 132, 140) loops
Custom sizing:
If desired, add more rows to make the back longer or remove some rows to make it shorter.
Only sizes 7-12
Plain row. Tss across, Ls, R
Decrease row. Tss2Tog, Tss until 2 Sts are left, Tss2Tog, Ls, R — 2 fewer loops than on the previous row
Rows [12, 12, 13] {13, 13, 13} – [68, 68, 68] {66, 72, 75}. Repeat [[19, 19, 14] {9, 10, 9} Plain rows, 1 Decrease row] for a total of [3, 3, 4] {6, 6, 7} times — [148, 158, 166] {174, 184, 192} loops
Rows [69, 69, 69] {67, 73, 76} – [70, 70, 70] {72, 76, 78}. Make [2, 2, 2] {6, 4, 3} Plain rows
OR decrease evenly until the piece measures [35, 35, 35] {36, 38, 39} cm in height and [69, 73.5, 77.5] {81.5, 86, 90} cm in width.
Custom sizing:
If desired, add more plain rows to make the back longer or remove some plain rows to make it shorter.
Distribute the added/removed rows evenly between the decrease rows.
Back – armhole shaping

Excepting size 1, for this section the following rows are shorter than the previous rows.
You will bind off at the beginning of the last worked row and not work into the stitches at the end of the last worked row.
All subsequent rows will have a smaller loop count than in the previous section.
Row 57, 59, 61 (65, 69, 67) [71, 71, 71] {73, 77, 79}. Bind off 0, 2, 4 (8, 11, 15) [19, 23, 27] {32, 36, 38} Sts, 95, 99, 105 (105, 107, 109) [109, 111, 111] {109, 111, 115} Tss (last Tss will count as Ls only in this row), R — 96, 100, 106 (106, 108, 110) [110, 112, 112] {110, 112, 116} loops
Use slip stitches to bind off.
Rows 58, 60, 62 (66, 70, 68) [72, 72, 72] {74, 78, 80} – 87, 91, 93 (97, 101, 101) [105, 111, 113] {117, 123, 127}. Tss across, Ls, R — 96, 100, 106 (106, 108, 110) [110, 112, 112] {110, 112, 116} loops
OR until you reach an armhole height of 15, 16, 16 (16, 16, 17) [17, 20, 21] {22, 23, 24} cm.
Back – neck shaping
Side 1 (right for right-handed, left for left-handed)

Row 1 all sizes. 35, 37, 39 (38, 39, 39) [39, 39, 39] {37, 38, 39} Tss, 1 Tss that counts as Ls, R — 37, 39, 41 (40, 41, 41) [41, 41, 41] {39, 40, 41} loops
Rows 2 – 7 all sizes. Tss until 2 Sts are left, Tss2Tog, Ls, R
Row 8 all sizes. Tss across, Ls, R — 31, 33, 35 (34, 35, 35) [35, 35, 35] {33, 34, 35} loops
Rows 9 – 14 all sizes. Sl St to bind off 5 Sts by making a Sl St in each St as if you were making a Tss, Tss across, Ls, R
Row 15 all sizes. Tss across, Ls, R — 0, 2, 4 (3, 4, 4) [4, 4, 4] {2, 3, 4} loops
Bind off until you reach the Ls, using slip stitches. Ch1 and Sl St along all the Ls of the neckline until you reach the main body.
Bind off 23, 23, 25 (27, 27, 29) [29, 31, 31] {33, 33, 34} Sts. Use slip stitches to bind off.
Side 2 (left for right-handed, right for left-handed)

Row 1 all sizes. 35, 37, 39 (38, 39, 39) [39, 39, 39] {37, 38, 39} Tss, Ls, R — 37, 39, 41 (40, 41, 41) [41, 41, 41] {39, 40, 41} loops
Rows 2 – 7 all sizes. Tss2Tog, Tss across, Ls, R
Row 8 all sizes. Tss across, Ls, R — 31, 33, 35 (34, 35, 35) [35, 35, 35] {33, 34, 35} loops
Rows 9 – 14. Tss across until 4 Sts are left to make (not including the Ls), SRR
Bind off along all the short rows until you reach the Ls on Row 8, using slip stitches.
Cut off the yarn and weave in the ends, leaving one long tail for seaming. The back piece is finished.
Continue with the sleeves or with joining the front and the back.
Sleeves
Choose a construction method that you prefer. If using gradient yarn or a fade, work bottom-up.
Otherwise, it is easier to work top-down. Both constructions are detailed below.
Make 2.
Top-down
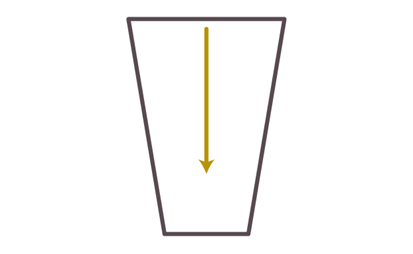
Row 1 all sizes. Chain 85, 89, 95 (101, 105, 115) [115, 123, 131] {137, 145, 151} and pick up 85, 89, 95 (101, 105, 115) [115, 123, 131] {137, 145, 151} loops in back bumps of chains, R — 86, 90, 96 (102, 106, 116) [116, 124, 132] {138, 146, 152} loops
Row 2 all sizes. Tss across, Ls, R — 86, 90, 96 (102, 106, 116) [116, 124, 132] {138, 146, 152} loops
Plain row. Tss across, Ls, R
Decrease row. Tss2Tog, Tss across until 2 Sts are left, Tss2Tog, Ls, R
Rows 3 – 13, 5, 14 (10, 4, 15) [18, 6, 33] {29, 21, 17}. Rep Plain row 12, 4, 13 (9, 3, 14) [17, 5, 32] {28, 20, 16} times
Rows 14, 6, 15 (11, 5, 16) [19, 7, 34] {30, 22, 18} – 98, 100, 102 (106, 108, 108) [108, 108, 109] {109, 109, 109}. Rep [Rep Plain row 4, 4, 3 (3, 3, 2) [2, 2, 1] {1, 1, 1} times, 1 Decrease row] 17, 19, 22 (24, 26, 31) [30, 34, 38] {40, 44, 46} times
OR decrease evenly at the beginning and end of the row for a total of 17, 19, 22 (24, 26, 31) [30, 34, 38] {40, 44, 46} times in the sleeve, to reach a loop count of 52, 52, 52 (54, 54, 54) [56, 56, 56] {58, 58, 60} and a total row count of 98, 100, 102 (106, 108, 108) [108, 108, 109] {109, 109, 109}
Rows 99, 101, 103 (107, 109, 109) [109, 109, 110] {110, 110, 110} – 107, 110, 111 (115, 118, 118) [118, 118, 120] {120, 120, 120}. Rep [Tss, Tps] until the end of the row, Ls, R — 52, 52, 52 (54, 54, 54) [56, 56, 56] {58, 58, 60} loops
Bind off by making Sl Sts in each St as if to make Tss. Use slip stitches to bind off.
Cut off the yarn and weave in the ends, leaving one long tail for seaming. One sleeve is finished.
Make the second sleeve and continue with seaming.
Bottom-up

Row 1 all sizes. Chain 51, 51, 51 (53, 53, 53) [55, 55, 55] {57, 57, 59} and pick up 51, 51, 51 (53, 53, 53) [55, 55, 55] {57, 57, 59} loops in back bumps of chains, R — 42, 42, 42 (44, 44, 44) [45, 45, 45] {46, 46, 46} loops
Rows 2 – 10, 10, 10 (10, 11, 11) [11, 11, 12] {12, 12, 12}. Rep [Tss, Tps] until the end of the row, Ls, R — 52, 52, 52 (54, 54, 54) [56, 56, 56] {58, 58, 60} loops
Plain row. Tss across, Ls, R
Increase row. M1R, Tss across until 2 Sts are left, M1L, Ls, R
Rows 11, 11, 11 (11, 12, 12) [12, 12, 13] {13, 13, 13} – 95, 105, 98 (106, 115, 104) [101, 113, 88] {92, 100, 104}. Rep [Rep Plain row 4, 4, 3 (3, 3, 2) [2, 2, 1] {1, 1, 1}, 1 Increase row] 17, 19, 22 (24, 26, 31) [30, 34, 38] {40, 44, 46} times
Rows 96, 106, 99 (107, 116, 105) [102, 114, 89] {93, 101, 105} – 107, 109, 111 (115, 118, 118) [118, 118, 120] {120, 120, 120}. Rep plain row 12, 4, 13 (9, 3, 14) [17, 5, 32] {28, 20, 16} times
OR increase evenly at the beginning and end of the row for a total of 17, 19, 22 (24, 26, 31) [30, 34, 38] {40, 44, 46} times in the sleeve, to reach a loop count of 86, 90, 96 (102, 106, 116) [116, 124, 132] {138, 146, 152} and a total row count of 107, 109, 111 (115, 118, 118) [118, 118, 120] {120, 120, 120}
Bind off by making Sl Sts in each St as if to make Tss. Cut off the yarn and weave in the ends, leaving one long tail for seaming. One sleeve is finished.
Seaming
Shoulders
Lay the two panels (front and back), right sides together, with shoulder seams aligned (see photo tutorial).
Attach yarn and seam the shoulder seams by making slip stitches along them, taking up the two loops on the side of each panel for each slip stitch, plus a loop from the return pass of each panel or going through the return pass chains on both sides.
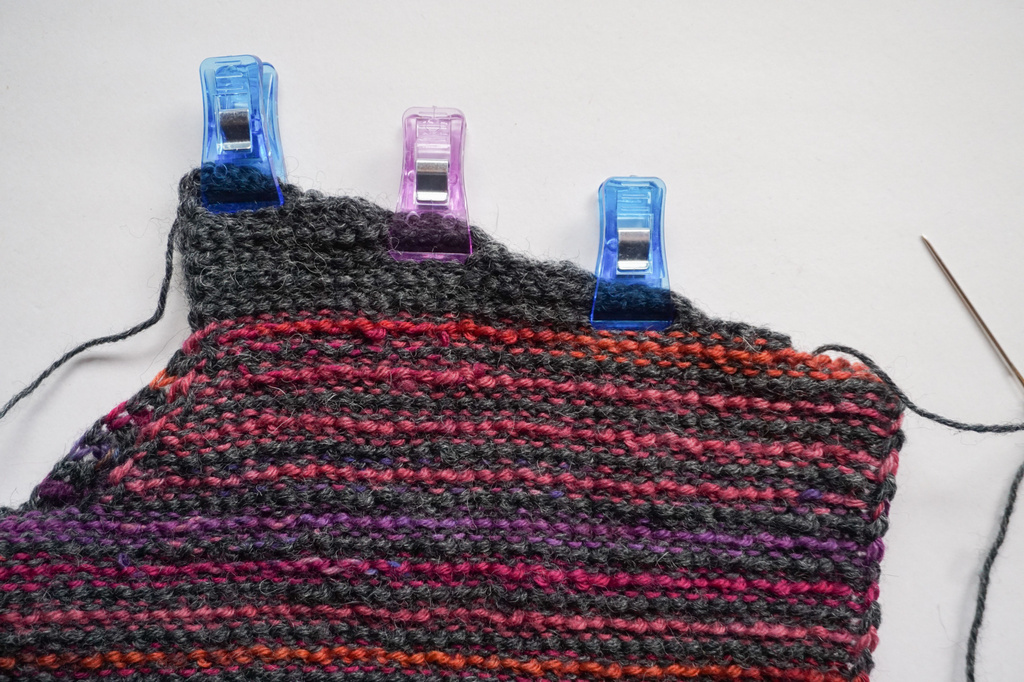
After the second shoulder seam, don’t cut the yarn, but continue with the yarn to make the collar.
Alternatively, use a needle and the tails to sew the seam in a spiral of whip stitches, going through and around the two layers. Go through the return pass chains.
In this case, attach new yarn at the neckline end of the seam to continue with the collar.
Collar
Turn the work right side out, so the shoulder seams are inside. You will make the collar on the edge of the neckline and then fold it in towards the wrong side of the work to seam it.
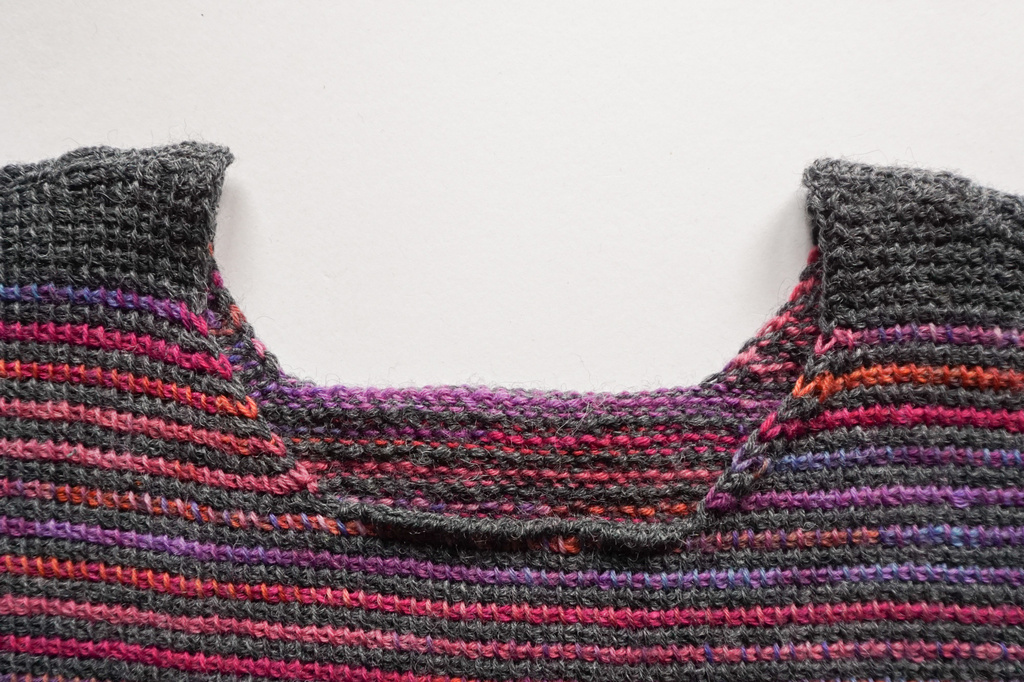
Row 1. Ch 5, pick up 5 loops in the back bumps of the chains, pick up 1 loop in neckline, SRR
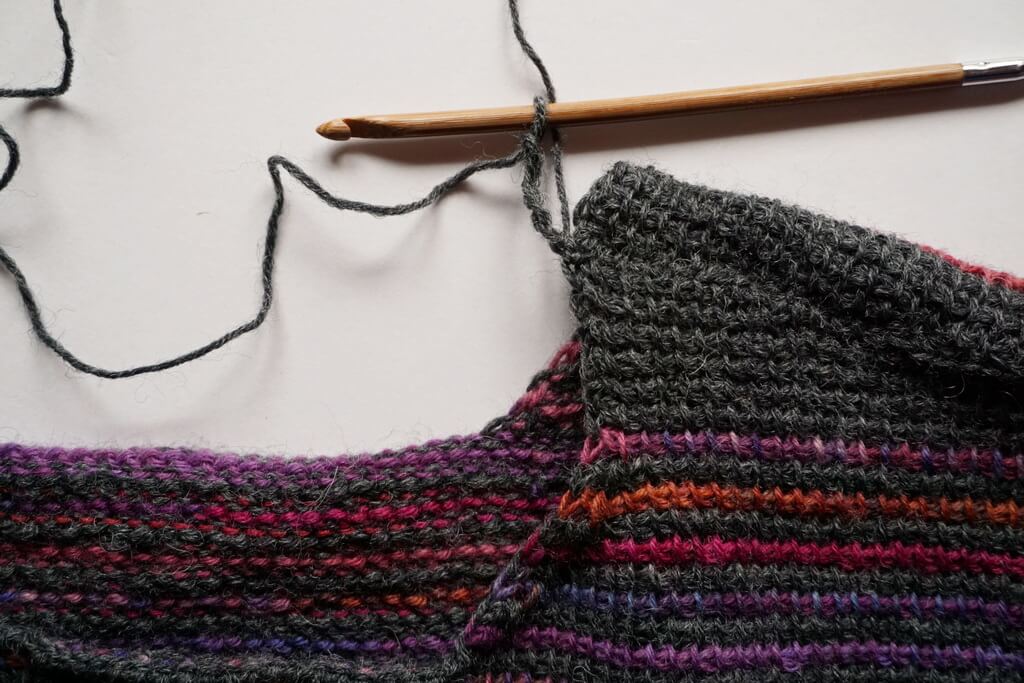
Row 2. 2 Tss, YO, Sk 1, 2 Tss, pick up 1 loop in the next St of the neckline, SRR
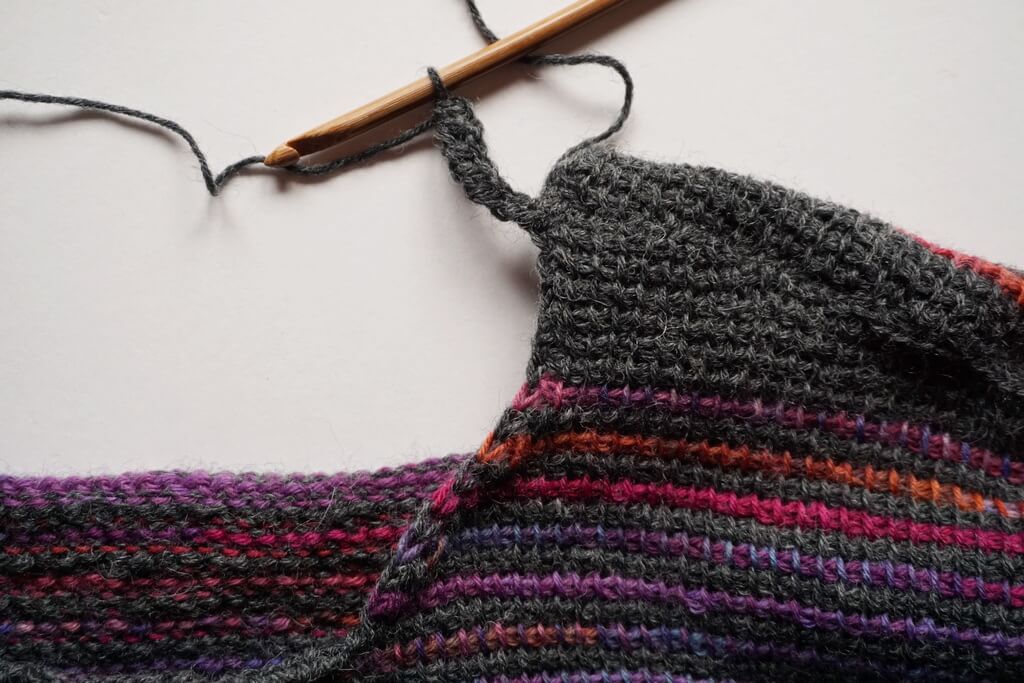
Row 3. 5 Tss, pick up 1 loop in the next St of the neckline, SRR
Repeat Rows 2-3 until you reach back to Row 1. Sl St into the first St of Row 1. Turn the work.
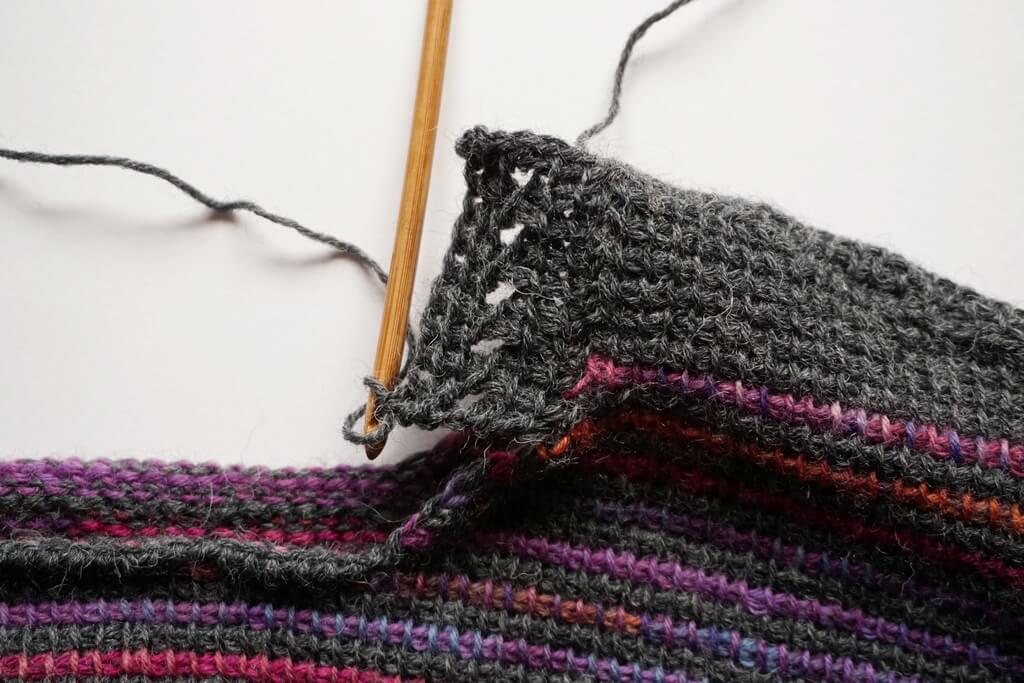
Fold the collar in two with the loose edge towards the inside of the sweater.
Using the smaller hook, attach the outer edge of the neckline to its base by making a loose Sl St into each row’s top and bottom, on the wrong side of the work.
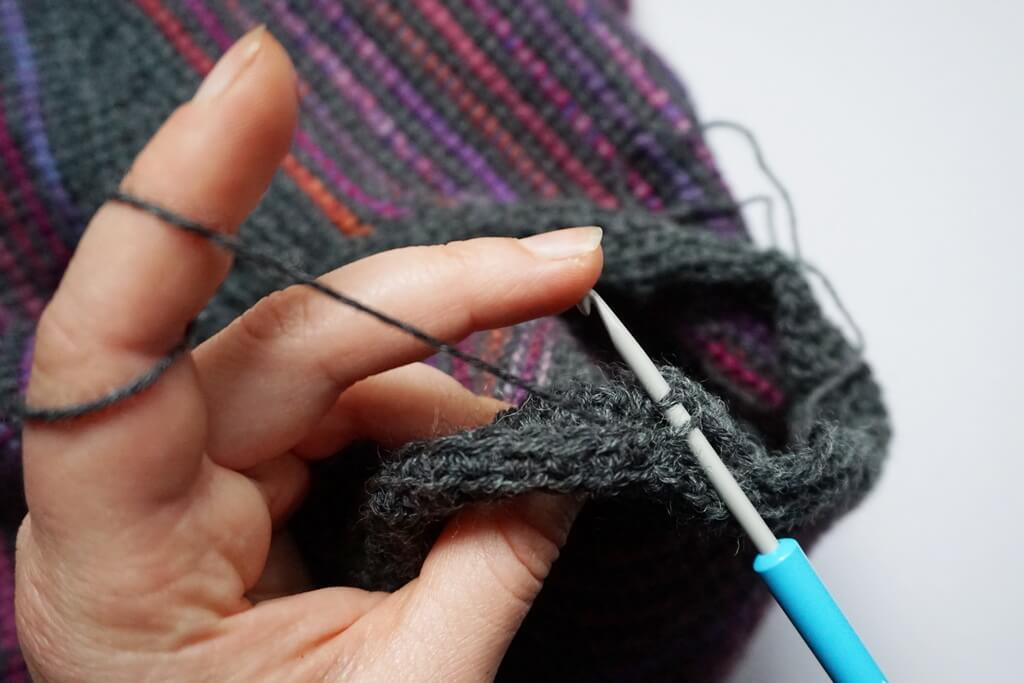
When you return to Row 1, cut off the yarn and use the tail to seam the gap in the collar.
Alternatively, watch the video below to see how to add the collar.
If the videos don’t load, turn off your ad blocker.
Right handed video tutorial for collar.
Left handed video tutorial for collar.
Side seams
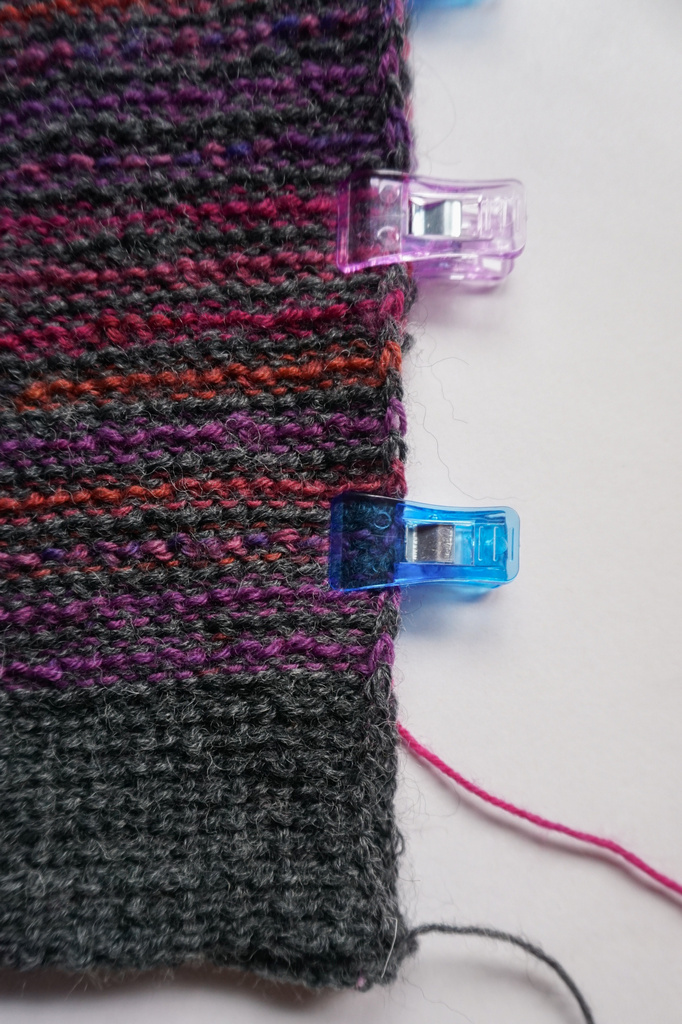
Using the same technique as for the shoulder seams, keeping the sweater inside-out, seam along the two sides of the body, starting at the bottom and going up.
When you reach the underarm area, do not cut the yarn, but prepare a sleeve and insert it in the gap, to continue seaming (see below).
Sleeves
Fold each sleeve with right side in and seam along the edge with the smaller hook, making Sl Sts along the edge, picking up a loop from the return pass as well for both ends of each row.
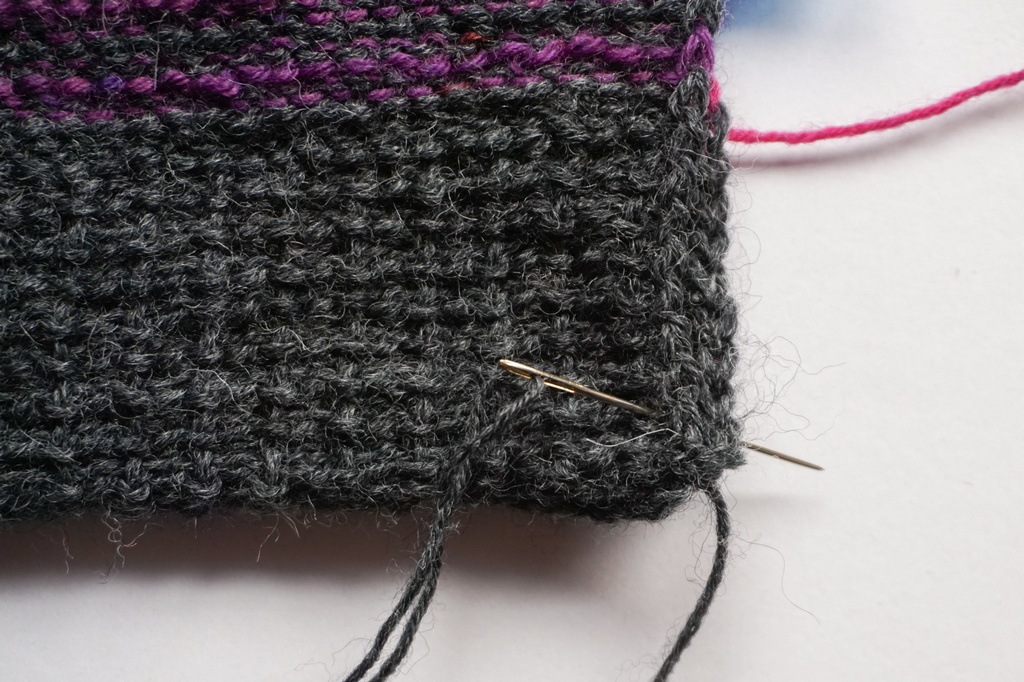
Turn the sleeve right side out and the sweater inside out. Align the sleeve inside the armscye, with the seams overlapping, then pin in place to prepare for seaming.
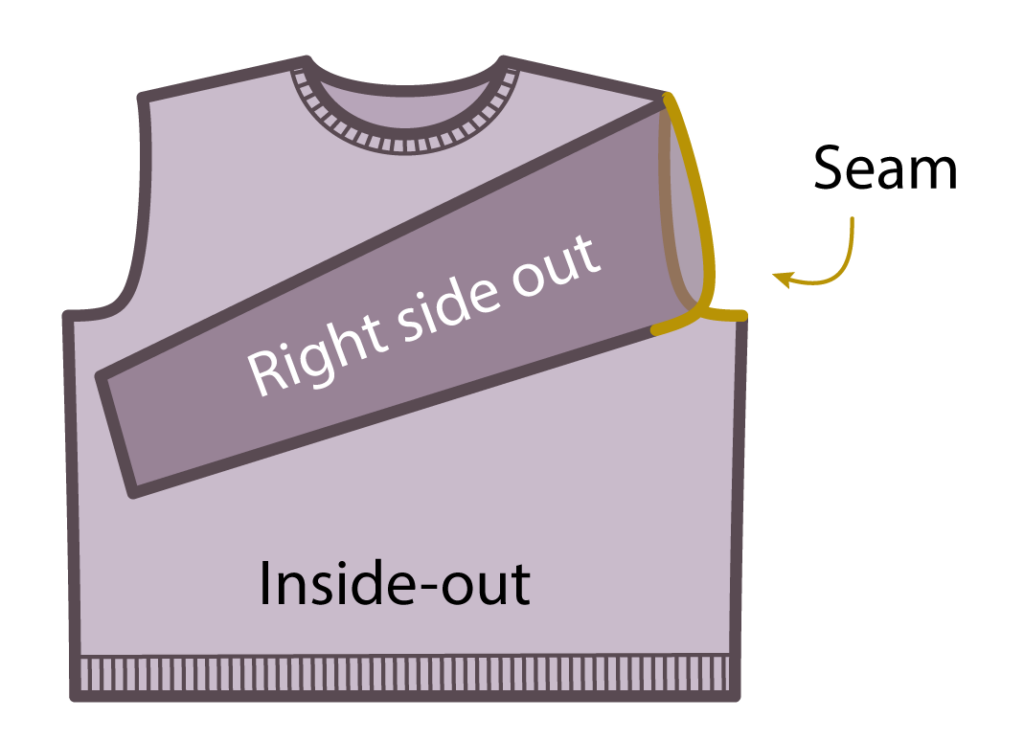
Use the smaller hook and make slip stitches around the armscye, picking up loops from the return pass on either side, where applicable, to prevent gaps from forming.
Repeat for the other sleeve. Turn the sweater the right side out and try it on. Use the remaining tail to sew any gaps.
Printable pattern with individual sizes
This pattern is also available in PDF form.
If you want to buy the PDF version, here are the different platforms where you can do so:
There are 5 files included in your purchase.
- All the instructions (print-friendly), schematics and photo tutorials.
- Easy read or low vision version with all the text in a large font.
- Each size individually written out, with a table of measurements for each size.
- An easy read version with individual sizes written out.
- A universal guide for improving the fit of your garments.
More free Tunisian crochet patterns
There more free patterns on my blog and you can find some of them below or by visiting my list of free Tunisian crochet patterns.
Here are some projects you might be interested in making:
If you want to know when I publish more patterns or when I launch testing calls, when you can get a pattern for free in events or when I publish a new blog post about crochet design, sign up below to my email updates.
I hope you enjoyed this pattern and that you will make many Tunisian crochet sweaters using this free and size inclusive pattern.
I am especially looking forward to your feedback.
Check out other Tunisian crochet sweater patterns in this roundup I created with patterns from different designers.
Hugs,
Andrea




Hi Andrea.
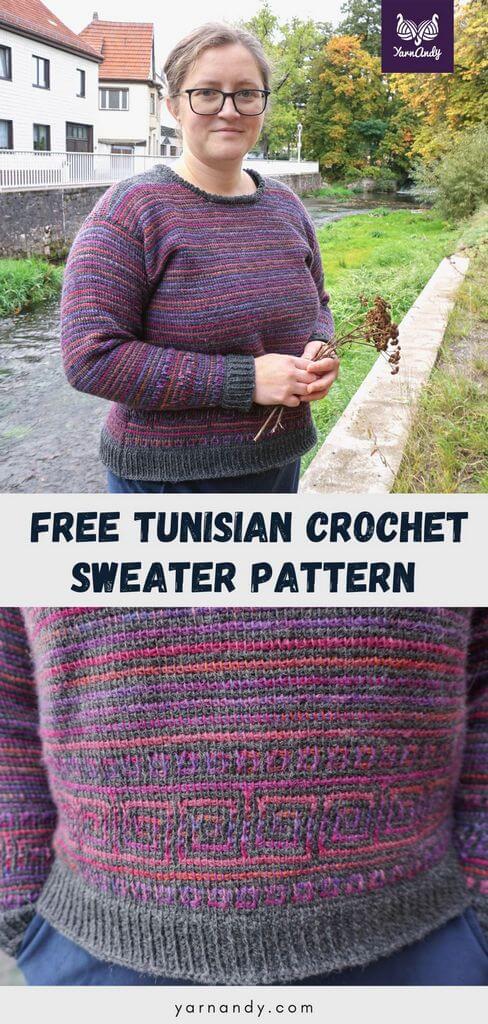
Does your paid pattern have instructions to make the design you have on the dark grey with colorful yarn sweater?
Do you mean the mosaic? Yes, it includes the chart for the mosaic, but no tutorial for mosaic Tunisian crochet. You’ll find that here. https://yarnandy.com/how-to-make-tunisian-crochet-mosaic/
Hi Andrea. Thank you for such a wonderful pattern but mostly thank you for always explaining the why and how of everything!!
I’ve decided to make the sweater in size 5 for my husband. After making the chain and 1st row of the sleeve, I unravelled it 4 times…I should make 105 ch, pull up 105 loops but the st count should have been 106. I thought I was counting wrongly but then I thought, she must do a yarn over or something to gain that 1 st. I went and looked at your video and you do start in the 1st ch from the hook. Great! I solved this! But then, in row 2, I should end up with 108 st in a simple tunisian st row. How do I get to 108 without increasing? Maybe I’m not understanding something…could you please enlighten me?
Hey Simona, thanks for your comment. Yes, you don’t skip a chain when starting the foundation row. If you want to skip it, add one extra.
The 108 was a typo, it should read 106 loops on the hook. I fixed it in the text.