In this article, I’ll show you how to add closed captions to your YouTube videos and I’ll walk you through my process. We’ll also discuss a bit about what these captions are and why you need them.
If you make any kind of videos for YouTube and you care even a little bit about accessibility, captions are the first thing you should think of when publishing a video.
They not only help those with hearing impairments, but also those of us who are neurodivergent and need subtitles to separate speech from noise/music, as well as providing a good basis for the auto-translate feature, which allows your content to reach way beyond your original audience.
I’ve been publishing videos since about 2020, with captions, and find that about a third of my audience uses them. I’ll reiterate: over 34% of viewers use the closed captions on my YouTube videos.
I’ve updated the page to reflect the process that you have to go through in 2025 (it was originally written in 2022) and the tools you might use to get there faster.
Contents
If you’re a small-time crochet designer like myself and have started working on a little YouTube channel of your own with patterns or tips and tricks of the trade, you may want to add closed captions to your videos.
I’ve searched high and wide for an actual step-by-step tutorial on how to easily add captions to my videos, to not end up wanting to pull my hair out in frustration. I couldn’t find one.
So I’ll share my journey and the lessons I’ve learned from trying to add proper captions to my YouTube videos, as opposed to the garbled trash that comes out of the tool for autogenerated captions from the platform itself.
Now I don’t mean to bash the YouTube captioning AI (artificial intelligence) for the trash it produces, as it saves me a lot of work, writing out most of what I say, even if it’s not really legible.
But there’s a lot of work to be done on auto-generated captions before you can call them closed captions.
Just to be clear, I’ll assume that you don’t read from a script when you film your videos, but give the instructions on the fly while demonstrating the stitches, like I do.
If you do have a script (who has time for that), your work will be much easier, you just upload the script and assign timings.
But first of all, what are closed captions?
Closed captions, also known as CC, are essentially subtitles that describe the sounds that appear in a video.
They can transcribe the words that are spoken and they also bring additional information, describing sounds in the environment, music (sometimes even mentioning the artists, titles and even lyrics, which is awesome) and are used by a wide variety of people.
There are Deaf and hard of hearing people who used closed captions, but they are not the only ones!
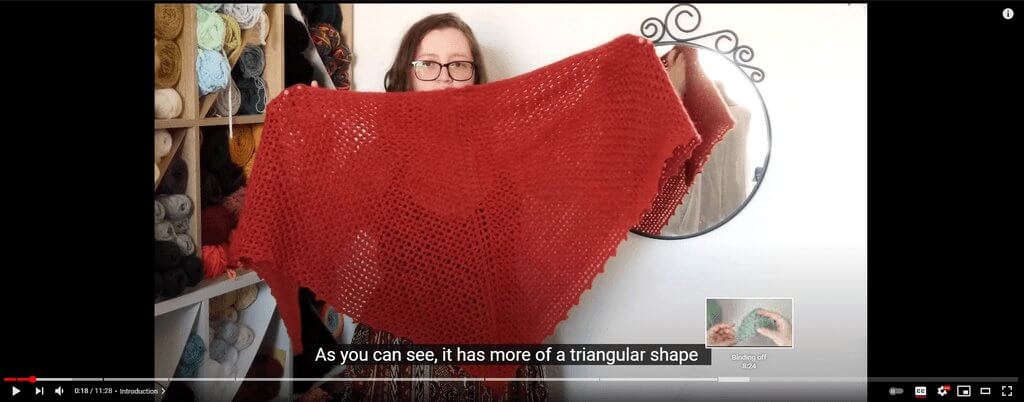
There are many people who like to read, along with listening to the words, for better understanding.
I’m one of them and I can’t watch movies without subtitles because of the overwhelming amount of various sounds in the background of most scenes, which I can hear/perceive just as loudly as the actual speech of the characters.
There are people who use the auto-translate ability of the YouTube AI, which is pretty decent, as it’s based on Google Translate, but it too will produce trash if you feed it with trash captions.
There are also people who are learning foreign languages while watching videos on YouTube and find closed captions super useful for understanding how words are written, as opposed to the sounds they make, in the wonderful language that is English (I’m assuming you’re reading this in English, but maybe I shouldn’t assume things about your language).
The good thing about closed captions is that you can turn them off if you don’t need them (and edit them, if you’re the creator!), as opposed to open captions, which are hard-coded into the video and can interfere with some people’s enjoyment of your videos.
Why do you need closed captions for your YouTube videos?
Besides providing excellent service to your audience and your potential audience (how many more people will click on your title if you have a little [CC] in there?), it’s also a great way for your video to get found more easily.
Because in the world of YouTube and Google, closed captions are SEO for your channel and can get your videos on top of other people’s videos on the same topic simply because they exist.
How does that work, do you ask?
The captions of your videos are parsed by search engines (especially Google, since, you know, it owns YouTube, just saying) and used to provide answers to search queries.
Let’s say you have a video about weaving in ends. There are many written articles and some videos (I’m just inventing this, I have not idea how many videos are on this topic).
If you are the only one to add closed captions to your video, the next time someone searches on Google for “how to weave in ends”, your video will possibly be recommended at the top of the search results page because you have that exact expression in the closed captions of your video.
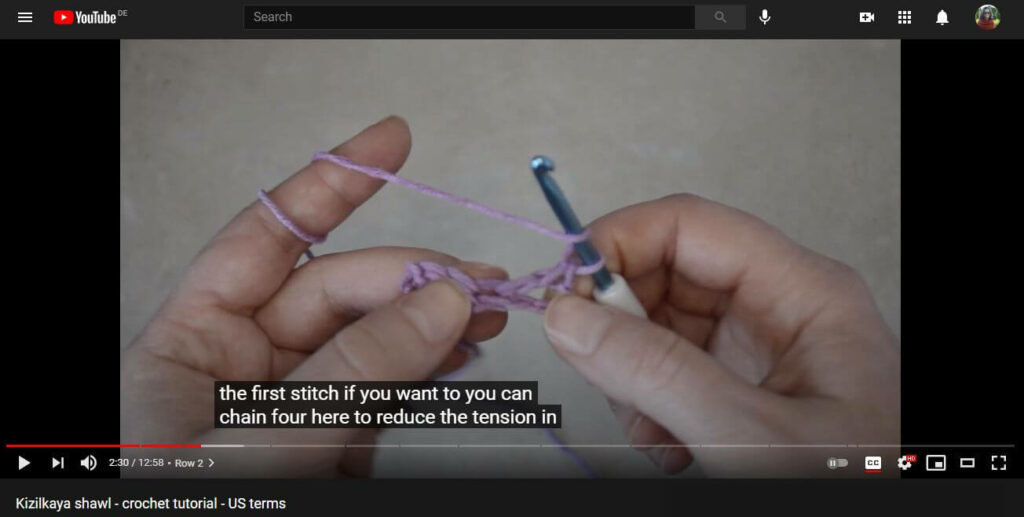
Auto-generated captions are not a popular a source of results because Google recognizes that its automatic system is full of flaws and it should not recommend auto-generated content.
OK, that last bit is only my assumption, but I’ve never seen a video recommended like this that didn’t have manual closed captions.
What’s wrong with auto-generated captions?
First of all, they suck.
Just look at this screenshot below, with a wall of uncapitalized text that has no punctuation, no paragraphs.
It’s unreadable. And that’s OK, because we can fix this.
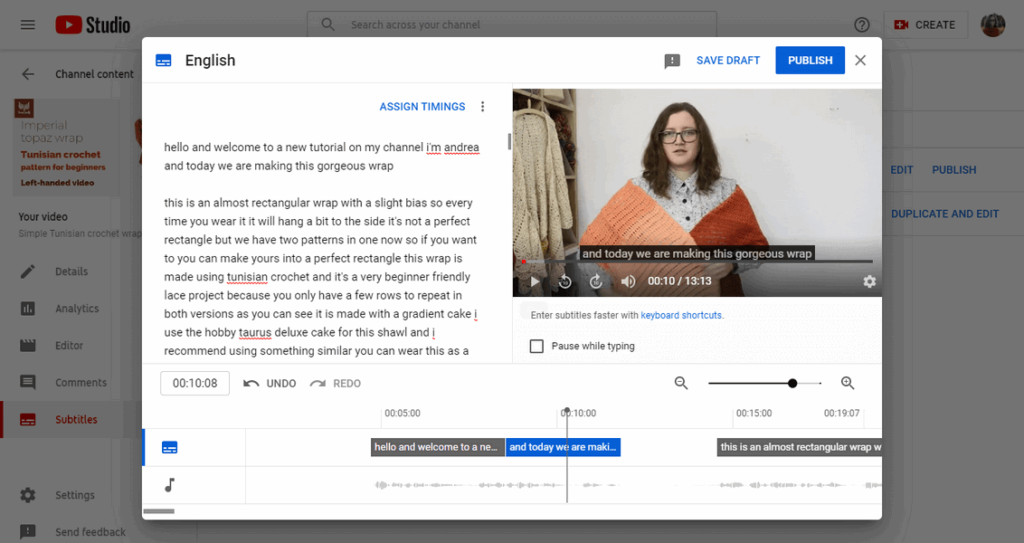
Second of all, when you have such garbled nonsense, nobody will be able to follow your auto-generated captions.
They are not meant for human eyes. Well, maybe just the eyes of the human who will extract meaning and structure from here.
How to add closed captions to your YouTube videos in three steps
The process is a bit convoluted, but what takes the most time is the actual editing of the wall of text than anything else.
1. Make sure you have auto-generated captions
You may even not have those enabled, in which case you need to have YouTube generate them for you.
They will be generated when you upload a new video if you select the language of the video. But if you forget, you can do it later, like this.
In your creator Studio, you go to the list of videos, select the video that you want to add captions to and click on edit.
On the edit page, scroll down to SHOW MORE and click it.
Then scroll down to Language and caption certification and select your language.
For now, YouTube can generate automatic captions in a few languages, including: English, German, Dutch, French, Italian, Spanish, Portuguese, Russian, Korean and Japanese (yes, I know, we Europeans are spoiled).
Once you select the language, it should automatically generate a caption file if there’s speech in the video. It will take at least a few minutes, so come back a bit later to edit the generated subtitles.
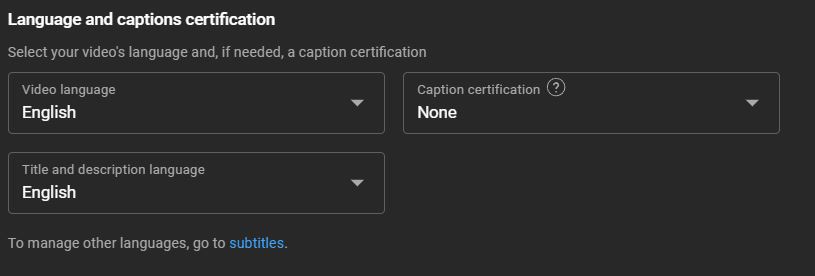
Another way to get the auto-generated captions is by going to Subtitles on the left-side menu and from there you can select the language, like this.
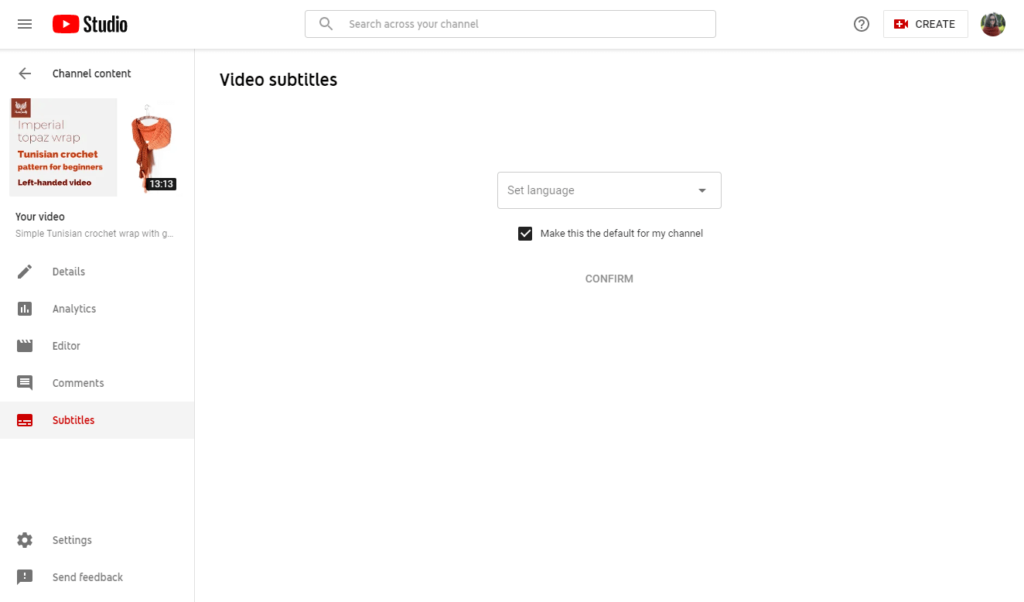
Selecting the language should automatically show you the auto-generated captions, provided that you’ve had the video uploaded for at least a few hours.
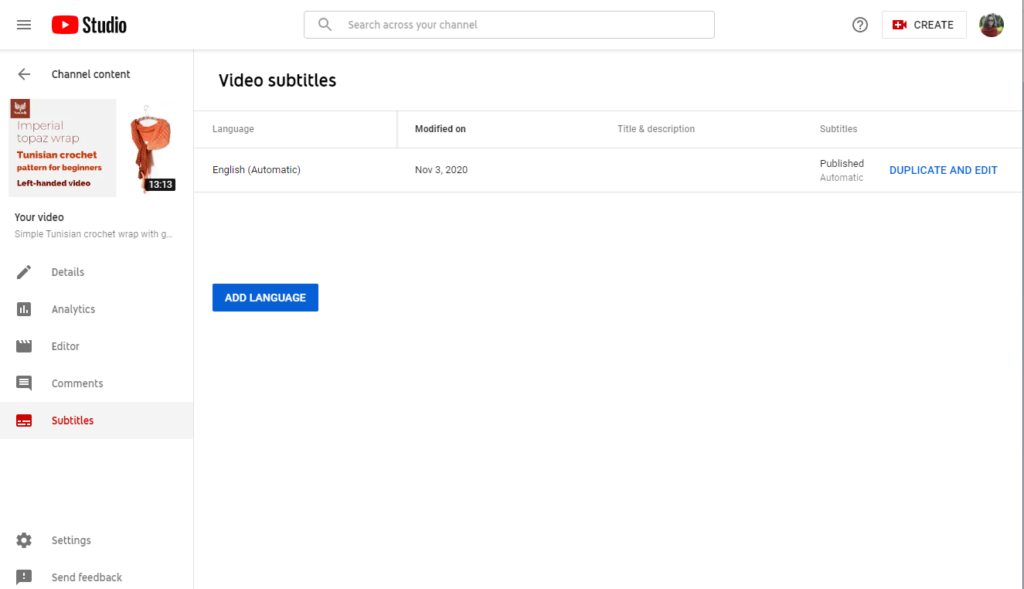
Yay, we have ugly, auto-generated captions. But it’s something.
2. Edit the auto-generated captions
Now once you have the wall of ugly text, it’s time to have some fun with it.
First click on that Duplicate and edit button, which appears if you hover over the Published section under the Subtitles column.

It used to be different, but now you have to hover to access the duplicate button.

You can’t edit the machine-generated captions, but what you can do is make a copy and edit that.
Once you click on that Duplicate and edit button, you get this pop-up window where you’ll do all the editing of the text and moving around of elements.
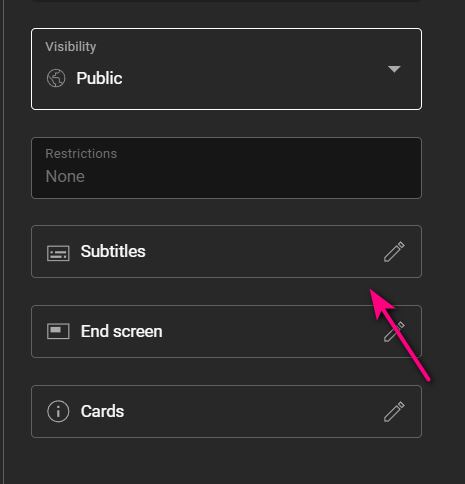
Another method of reaching the same page is by clicking on the “Subtitles” button in the rightmost pane of the Details page when editing a video.
That’s the main page that opens when you click on a video.
Fixing the auto generated text
Once you open this popup, you want to fix the text before you assign timings and publish the subtitles.
No, you can’t edit this pop-up like a regular window, there are no handles to move things around, what you see is what you have to work with.
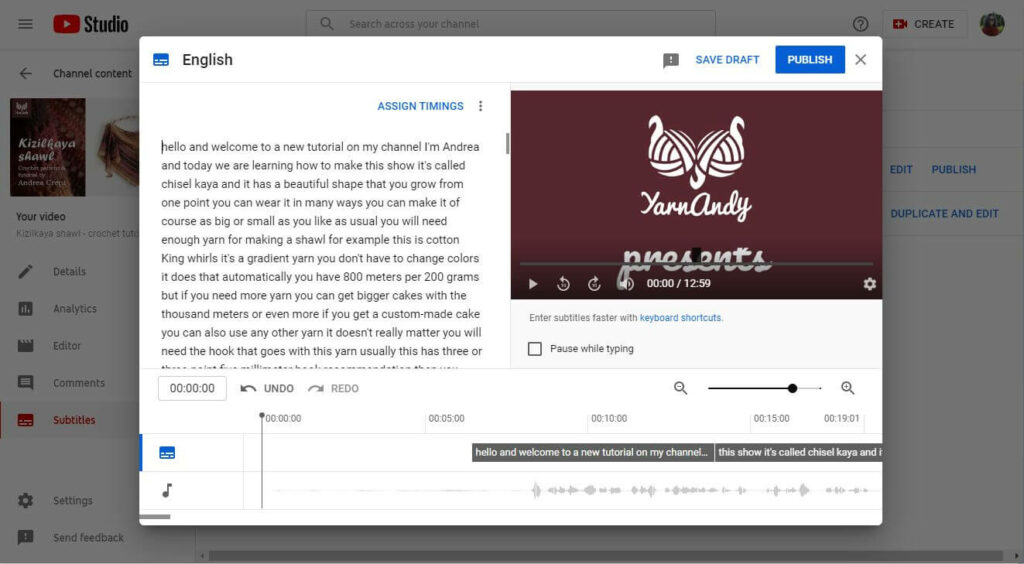
Although, to be fair, in the current iteration (2024), the popup is wider than it was in 2022. So someone’s been listening to feedback.
But the popup is wide only if you navigate to it from the Subtitles page, not from the Details page. Odd.
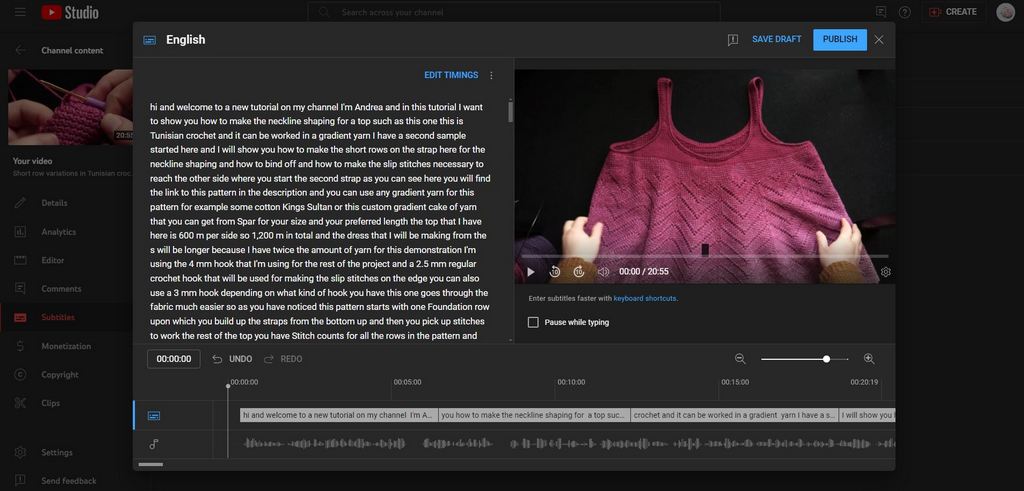
Moving on. Now is where the fun used to start, but these days we have a smart tool that can make the process easier.
First of all, look at the text you have there. Chances are you also have a big sausage of words, with no beginning and no end.
Your task is to turn this word sausage into beautifully crafted paragraphs that are easy to read.
We humans normally don’t speak in full paragraphs because we generally get interrupted and don’t have a chance to express our ideas fully (which is why I prefer writing), but a good video will be made up of sentences and paragraphs that are connected into a coherent story/script, even if you make things up as you go, like when recording instructions to make something.
If you have trouble reading your own speech as it is interpreted by the AI, maybe because of too many uhms and ahs or filler words that don’t lead anywhere, you might be better off to begin with editing your videos better and maybe adding a voice-over, instead of explaining the stitches while working them.
That will both improve the quality of your videos overall and give you less of a headache while fixing captions.
I’ll assume that what you got is decently legible and only needs to be broken into paragraphs with capital letters and proper punctuation.
Of course there will also be strange words invented by the AI, which is why you need to actually read the text and correct those words, not just skim it.
You now have two options.
- Edit this big chunk of text
- or click on
ASSIGNEDIT TIMINGS and try to fix each line by itself on the timeline.
Trust me, you do not want to try the second approach.
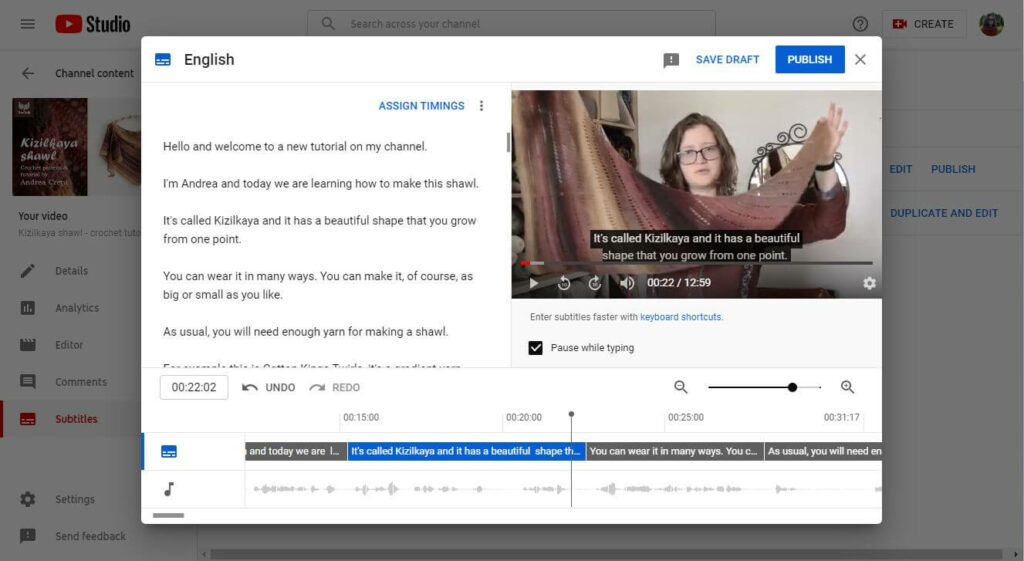
So the best way is to start reading right away and separating the paragraphs.
Update: I found a free tool that can add punctuation to most of your text.
2024 Update: That tool is gone. You can now copy your text into ChatGPT and ask it to add correct capitalization and punctuation. See below for examples.
2025 Update: Le Chat AI is much better at this because it can take your entire script and fix it without changing your text, like ChatGPT does sometimes.
You could also copy all the text and paste it into a text editor, but I see no advantage in doing that*, since you lose the ability to check the video when you are in doubt and would need to work with multiple windows.
*I actually use a Word document now for editing the text, so do whatever you want.
You don’t need to add double spaces, but the AI uses these as break-off points to separate the different chunks of text when it generates the timings.
If editing manually, the paragraphs are easier to read when you have them, so I recommend using them even within longer paragraphs.
You can listen to the video while working on the text, but I reserve this only to confusing things, like words that don’t exist, where I have no idea what I was trying to say.
Because it’s such a smart system, the AI can take your beautiful paragraphs and put them almost perfectly on the timeline once you’ve done the hard job of fixing them up.
If using ChatGPT to correct the punctuation and capitalization, work in chunks of text. I ask it to fix chunks of about 300-400 words.
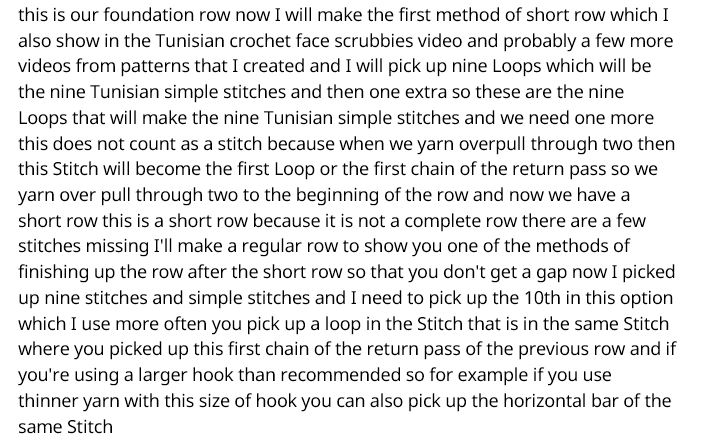
I once tried the whole 2000 word thing at a time and it fixed a random chunk of it and everything else was lost, so it’s better to select a piece of text that makes sense and would normally end with a period.
The ChatGPT output isn’t perfect, so you have to read through and fix any lingering mistakes that it can’t possibly know are mistakes.
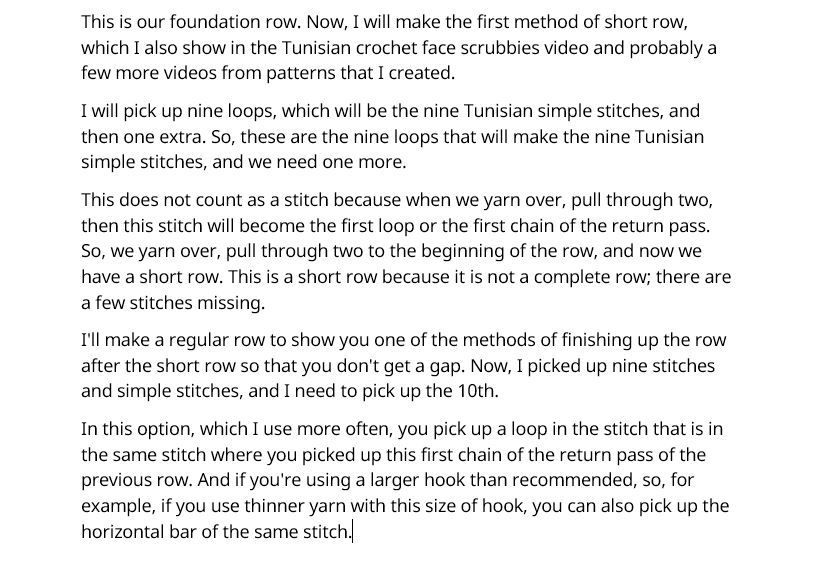
You repeat this process until your entire text is clean and correct.
It only takes a few minutes, most of which is spent reading through the resulting text. It’s a much more efficient process than what I used to do before, with reading, adding punctuation and capitalization by hand.
Once your text is nice and clean, it should look like actual readable text. Don’t worry about paragraph breaks, the YouTube AI ignores them anyway.
Now click on Edit timings and check that everything is in place, if you want to. I never do it any more because the editing is clunky and the captions are good enough as they are.
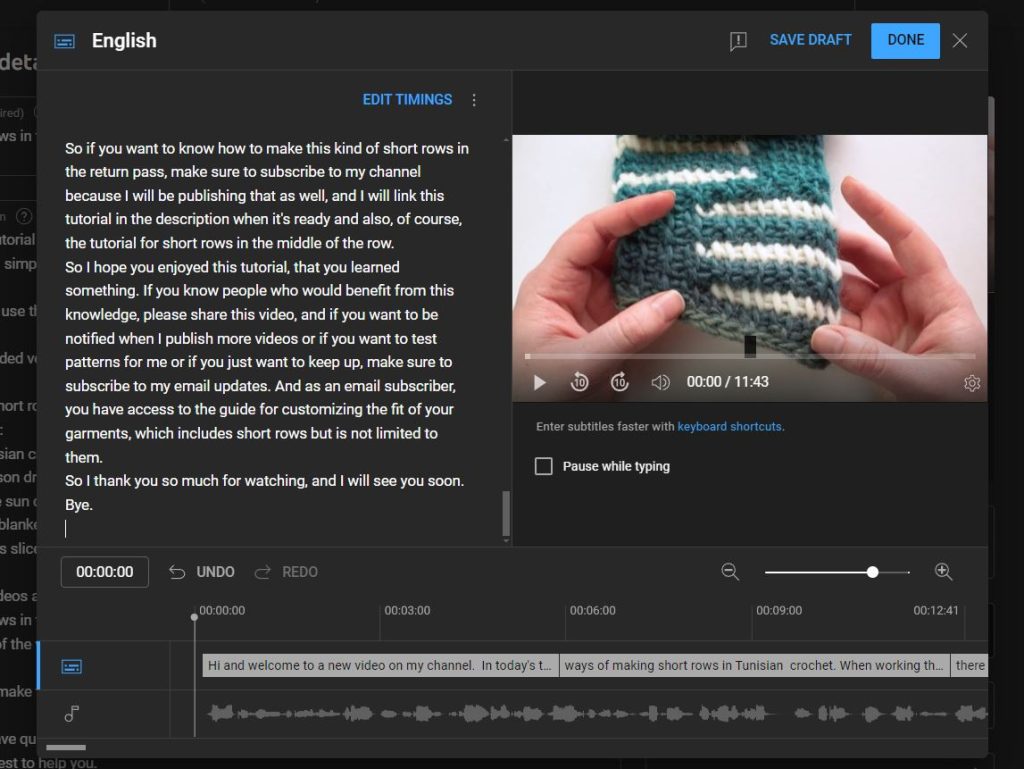
When I did want to waste my time and tried to fix the timings, I noticed that the timings are mostly off when I stop talking and there’s a pause.
You can move the beginning and end of each section by using the handles on the selected section.
But beware that these handles are not very user-friendly and are very frustrating to use. So keep this editing to a minimum if you want to keep your sanity.
3. Publishing your manual captions
Once you’re happy with how the captions appear on your video (I watch the whole thing through on 2x speed at least once to make sure everything is right), you can just hit that big PUBLISH button.
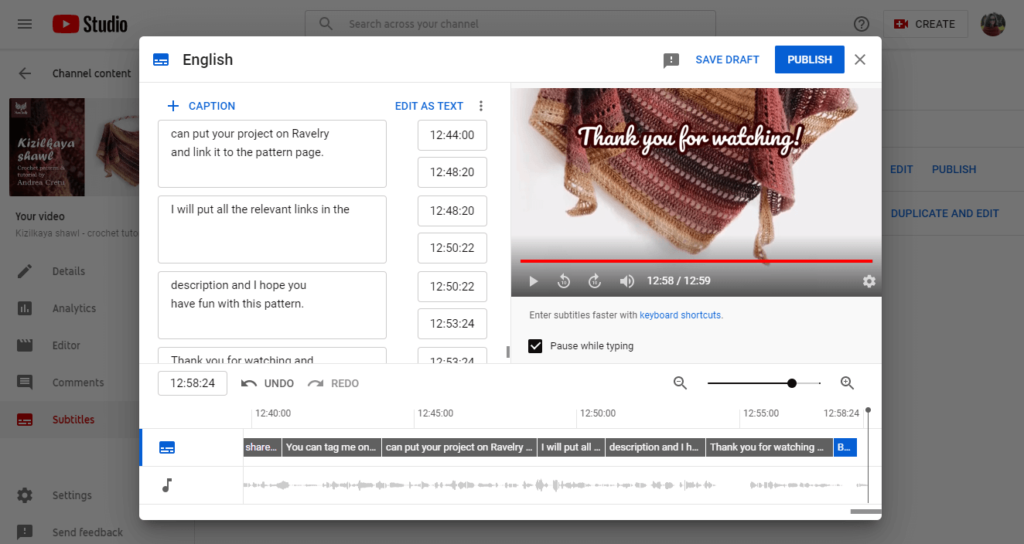
It will make your captions available instantly and then you can delete or unpublish the auto-generated captions, since those were just a crutch to help you get proper captions.
To delete or unpublish the auto-captions, click on the trash can button that appears when hovering, like before, over the “Published” text on the Subtitles page.

If you want to do something else with these auto-captions, don’t delete them, just unpublish them, so when someone visits your video, they only get the option to watch the actual captions, not the craptions (yes, I just invented this world, watch me get it patented, except it’s been in use for a while and I’m not the only funny person out there, oh well…).

Wrapping up
Now I hope you’ve been able to follow along with this tutorial on how to add closed captions to your YouTube videos because it will give your videos a lot of value and your audience even more!
What’s more important than giving love to your audience?
I know this is a time-consuming process, but so is filming and editing a video for your channel and you set time aside for that because it’s important to your business, right?
So why not set a bit of time and mental energy aside to add this extra layer of awesomeness to your videos that will instantly make them more searchable and essentially more easily reached by your potential audience?
Now if you don’t have time or the mental energy for all of that, there are companies out there that will do the transcribing and correcting for you, you just need to upload the subtitles they give you.
Let’s also explore how you do that.
Bonus – uploading your script to a video
If you already have a written script, or hired a company to do the transcribing/translating for you, or if you have right-handed and left-handed videos of the same content (kudos for you for creating content for the left-handed, who are mostly ignored by the crafting community – why, I wonder), you’ll only need to upload a subtitle to your video, no more auto-captioning shenanigans.
First you should know how to export the subtitles you already have, so you can easily send them on, upload them on another video or on the same video on another platform.
To export, you just go to the subtitles page, click on the three dots next to your good set of captions and click that big Download button to get a file.
You’ll get options for three file formats. Choose whichever one strikes your fancy (or is required by the platform you’ll be using in the future).

Once you’ve got your file, now you can do whatever you want to it.
If you want to upload it to another video with the same audio (left-handed videos, anyone?), then go to the edit page of that particular video and under Subtitles first over over the – sign under the Subtitles column.
The – sign will turn into a pencil icon with the text “Add”. Click on it

Click on the Add button under Subtitles, not under Title & description. This will open up the pop-up you are already familiar with, but with different options.
Click on the Upload file button, select whether the file comes with timing or without timing (which is only available if you upload subtitles for the original language, not for translations) and navigate to your saved file.
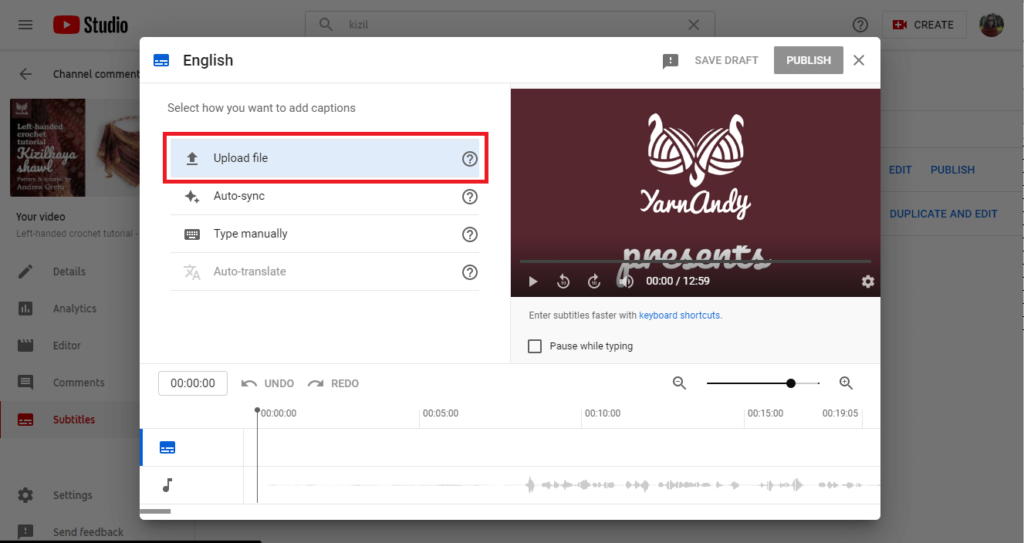
Then you can make any changes you need to (if you changed anything in the audio, now is the time to find the changes and add them to the captions).
Then hit PUBLISH and you’re good to go.
Wrapping up
I hope all of this information has been useful to you and will help make your videos shine.
Stay tuned, because there are more articles like this coming your way.
They may be long, but they are packed full of information and step by step instructions that you won’t find anywhere else because they take a lot of time and effort to create (but I love it, so I’ll keep doing this).
If you haven’t seen them yet, here are my other articles dedicated to crochet designers, some about making crochet charts for your patterns, about finding a niche and a lot more.
If you’re interested in accessibility, I have a few more posts about this topic. It’s important to me.
If you want to know about all of the updates and get a free pattern, please sign up in this form, so you’ll get the general updates.
I hope you found this useful and I’ll see you soon!
Hugs,
Andrea


Very helpful – Thanks so much!! Just followed your process for a video I made re:Earthing ~ Thanks again! I plan to do this for all my videos moving forward 🙂
That’s amazing! I checked them out right now and they are 100% awesome. Nice work and good luck with your channel!