Here’s how to fix different kinds of mistakes in Tunisian crochet, such as making the wrong stitch, without having to frog the whole row.
We all make mistakes, it’s part of being human. Especially when we make things by hand, chances are that there will we some mistakes that creep into our work.
The point of doing things by hand isn’t to make things perfectly from the beginning, it’s learning how to improve over time and enjoying the process, as well as the finished project.
Contents
Everyone makes mistakes in Tunisian crochet
Not only beginners make mistakes! Can you guess how many mistakes I made in these projects? Who can even count them.
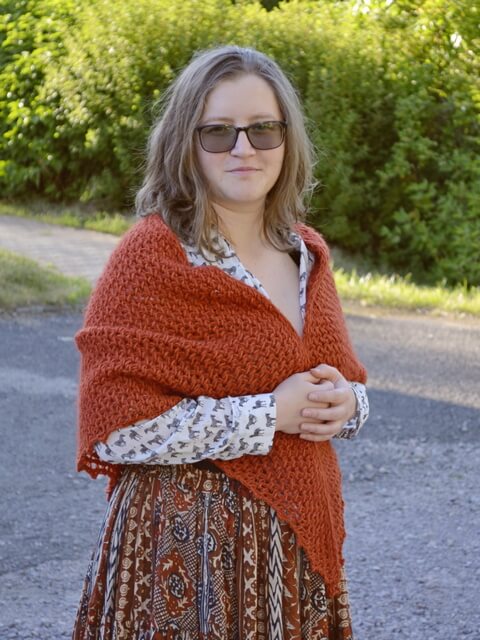
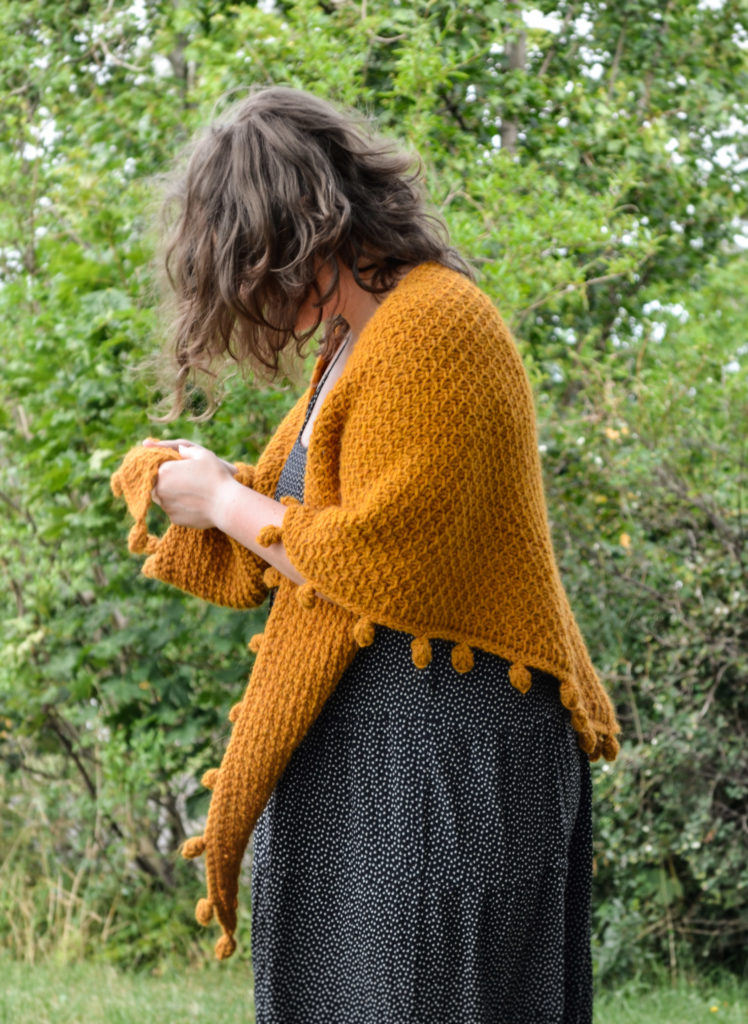
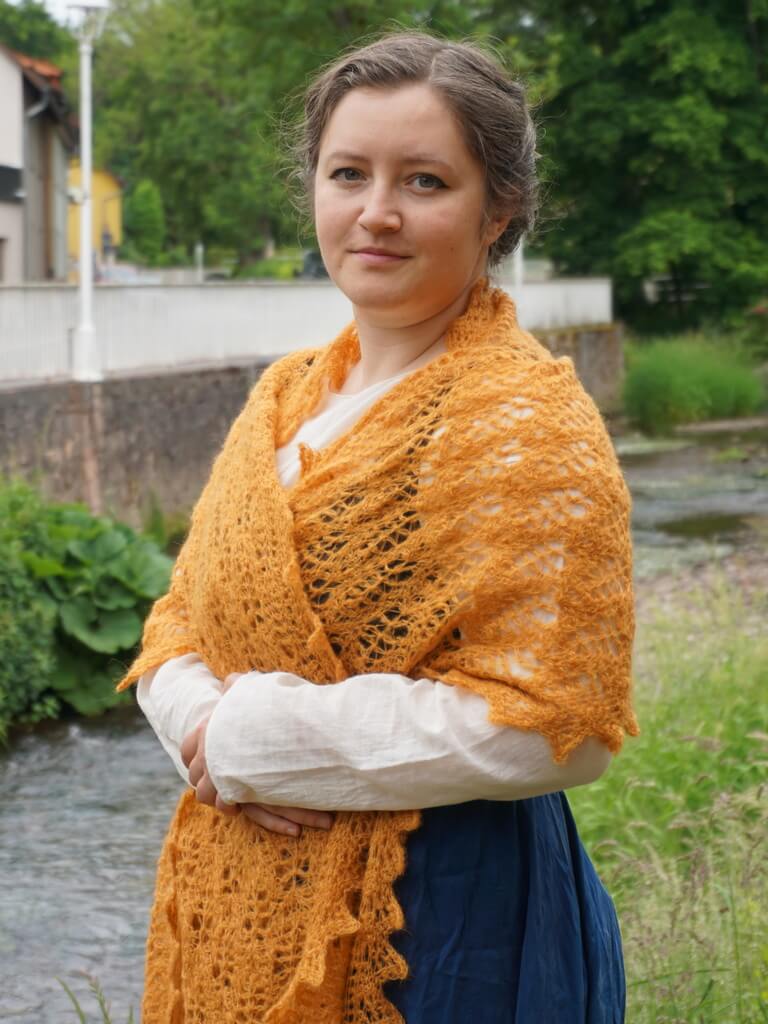
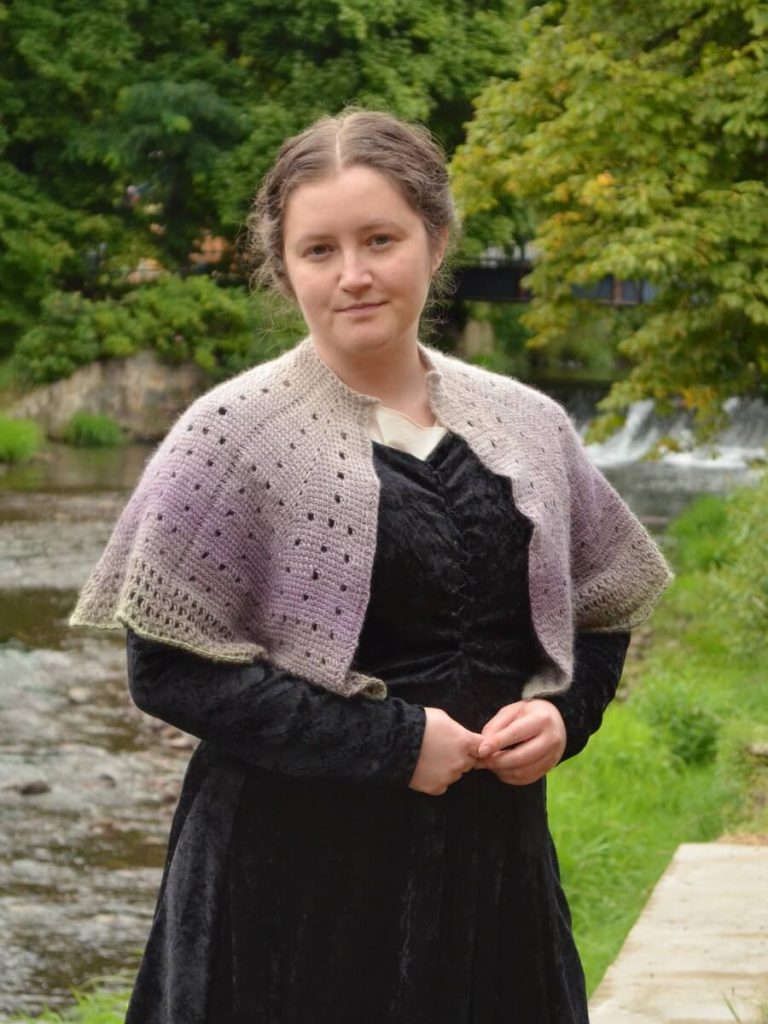
So don’t worry if you’ve been doing Tunisian crochet for decades, we all mess things up.
It’s natural and part of life and it’s a given if you’re like me with ADHD and need to make all the things now, but forget to pay attention to certain details.
There are fixes for most of the common and not so common mistakes that Tunisian crocheters make in their projects.
If you don’t find a fix for your problem/mistake in the list below, put it in the comments and we’ll troubleshoot together.
I love finding solutions for all sorts of problems and if I can’t find it, then the gentle and helpful folk in the Facebook and Reddit communities will surely help, just like they helped with compiling the list of mistakes (thank you, everyone who submitted ideas for common mistakes).
Why you should fix your mistakes in Tunisian crochet projects
In some cultures, the little mistakes that go unnoticed are considered the mark of the maker and some people even have a saying that “a little bit of your soul escapes through the little mistakes”.
Yeah… I’m not a fan of my soul escaping through my work, thanks.
Whether you should fix small mistakes depends on multiple factors:
- do they change the shape of the item?
- are they visible on the front of the work, or both sides if it’s a double-sided item?
- will the colors/texture of the yarn hide your mistakes?
- will the mistakes propagate?
For three of the questions above, the answer is that yes, you should fix the mistakes. Can you figure out which ones?
Even if the texture or colors of the yarn will hide your mistakes, if the mistakes tend to propagate (they will keep generating new mistakes on subsequent rows), then you need to fix them.
Your sanity will thank you later on.
A rule of thumb for me is that if I notice the mistake in a Tunisian crochet project without searching for it, it needs to go.
If I know it exists, but can’t find it without searching, doesn’t impact the item in the future (like a loose thread or something), it stays.
Some items with mistakes in them get completely unraveled because they are learning pieces and those would never get used anyway.
How to fix mistakes in Tunisian crochet stitch patterns
In knitting, fixing mistakes is pretty easy, you just drop a stitch down to your mistake and pick all the dropped stitches with a crochet hook.
But in Tunisian crochet it’s different. You can’t drop more than one row of stiches, the current row you are working on.
In regular crochet, you only have one option. Frog, frog (rip it, rip it), until you reach the mistake.
In Tunisian crochet you have different methods and we’ll be exploring them all in this article.
1. How to fix Tunisian crochet when you made the wrong stitch
When you make a stitch pattern in Tunisian crochet, you sometimes have the same kinds of stitches and sometimes have to make stitches with different heights or yarn consumption.
This fix works when you mistake one stitch for a similar stitch of the same volume/height, for example a Tss (Tunisian simple stitch) for a Tps (Tunisian purl stitch) or a popcorn for a bobble.
If you make a Teds (Tunisian extended double stitch) instead of a Tds (Tunisian double stitch), you might still be able to pull it off without frogging.
But if you have a large difference in yarn consumption between the stitch you made and the one you were supposed to make, you’re better off frogging.
Now let’s assume that the stitches are similar and let’s take honeycomb stitch as an example.
This method works for any stitch pattern where you have a mix of different stitches, since there’s a high chance of messing up the stitch pattern when you have to keep changing what you do every other stitch.
Honeycomb consists of one Tss (Tunisian simple stitch) and one Tps (Tunisian purl stitch). On the next row, you have the same repeat, but you start with a Tps and continue with Tss.
1.1. Fixing the mistake in the forward pass
Let’s say you made a Tss instead of a purl in a row and you did not complete the return pass.
You just noticed the wrong stitch under your hook. What will you do? An option is to continue and make the return pass (see below on fixing in that case).
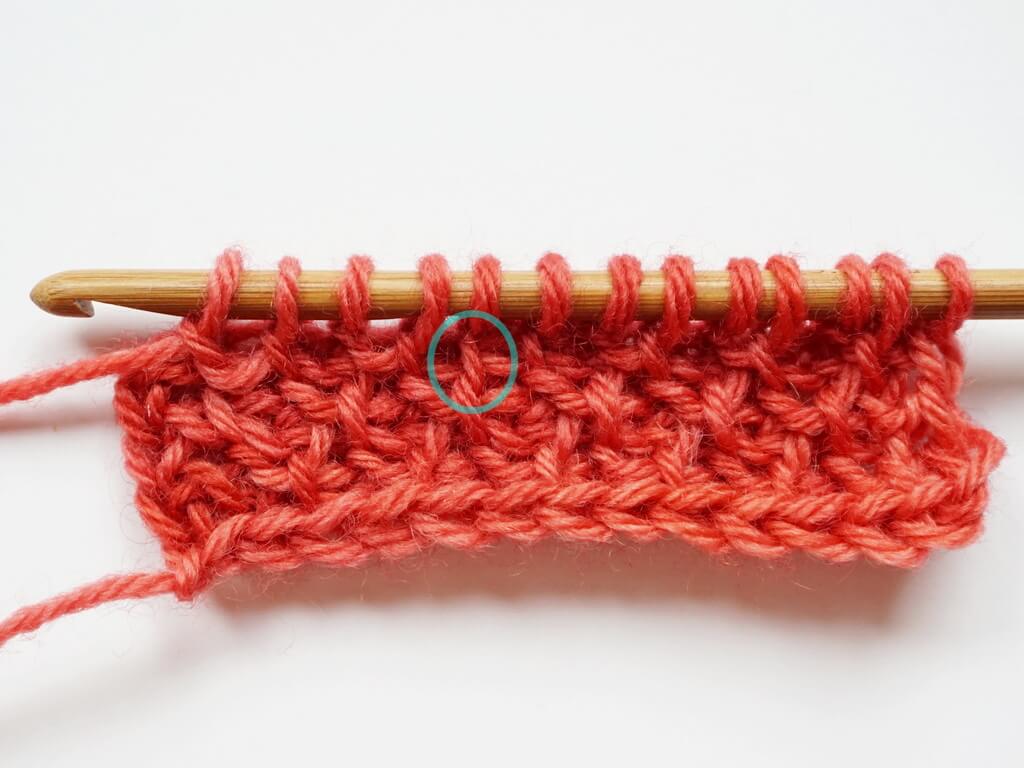
The other option is to put all live stitches after the mistake on a placeholder – a thinner hook or a knitting needle.
Then you take off the wrong loop from the main working hook.
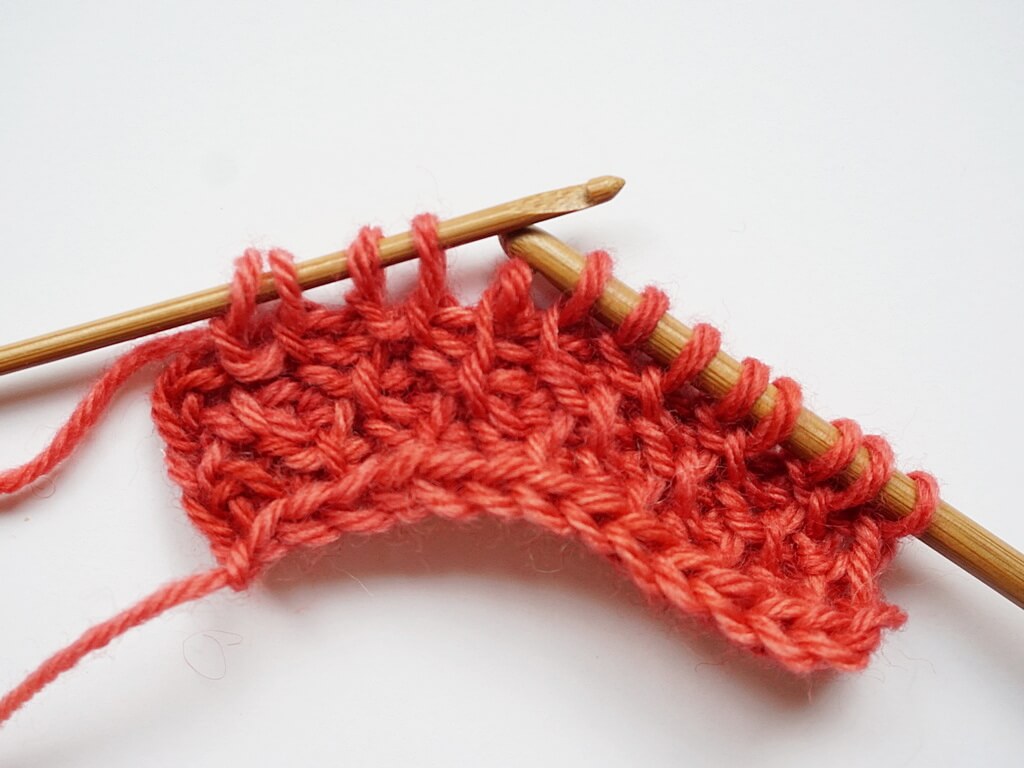
Next you create the correct stitch with the big loop that is left after unraveling. Make sure your tension is even and that you are not left with loopy or puckered stitches.
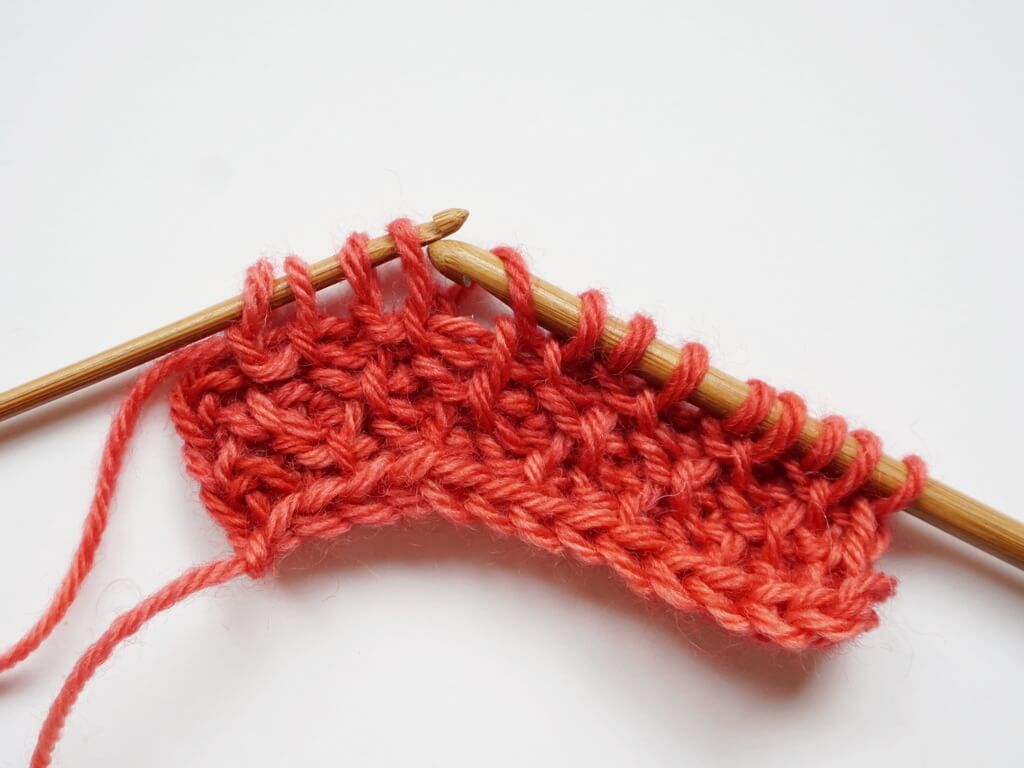
That’s it, from here on you can put the live stitches back on the main hook.
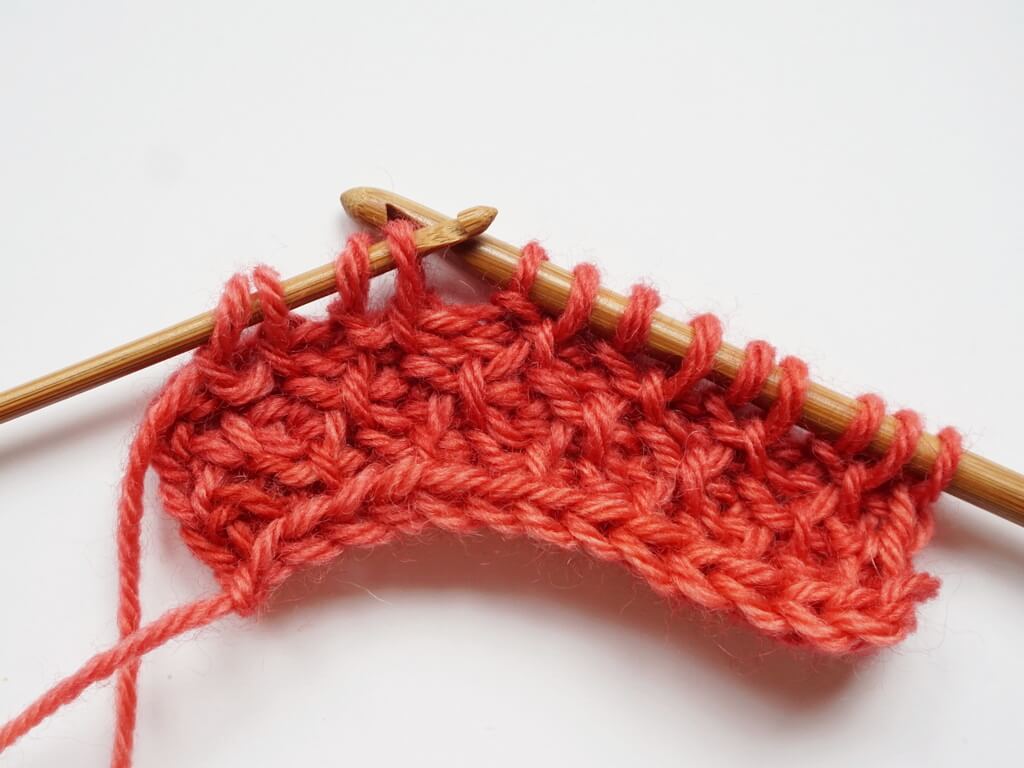
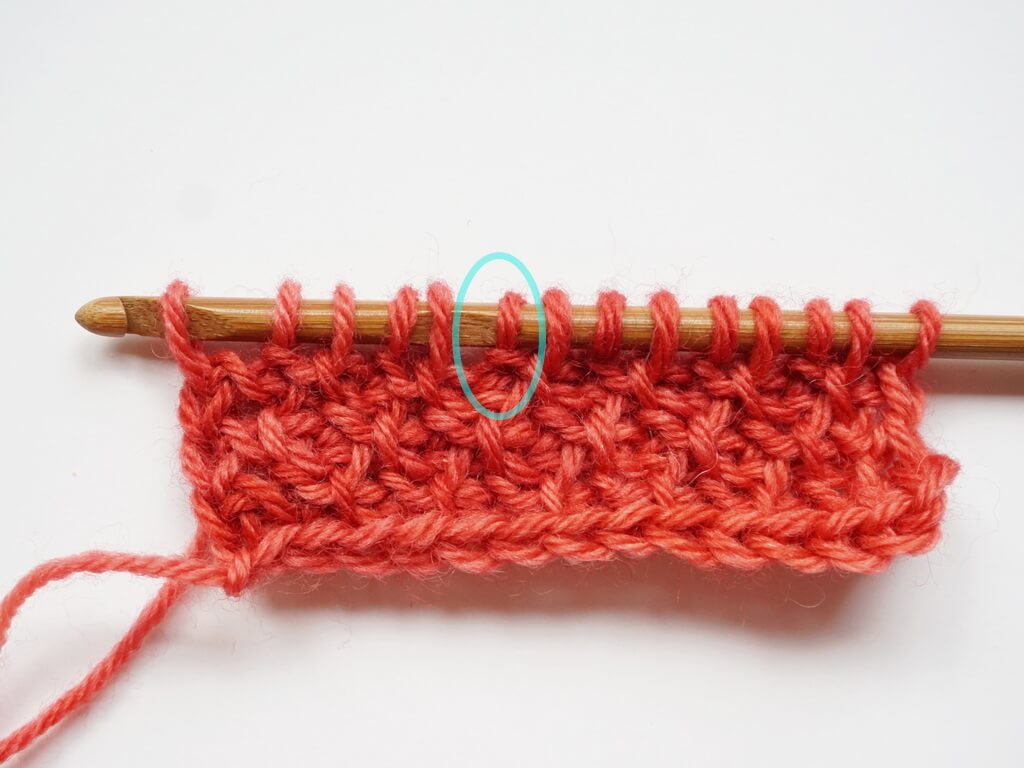
Continue with the remaining stitches in your row and the return pass.
1.2. Fixing the mistake in the return pass
Let’s say you made a Tps instead of a Tss in a row and you completed the return pass.
If you pay attention on the return pass, you might catch the mistake while returning, so you can fix the stitch on the return pass. Stop at the mistake, with the stitch on your hook.
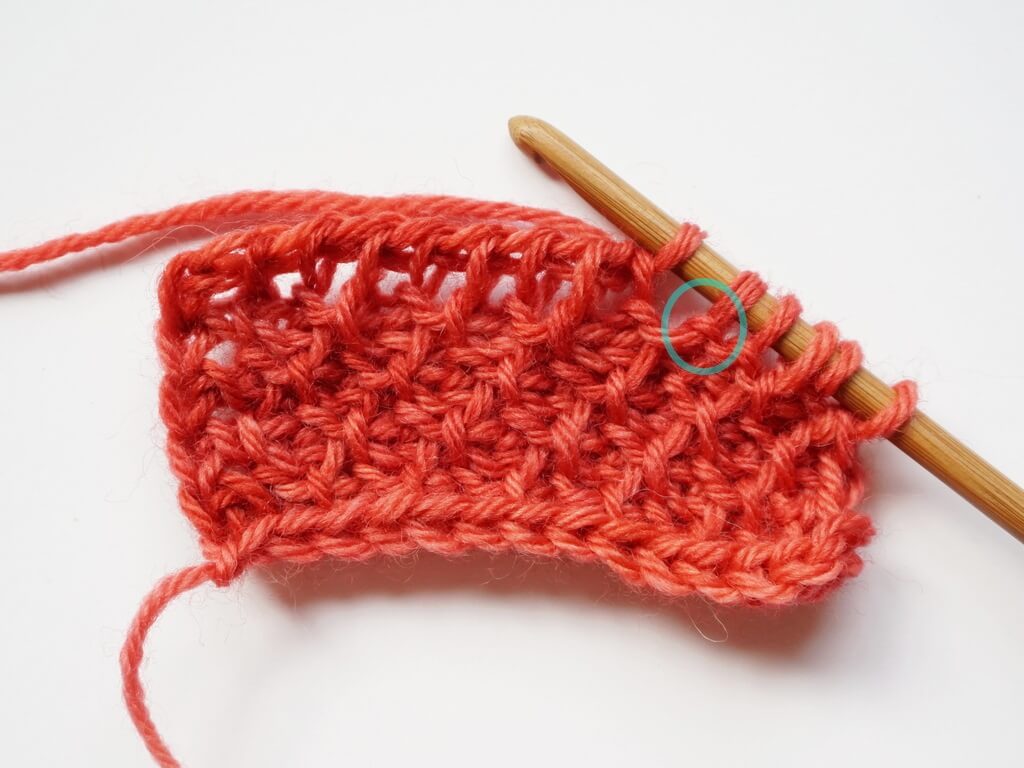
If you already completed the row, just pull back the stitches of the return pass and pick up the worked loops on your hook, going towards the mistake.
Stop after picking up the wrong stitch on your hook. You don’t need to frog the whole row and start again.
To fix the stitch, first leave the live loop of the working yarn to the side (put it on a stitch marker if it’s slippery or just to get it out of the way).
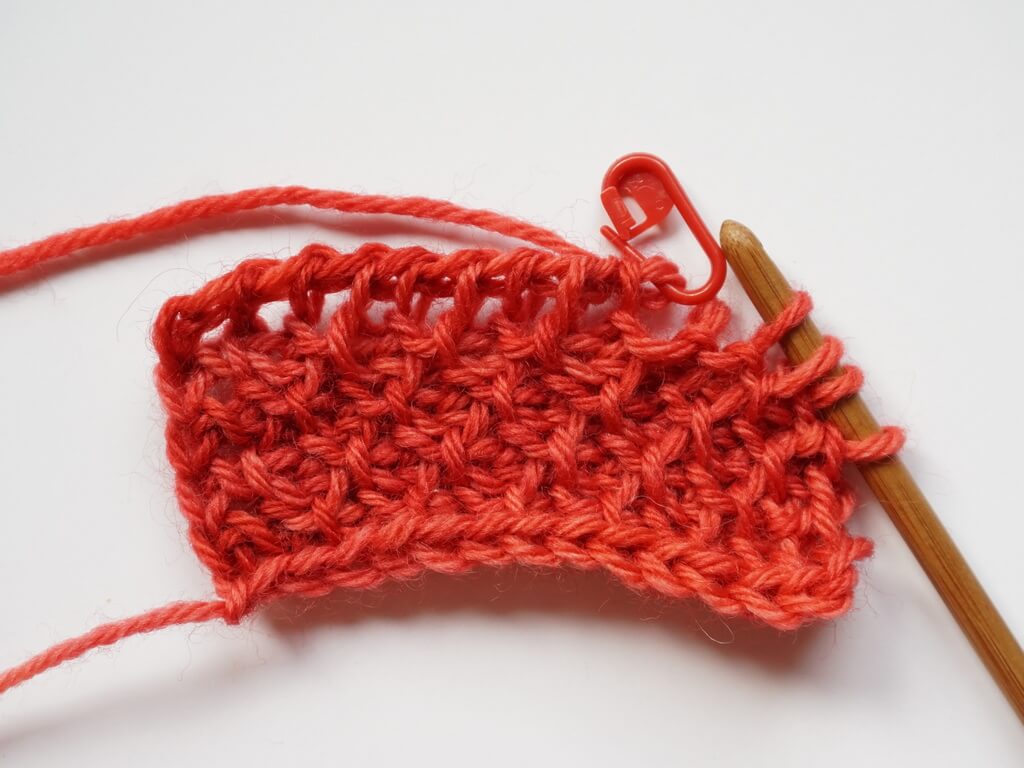
Take out the wrong stitch from the hook, then unravel it from the row below.
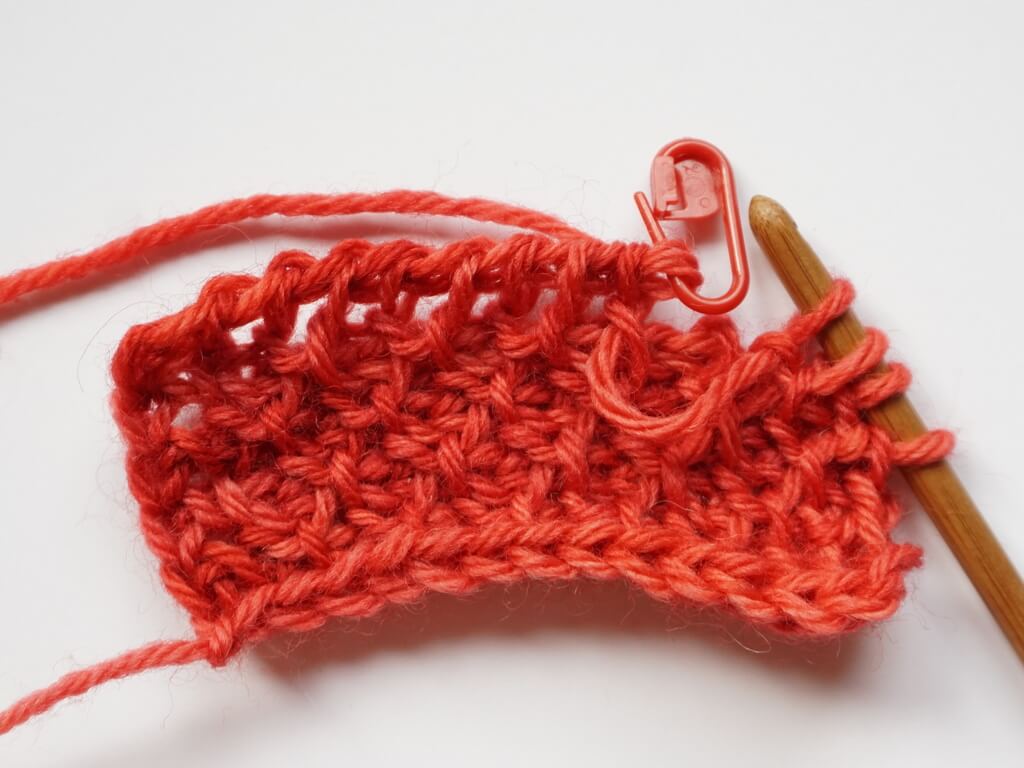
Take the yarn to the back as if to make a Tss, holding on to the large loop, then insert the hook and pick up the loop to make a purl stitch.
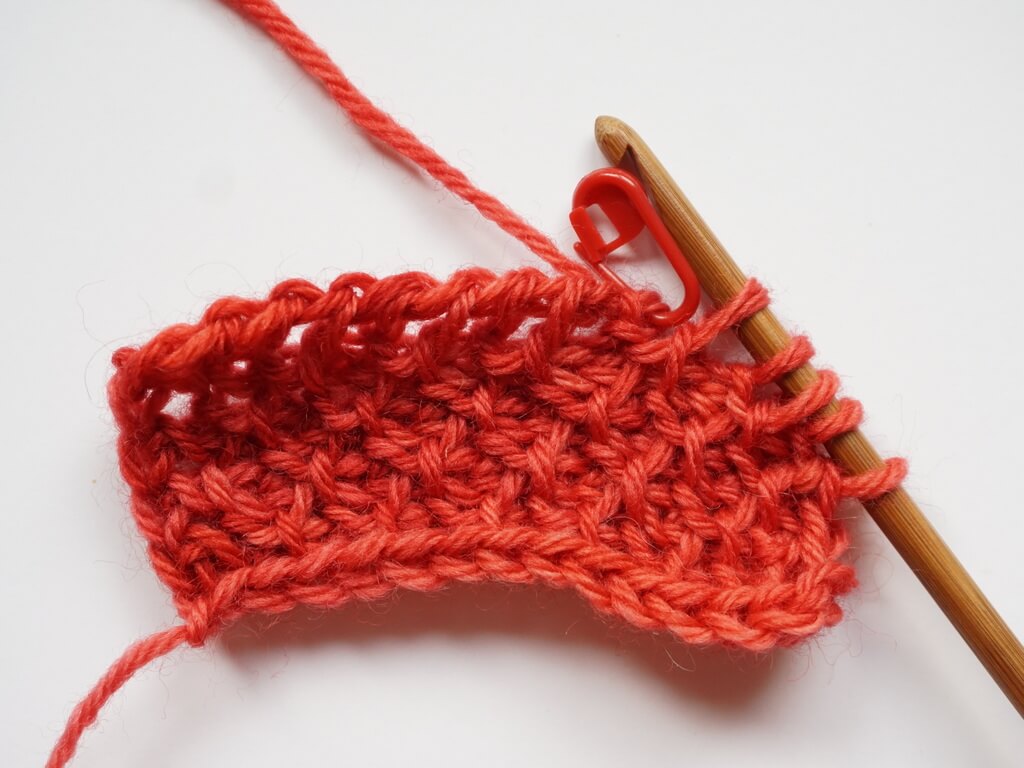
Pick up the live loop from the stitch marker and remove the marker.
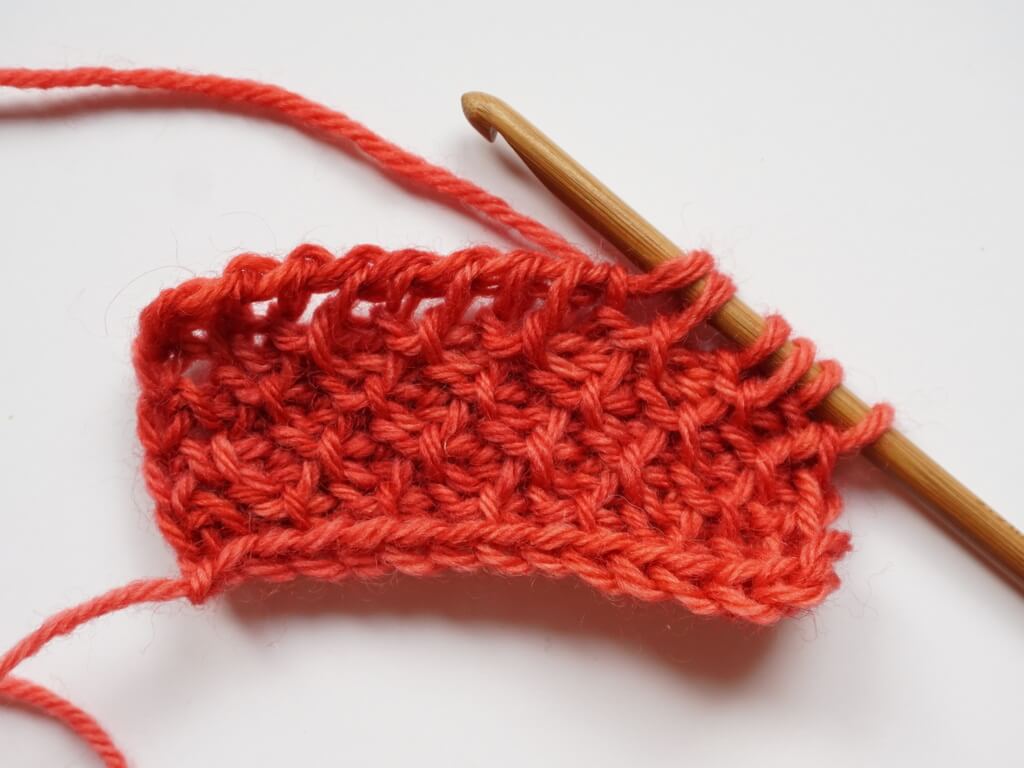
Then continue to YO and pull through 2 loops on the hook to the end of the row to finish the return pass.
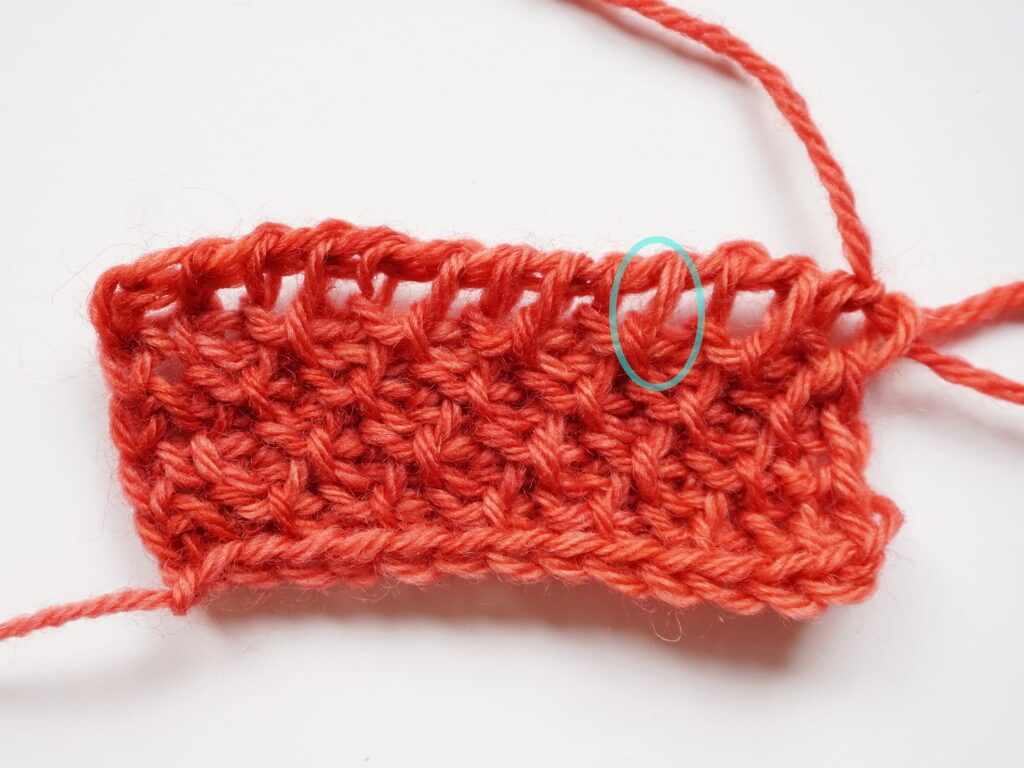
2. How to fix a skipped stitch in Tunisian crochet
This method only works if you skipped one stitch on the row! If you have multiple skipped stitches, unravel the whole row and start again.
When you skip a stitch, you essentially make a decrease (but not a pretty one).
The next row will have a lower stitch count and the piece you are working on will start to taper towards the top.
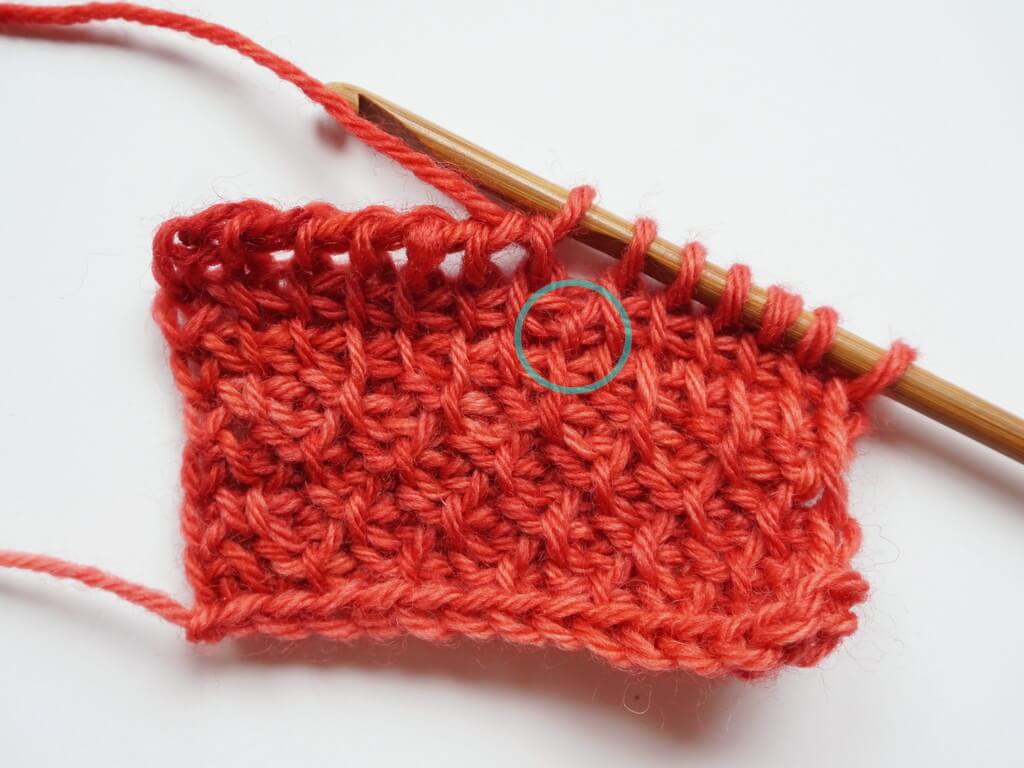
That’s not fun, so you can use a similar approach to the one above to add a stitch on the return pass.
If you have a lot of time or if your rows are short, you can unravel the row, picking up loops, all the way to the missed stitch.
Then you pick up new loops to the end of the row, then do the return pass.
If your rows are long and the mistake is at the beginning of the row, you could unravel only to the missed stitch.

Put the live working loop on a stitch marker and out of the way.
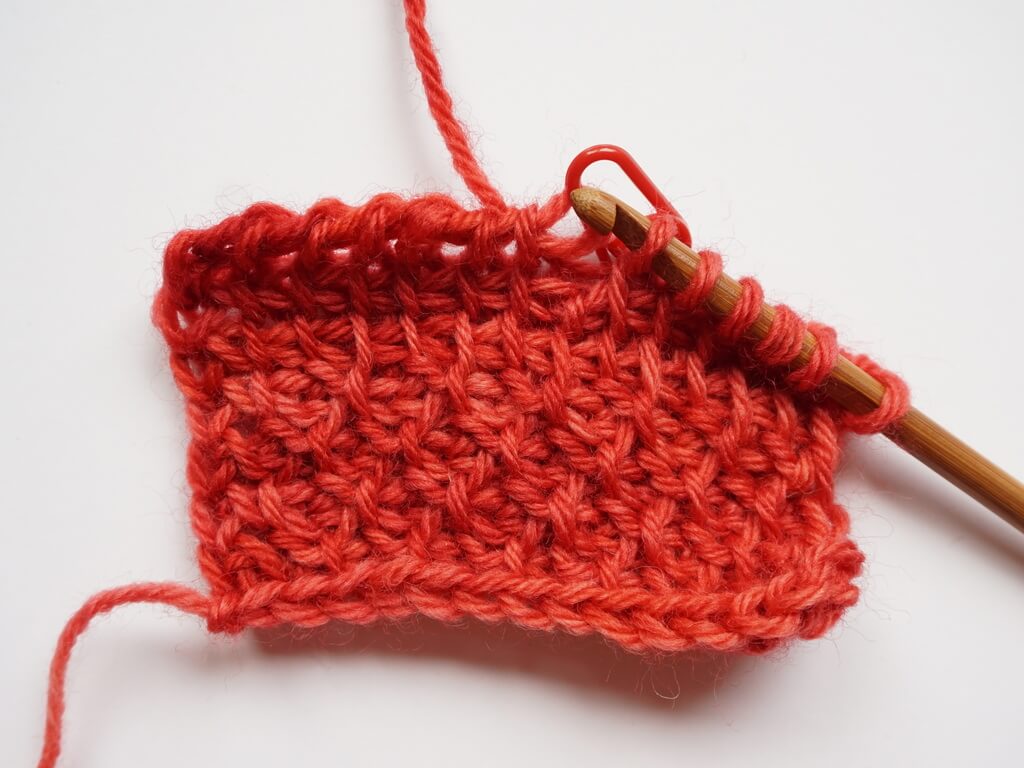
Then insert the hook in the missed stitch and use the little yarn left between the stitches you did make to pick up a loop in that stitch.
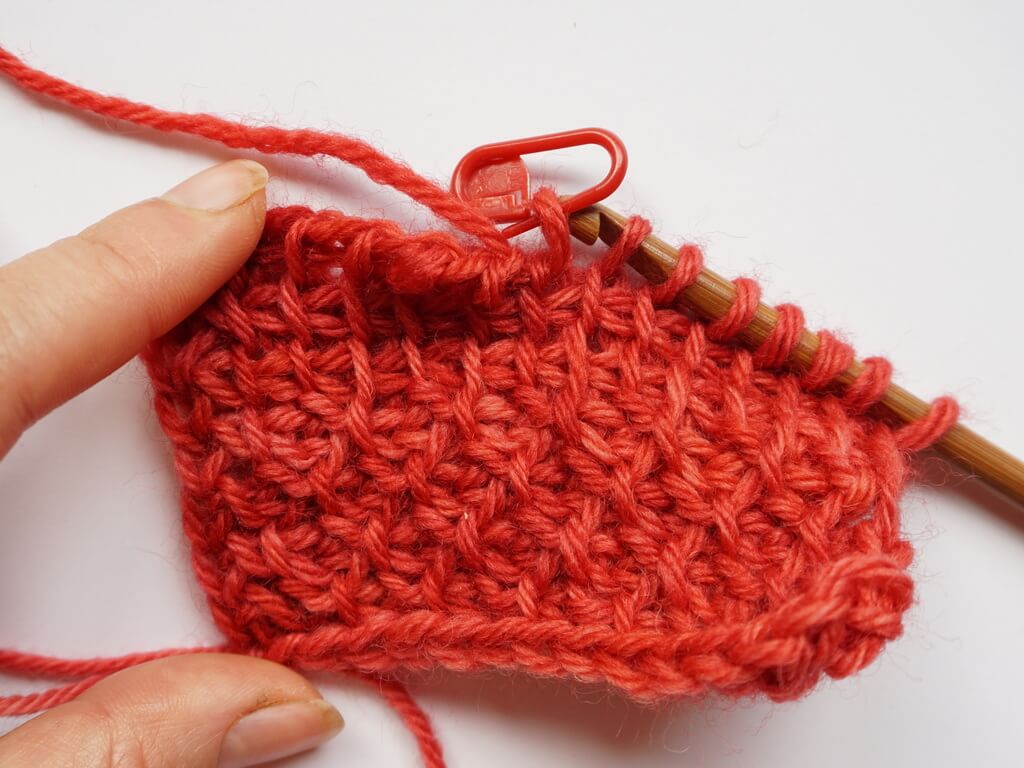
This will make the neighboring stitches tighter because you are essentially creating a new stitch out of the same length of yarn on the forward pass.
After you finish the row, the tension will propagate through the whole row and make all the stitches have the same tension.
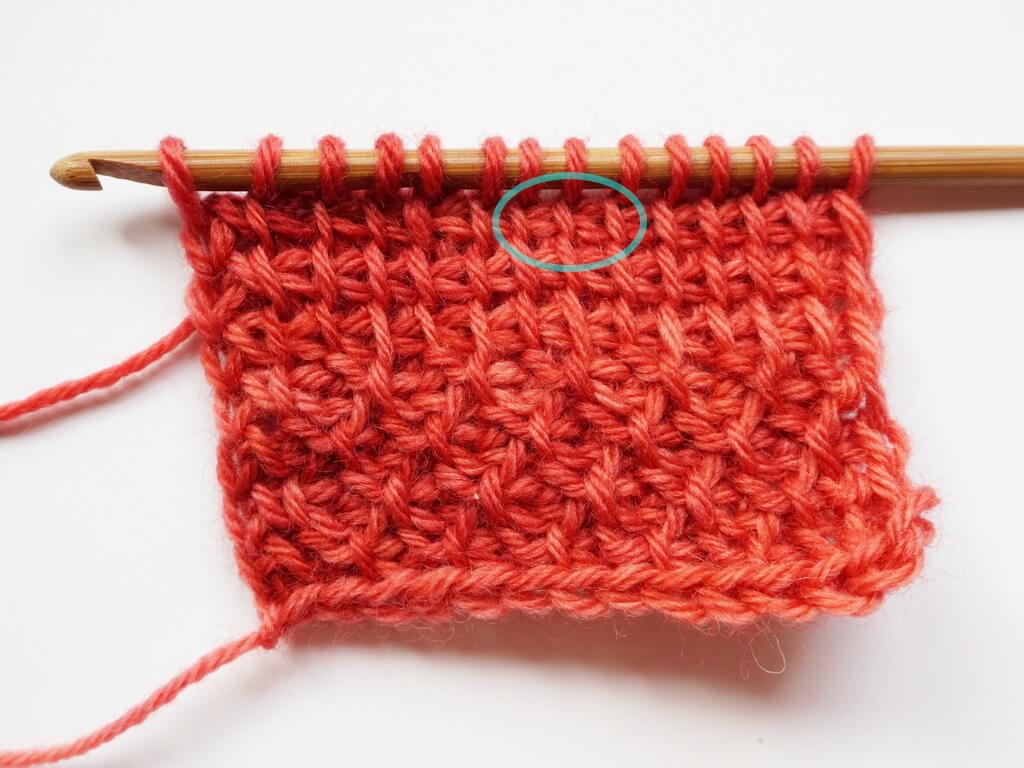
Then take out the stitch marker from the working yarn and finish the return pass.
3. The bottom of the Tunisian crochet project looks bad
That’s an easy fix. Well, at the beginning of the project, anyway.
There’s a reason why you pick up loops in the back bumps of the chains when making the first row.
This makes the bottom of the work look like the top and sides, with a pretty chain going all around the edge.
If you pick up loops in the front loop of the chains, the bottom edge will look like a braid. Not bad, but not necessarily pretty.
But there are many ways to make foundation rows in Tunisian crochet and in this video I demonstrate 4 of them.
They should all provide a beautiful bottom edge to your project.
But if you’ve alread messed up the bottom, in comes the border to the rescue.
Ah, yes, you can always add a border all around your project and hide the starting chain.
You can make it plain, in honeycomb stitch, or fancy, in lace.
I’m planning a whole collection of patterns for borders, both standalone and attached, for Tunisian crochet projects. Please pester me if you want that to become a reality in the near future, otherwise I’ll be here writing about tension and stuff.
Conversely, you could try a different cast on method, especially if you hate making 1038213 chains at the beginning of a wide project and picking up loops in all of them…
Separate article on several methods of casting on in Tunisian crochet coming soon (but for now we have a video). Make sure you’re signed up to my email updates if you want to know when that is.
4. Accidentally decreased on the return pass in Tunisian crochet
When you YO and pull through 3 on the return pass, instead of YO and pull through 2, you also make a decrease.
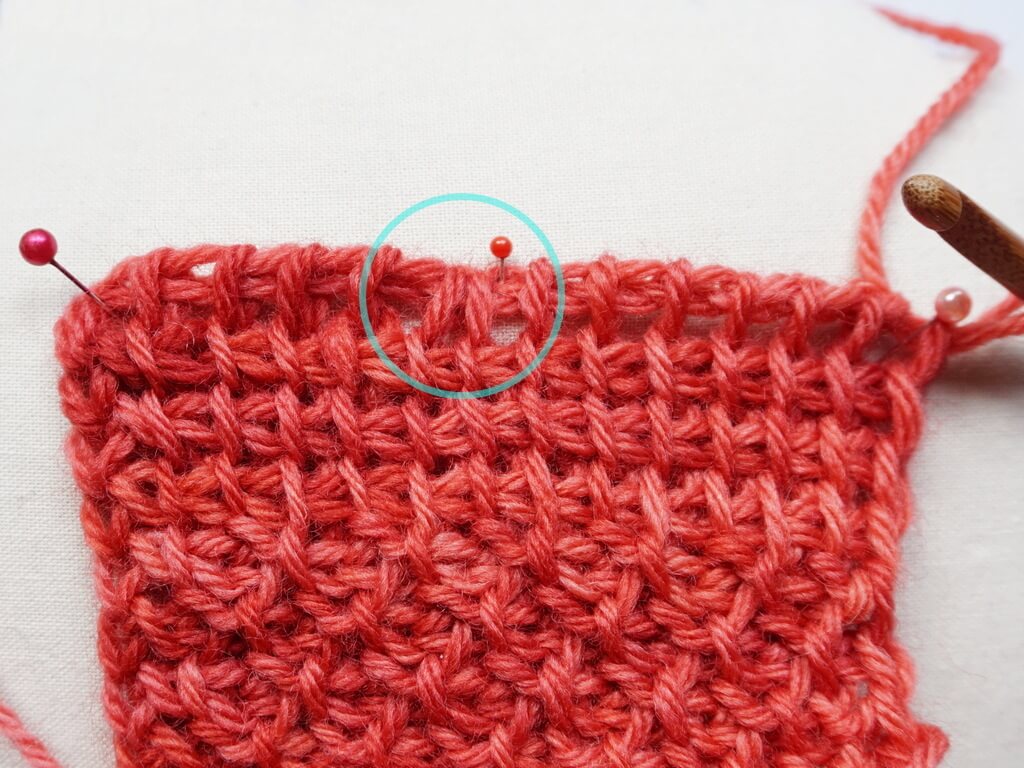
Sometimes it’s intentional, like in certain patterns where the decreases are on the return pass, but sometimes it’s a mistake.
Most of the time, I’d recommend that you unravel the return pass to that point and do the return pass correctly.
But if it’s toward the end of a very long row, this mistake might cost you a lot of time.
So you can fudge it (it’s not a perfect fix) on the next row.
This works for Tss, but not necessarily for other stitches.
When you reach the mistake on the next row, instead of working into the two loops as if they were one stitch, pull up a loop into each of the two loops visible, working into them as if they were regular stitches.
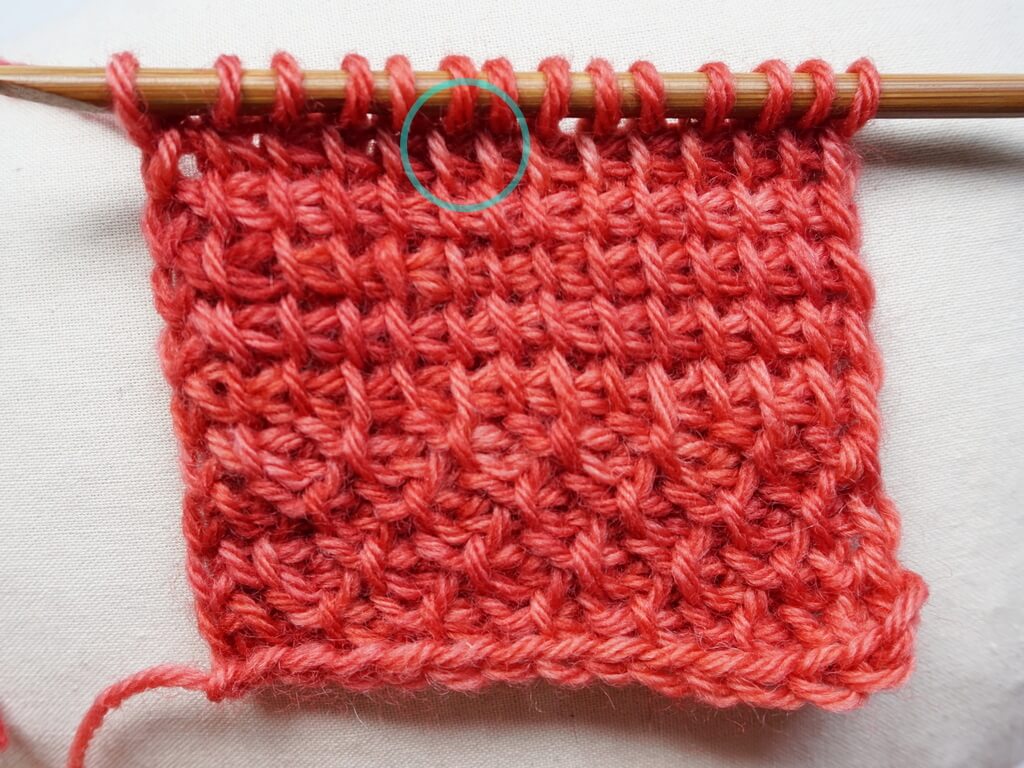
Continue working the row and do the return pass as usual. There will be a tiny pucker right at the spot of the mistake, due to there being only one chain for two stitches, but it may go away with steam blocking if you use acrylic.
Don’t use this method if you make something lacy! It’s very obvious with thinner yarn.
Take your time and do the return passes correctly and slowly to avoid having to fix this mistake.
5. The edges of the Tunisian crochet project are wavy
Or loose or wonky or the piece curves to one side.
When the edges of your work are wavy or frilly or just plain loose, it has to do with how loose your first and last stitches are.
When the first or last stitch is consistently loose, row after row, this will create additional height in just the edge, which will make it frilly.
Sometimes you want to use this to your advantage, such as when you intentionally want a frilly edge at the bottom of a wrap or a capelet.
Most of the time, when working blankets or similar rectangular items, you don’t want the edge to be taller than the body of the item.
This is a systemic issue and you need to pay attention to the first and last stitch on each row to prevent this issue from appearing in your work.
In time, it will become second nature, so learn the tricks below early on in your Tunisian crochet journey and you won’t have to worry about wonky edges.
If you work with super tight tension, you will not get this problem (but you should still check if you’re not making your life harder than it is).
At the beginning of the row, the most common way of preventing this is to pull up two regular stitches in pattern, then pull back on the working yarn to make the first 3 loops tight against the hook.
They will loosen up a bit as you continue working, but this will make sure the first stitch has the same height as all the others.
If you pull back on the working yarn only at the beginning of the row, it will not work, as there’s nothing to keep the loop from opening up again, so you need those two stitches to keep the first loop in check.
At the end of the row, as you pull up the last stitch, you might also get a loose edge, especially if you stop to take a break before the return pass and move the stitches down the hook.
To make sure the last stitch is the same height as the rest of the row, pull back on the working yarn, keeping the last stitch close to the tip of the hook and ready to start the return pass.
You want the last few stitches to be snug with the hook. In fact, you want all your stitches to be snug, but not tight, around the hook (see the next section about that).
Then Ch1 to begin the return pass. You want to add this Ch1 and not just start with YO and pull through 2, as skipping it will make that edge too tight.
The chain should have the same height or tension as all the other chains in the return pass.
By checking the tension at the beginning and the end of the row (at least), you’ll make sure to have straight edges on your work.
6. Making the stitch in the wrong place in Tunisian crochet
There are about 24 ways of making single loop Tunisian crochet stitches with a single hook in the row below
- behind the front loop,
- behind the back loop,
- between these loops,
- behind the front horizontal loop,
- behind the back horizontal loop,
- behind the middle horizontal loop,
- all of these from the front or from the back of the work,
- all of these with yarn in front or behind the hook.
Not even counting twisted stitches, backwards stitches, stitches worked in multiple loops and so on, that might bring the total up to over 30-40 (I’ll make a video about this one day).
That means that chances are quite high that you’ll make a stitch in the wrong space. Be it a simple stitch or a more complex stitch, there are myriads of ways of messing up.
So what do you do to fix it?
If you catch it early enough, that is, during the forward pass, you have three options.
- Option one is frogging all the way back and fixing the mistake. But if you work really long rows, you might not want to frog so much.
- Option two is transferring your correct stitches on a temporary holder (a smaller Tunisian crochet hook or a knitting needle) all the way back to the mistake. Then unravel that carefully, putting the yarn back on the hook and making the stitch correctly.
This prevents having to unravel a lot of work and then you can slide your worked stitches back on the hook to continue working.
- Option three is keep working until you finish the forward pass, start the return pass and stop at the stitch you need to fix.
This fix is also valid if you catch the mistake on the return pass. You stop right before the stitch you need to fix, take the wrong stitch off the hook.
Slowly unravel the stitch and hold the unraveled yarn as if you were holding the working yarn when doing the forward pass (with a little bit of tension). Insert your hook correctly and make the required stitch. .
You will ideally use up all this unraveled yarn, since you are making the same stitch, just in a different spot.
7. When your stitches slip off the hook during the return pass
First, it’s a tension problem, you shouldn’t be able to slip the stitches off that easily, check yarn thickness vs hook size (the hook should be able to capture the yarn if it slips) and check how limp the loops are.
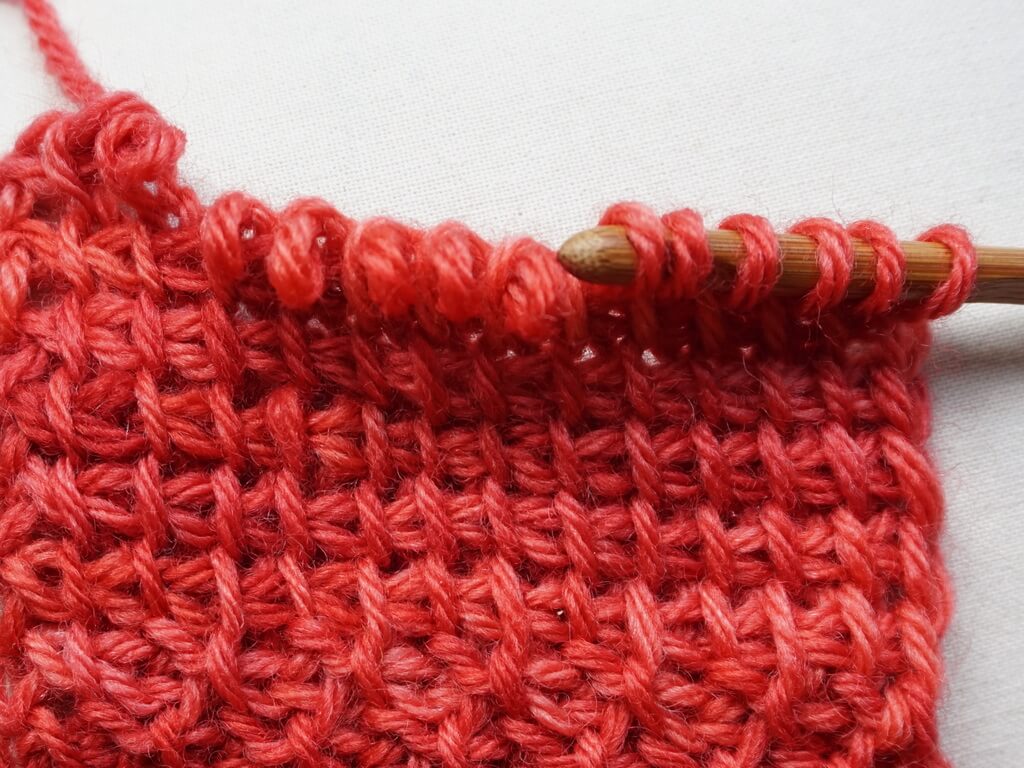
You want them to be snug to the hook, there should not be extra space between the hook and the yarn.
As for picking up accidentally dropped stitches, you just insert the hook back into the loops as they are, they should not be pulled out. If they become twisted, you will notice, take them off and put them back with the correct orientation.
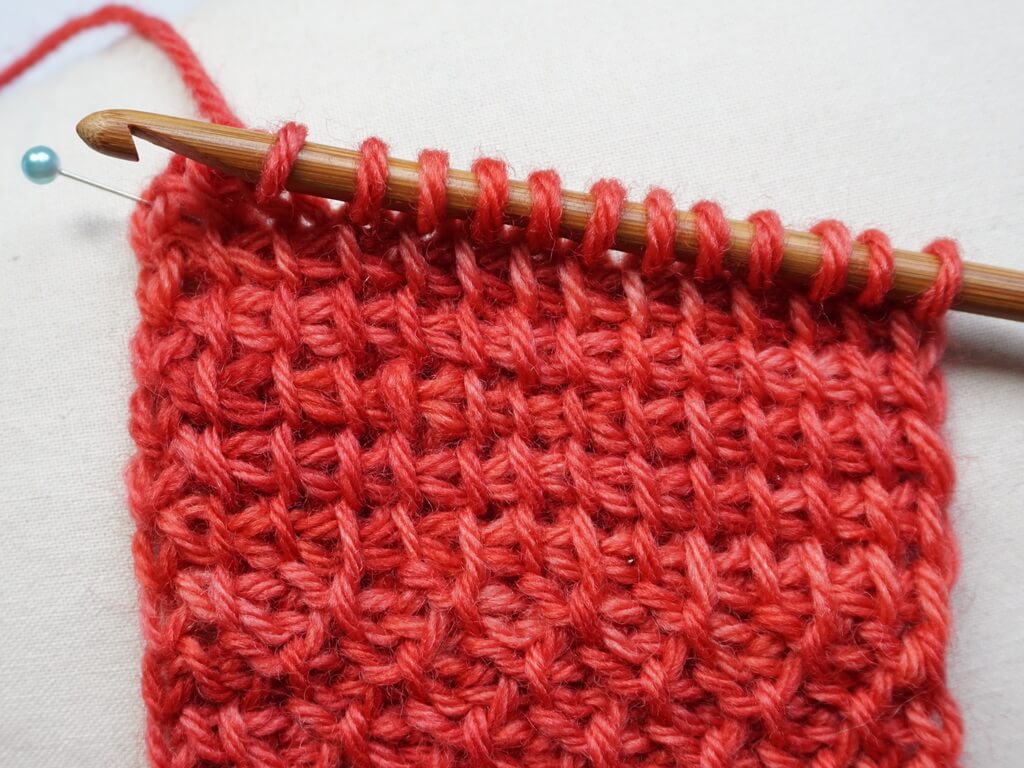
If the cat comes by and pulls on your live stitches and takes them out completely, you can use the resulting large loop as “working yarn” and pick up the lost stitches as if making a regular forward pass.
Just make sure the actual working yarn (the one doing the return pass) is secure with a stitch marker if this happens.
8. Not finding the short rows in Tunisian crochet
This is a tricky issue when working with patterns that include short rows.
The mistakes happen when you can’t find the beginning and ends of short rows in your work and you make increases or decreases where it’s not necessary.
To fix them, you need to understand the anatomy of short rows, which is easier if you make a swatch.
I have yet to encounter a pattern for short rows that end before the end of the return pass (I’m not saying they don’t exist, just that I haven’t found them).
Update: I’ve found one pattern with short rows at the beginning side of the row, but I don’t like how the beginning short rows look, so you’ll be getting another version when I finish my own patterns with this type of short rows.
Most short rows in current published patterns work by only picking up a specific number of stitches on the hook, instead of the whole row.
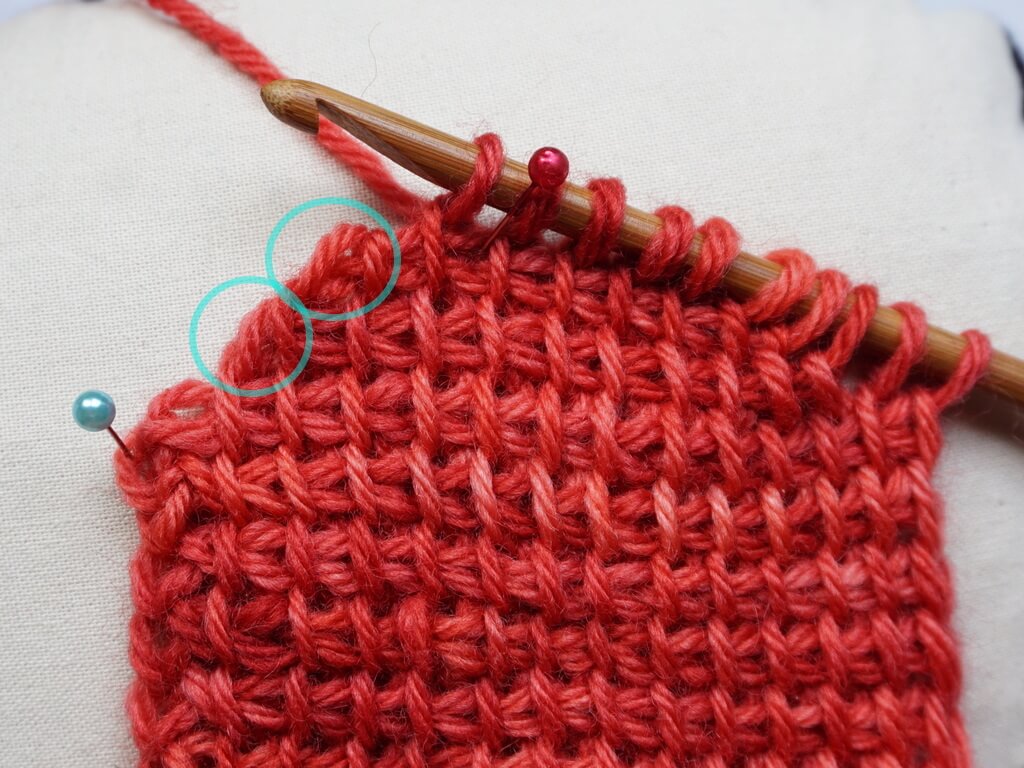
You do a short row return pass, which means that you don’t Ch1 at the end of the row to “lift” the edge of the work and create a vertical edge. This prevents bulk at the end of the short row.
When you reach back to the end of the short row on the next row (let’s assume it’s a regular row), you have to figure out which loop to work into.
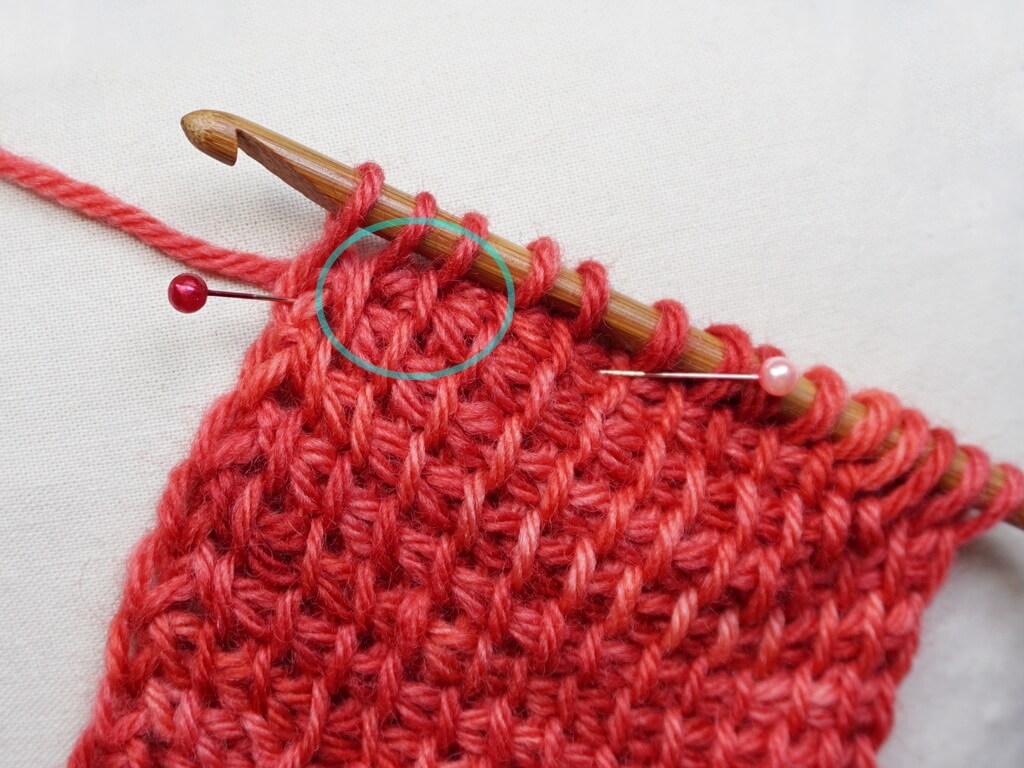
If you look at the work, you will notice that the short row has regular stitches and an “odd”, slanted stitch at the end of the row. This “odd” stitch is nothing else than a decrease that creates a pointy end in your short row.
Once you find it, you will make your next stitch in the stitch below, not in the “odd” stitch and this prevents increasing where you don’t want increases. If you make a stitch in the “odd” stitch and then in the one below, you will increase by 1, which may be what you want if the pattern tells you to do it, but probably it’s not something you want.
If you instead work into the “odd” stitch and skip the regular stitch under it, you will end up with a hole in your work where the short row ends.
For short rows at the beginning of the row, I will create a tutorial first, then do some troubleshooting and update this article with any insights I get.
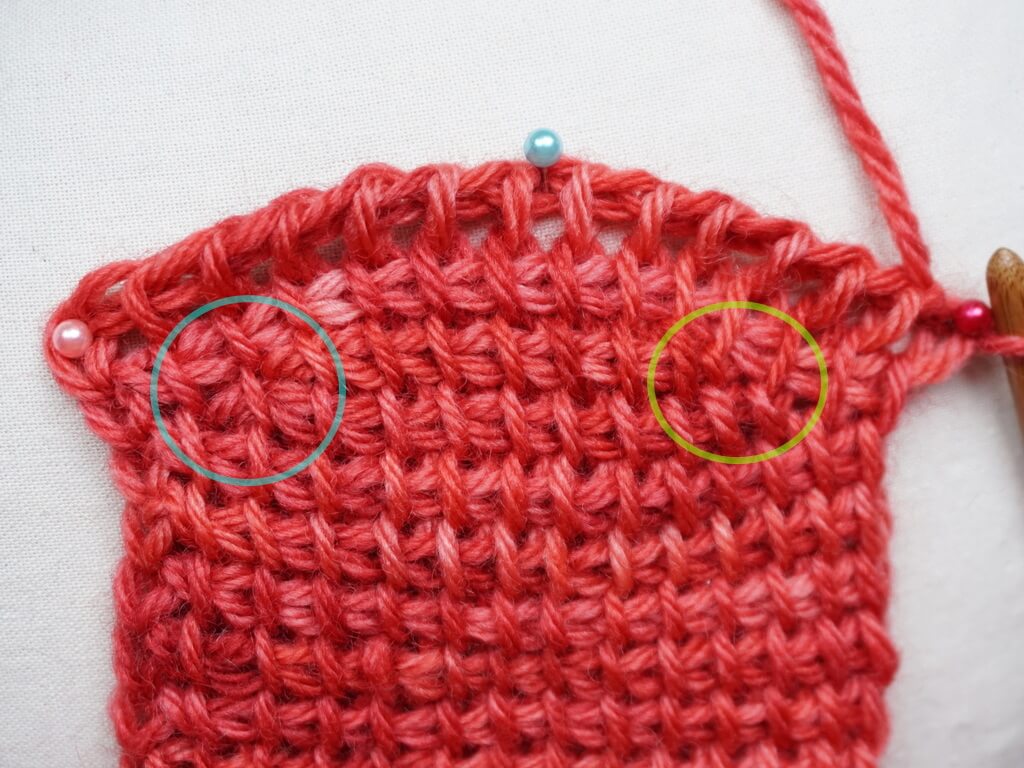
From my current experience with them, you don’t actually need to do anything, they look and feel like regular stitches on your hook, so unless you make other mistakes (like not doing the return pass correctly), there is not much you can mess up about them.
9. Tension issues in Tunisian crochet
This is a larger family of problems that will make your project wonky or lumpy.
Here are some issues caused by uneven or too tight/too loose tension:
- the fabric puckers in places;
- the fabric is limp in some places, with ballooning;
- some rows are shorter than the others;
- there are holes in the fabric;
Sometimes you want these exact characteristics in your finished project and use them in an artistic fashion.
But first you need to understand what causes these to appear and how to control them before you can apply them creatively. Deliberate art requires knowledge of technique to make the “boring” stuff correctly first.
Since this is such a large topic and you first need an introduction in tension and yarn holding, I’ve decided to address it in a separate article, together with troubleshooting tension issues in regular Tunisian crochet, return pass tension plus working with short rows.
Check it out here (coming soon).
Issues with return pass tension in Tunisian crochet
See separate article above about tension issues.
Wrapping up this article about fixing mistakes in Tunisian crochet
Did you learn something new? I sure hope so, this has been a long article and a long way coming.
If you have other mistakes that you’d like to get fixed and don’t know how, write them in the comments and once I figure out a fix (that doesn’t involve just frogging back to the mistake), I’ll add another section to this article, so we can help more people.
I hope you’ve enjoyed this article and that you’ll check out other articles with tips and tricks in crochet and Tunisian crochet. Here’s the latest selection from the blog:
Make sure to subscribe to my email updates if you want to know when I publish other articles like this that will save you from headaches and leave a comment with the mistakes that you make the most often (mine is decreasing on the return pass, ooops).
Hugs,
Andrea



Hi Andrea,
I made 6 Tunisian simple stitches the wrong color… I didn’t notice it until the next row. I didn’t want to frog the row, because there’s a lot of color changes (Hulk). When it was time to work into the wrong colors I couldn’t get away with the error. So I cut the forward and return wrong color stitches out. I placed a marker in the return stitch that was just hanging there. I crochet the new stitches with the correct color and did a return pass. I have a loop from a return pass cause I have nothing to connect it to. I will do a little locking the loop down on the back.
That’s a great solution to a problem I hadn’t thought about (I don’t work with color changes). Thanks for sharing it!
I came across your article doing a Google search for my problem.
I paid for a pattern I’m trying to crochet, so I don’t want to go into too much detail. So here’s an example – I’m supposed to chain 220. My foundation row will have 220 stitches. Row 2, forward pass – can have 213 stitches. I’ll rip it out, the next forward pass I’ll have 218 stitches. This is after counting 2, 3, 4 different times.
I can’t find out where to go, where to look, that might have what the problem is, or what I’m doing wrong…
Hi Lysa! Since you have 220 stitches in the foundation row (I’ll assume the last stitch is included), you should have 221 loops on the hook before starting the return pass.
I’d add a stitch marker every 10 stitches/loops to make sure you pick up loops in all the stitches. Move up all the stitch markers every 2-3 rows (so it’s not too much work).
Since I don’t know what pattern you’re working in, yarn, hook size, tension, I can’t say where you’re missing stitches.
If it’s Tss, it’s fairly straightforward, but when you start combining stitches you need to be familiar with what each stitch looks like, so you can make sure you’re not skipping any.
Hope this helps!
I do know of a pattern in Tunisian crochet which has the end of a short in the middle of the row. It’s called “The Radius Shawl” by Light and Joy Designs. There’s also a tutorial on youtube for it. Thought I’d share it because it is awesome 🙂
That’s awesome, thank you for sharing! I know about this pattern, it’s very pretty and a good lesson for making circles.
It has regular short rows, the ones that I have used as well in the tutorial, the ones where you pick up fewer stitches than on the row below, but cast them all off.
Hi, I hope you can help me. I am making a blanket in tuscan stitch. I’m 3/4 finished and it looks to long for the width. I have 10 rows of plain stitch, before the graph starts. Is there any way I can shorten the blanket from the bottom. Without my project unraveling. Any help would be greatly appropriated thanks shelby
Hi Shelby! Are you sure you want to shorten the blanket? You could add some more fabric on the sides instead, that would be much easier and you’d have the exact proportions you want.
If you really want to shorten it, you can cut inside row 10 to leave a decent bottom edge.
You cut the front loops of the Tss and the ends of the row, remove the bottom fabric, then pick out the remaining fragments and secure the new bottom of your project by picking up loops in there and making slip stitches or any border you want, really.
I haven’t done this before, so I would first try with a swatch, to see where things go, before doing it on the larger scale and potentially ruining your project.
Hope this helps!