In this guide, you can follow step by step instructions on how to measure yourself so you can find the best fitting patterns for your proportions, or to be able to alter patterns and even design your own garments that fit perfectly.
The guide currently includes 19 measurement points for the upper body. It will be updated with lower body measurements in the future.
This guide is useful whether you want to have measurements for crochet garments, you want to knit perfectly fitting clothes, or if you want to sew clothes that fit you just right.
Print the card at the beginning of the guide and fill it out, or download the PDF for free and write your values on it when you become an email subscriber.
Body measurements for improving garment designs study
In 2023 I started a project whose goal was to develop a trustworthy table of measurements for garment design.
I go into details in the blog post dedicated to it, but the main takeaway is that I need your help to develop this project further.
If you want to help improve the fit of garment patterns, you can fill out the survey using the same numbers you’ll get from the guide below.
That’s all I need from you. Once I have a few more data points, I’ll update the results. There’s a first round of results from April 2023.
What you need to measure yourself
You will need a measuring tape and possibly a friend to help with some of the measurements.
All measurements are taken while standing up, but you can also get some of these when sitting or lying down, depending on your mobility.
Wear your usual supportive garments and potentially a thin form fitting T-shirt and tights.
How to measure yourself with these tools
Use the measuring tape and write down each measurement as you take it.
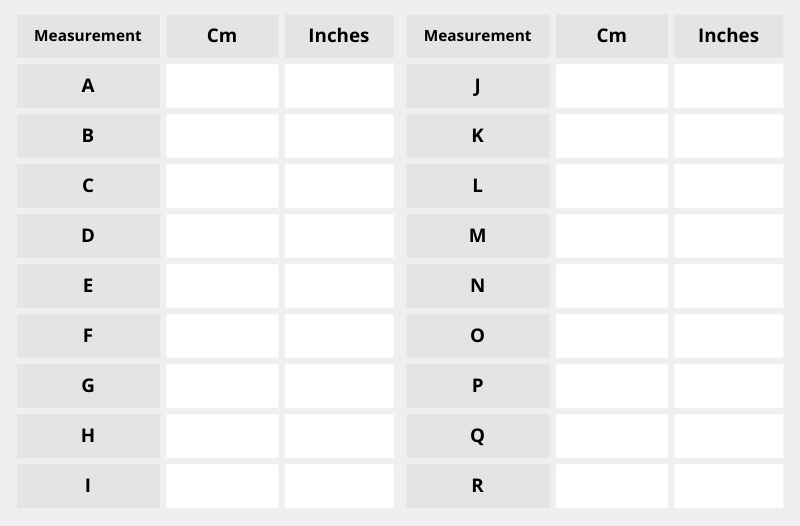
Fill out this card with the numbers, depending on your chosen measuring unit.
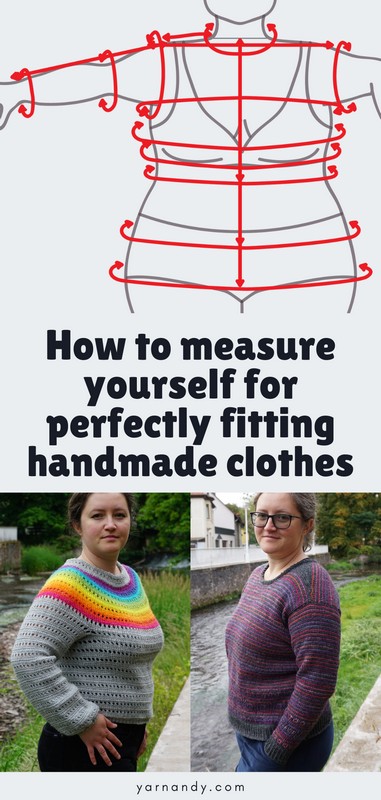
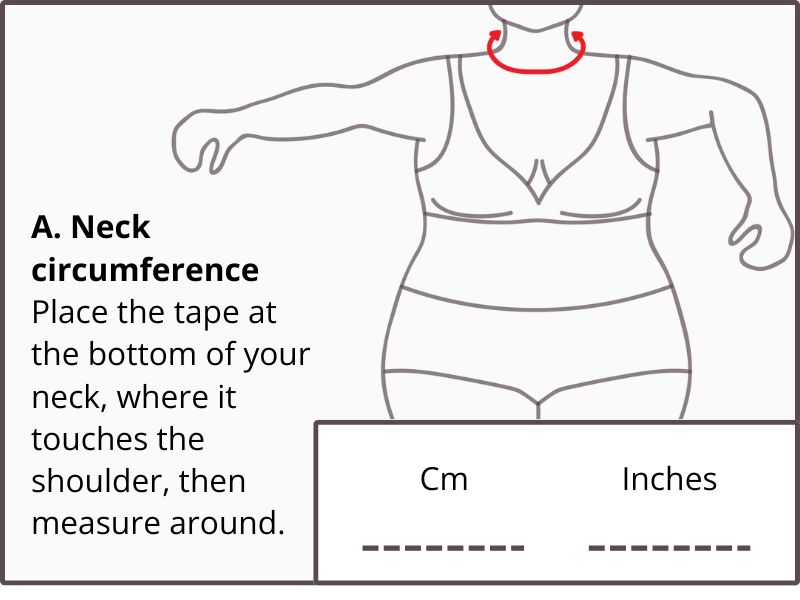
A. Neck circumference
Place the tape at the bottom of your neck, where it touches the shoulder, then measure around.
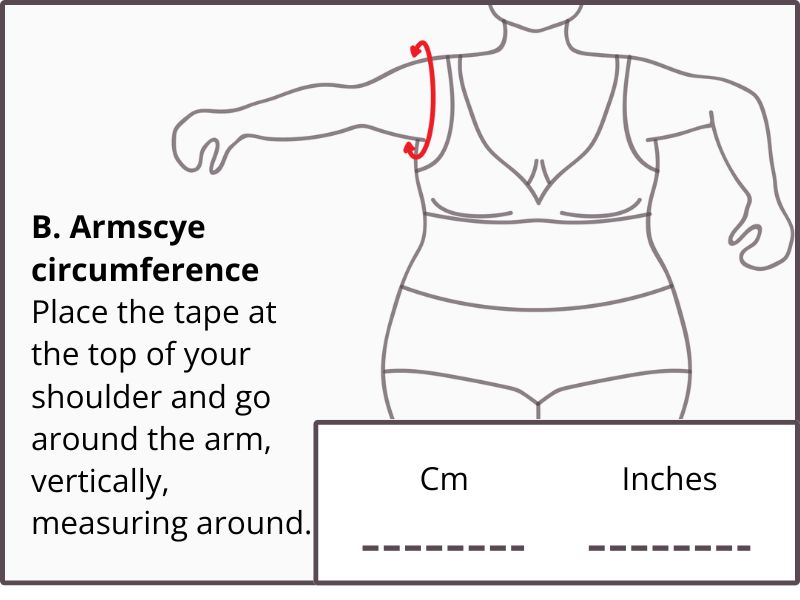
B. Armscye circumference
Place the tape at the top of your shoulder and go around the arm, vertically, measuring around.
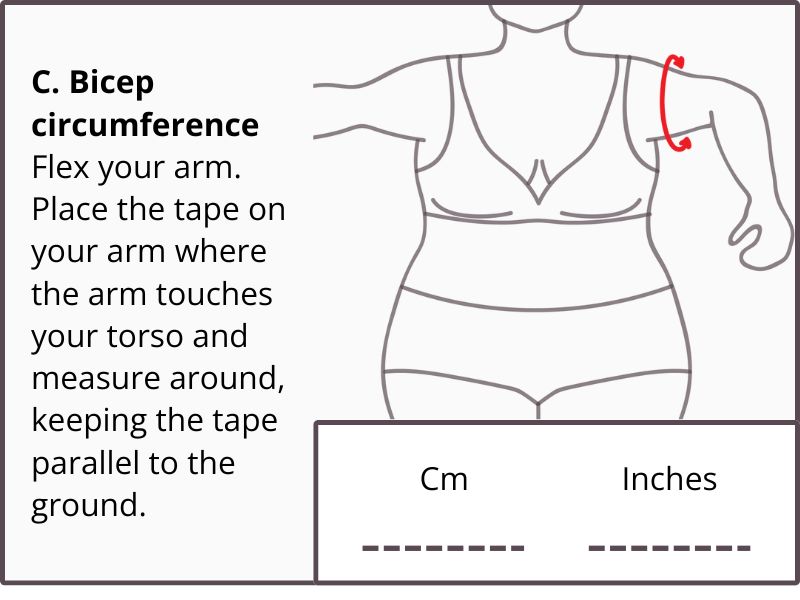
C. Bicep circumference
Flex your arm. Place the tape on your arm where the arm touches your torso and measure around, keeping the tape parallel to the ground.
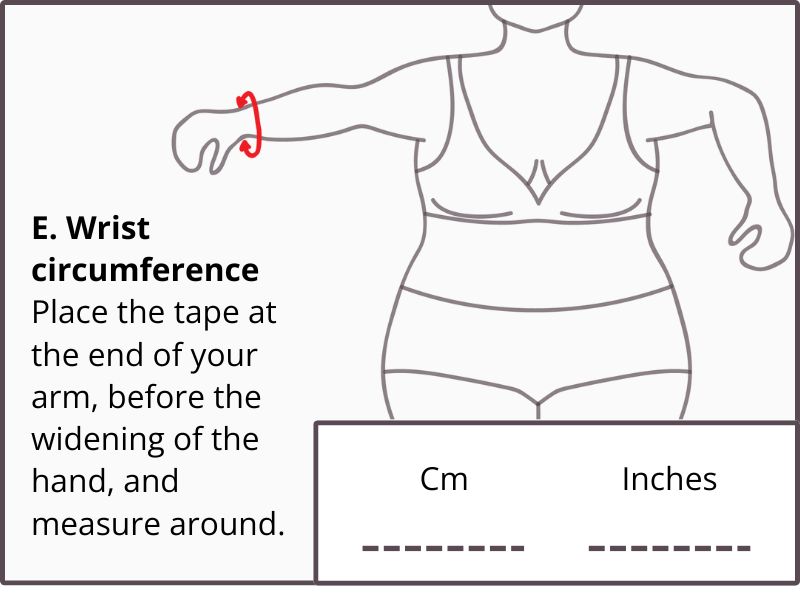
E. Wrist circumference
Place the tape at the end of your arm, before the widening of the hand, and measure around.
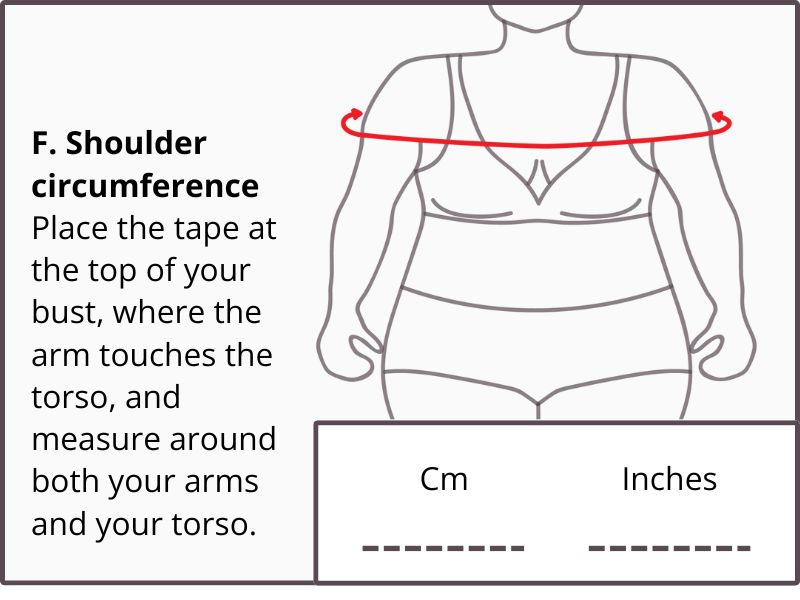
F. Shoulder circumference
Place the tape at the top of your bust, where the arm touches the torso, and measure around both your arms and your torso.
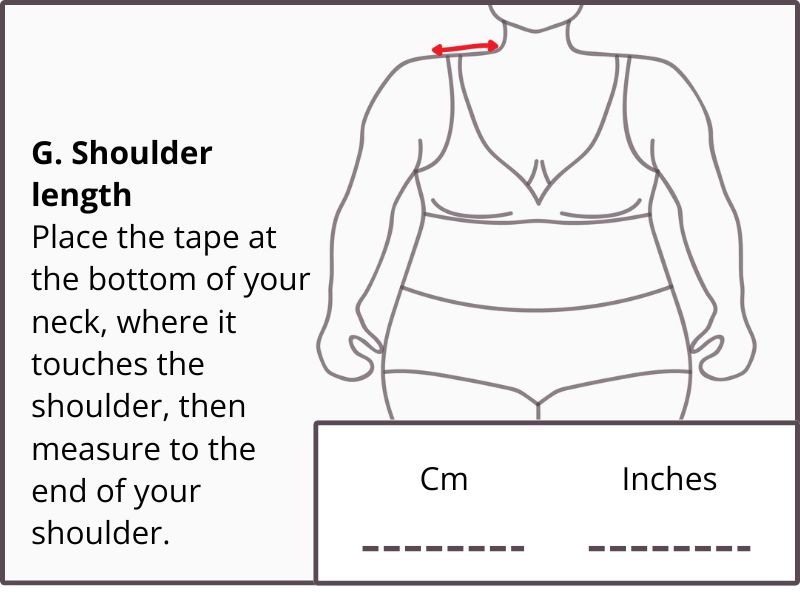
G. Shoulder length
Place the tape at the bottom of your neck, where it touches the shoulder, then measure to the end of your shoulder.
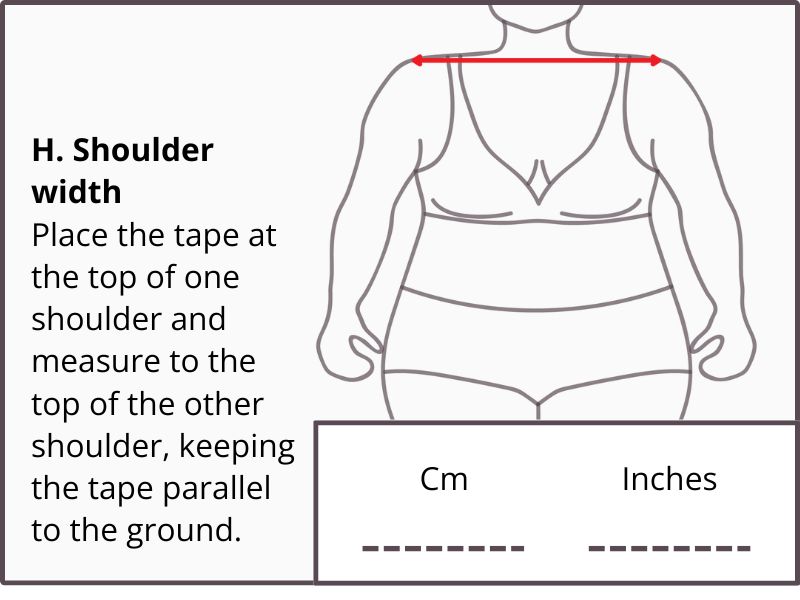
H. Shoulder width
Place the tape at the top of one shoulder and measure to the top of the other shoulder, keeping the tape parallel to the ground.
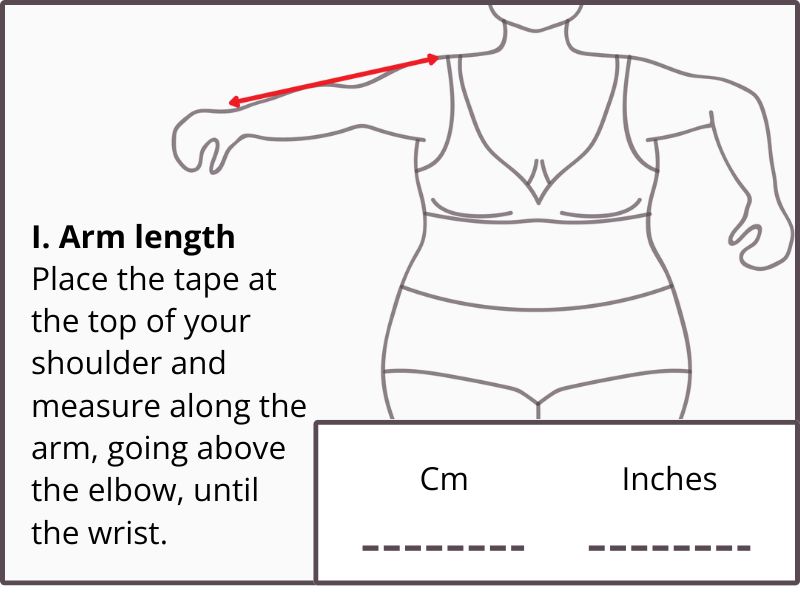
I. Arm length
Place the tape at the top of your shoulder and measure along the arm, going above the elbow, until the wrist.
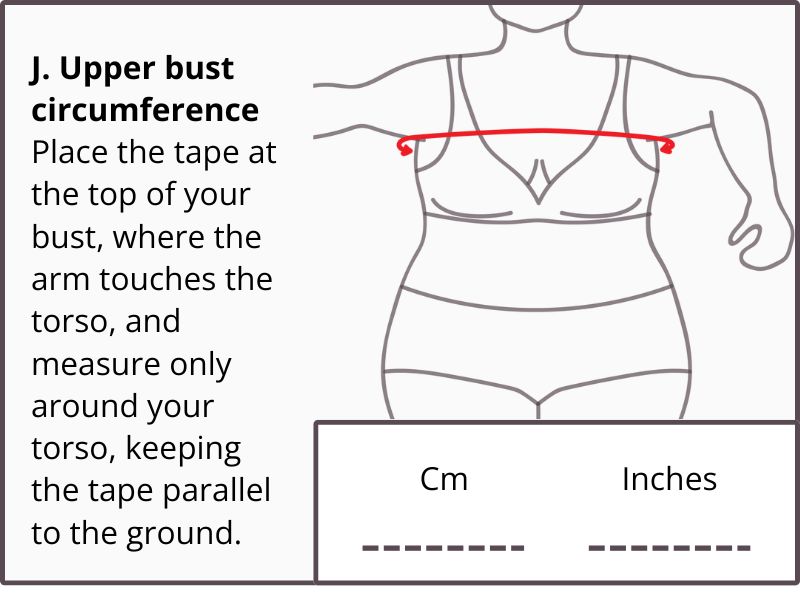
J. Upper bust circumference
Place the tape at the top of your bust, where the arm touches the torso, and measure only around your torso, keeping the tape parallel to the ground.
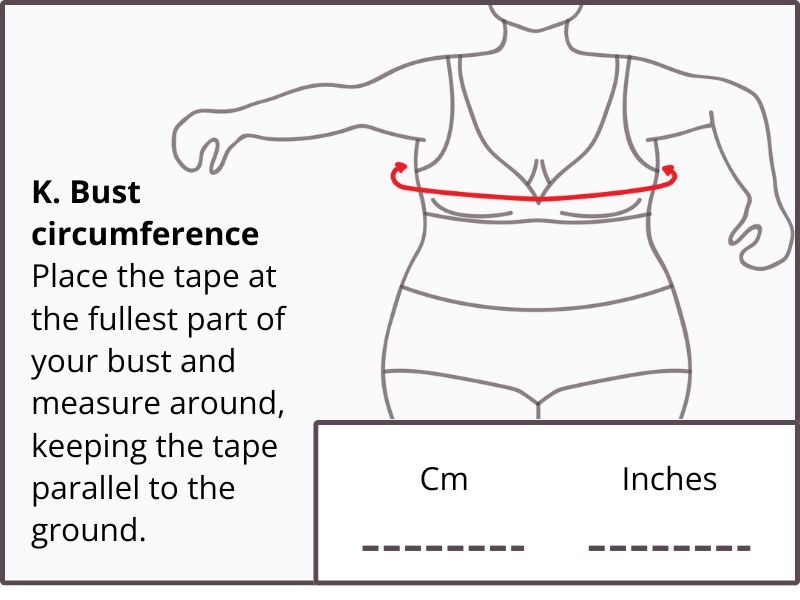
K. Bust circumference
Place the tape at the fullest part of your bust and measure around, keeping the tape parallel to the ground.
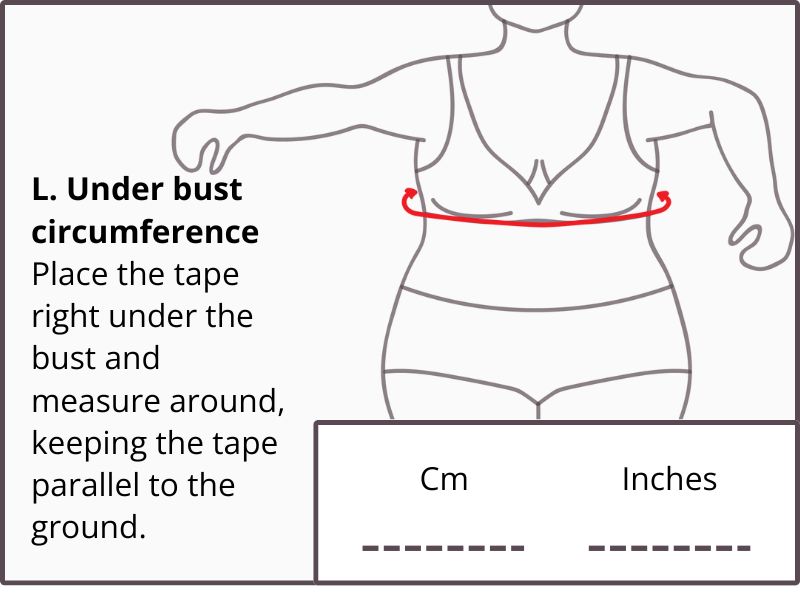
L. Under bust circumference
Place the tape right under the bust and measure around, keeping the tape parallel to the ground.
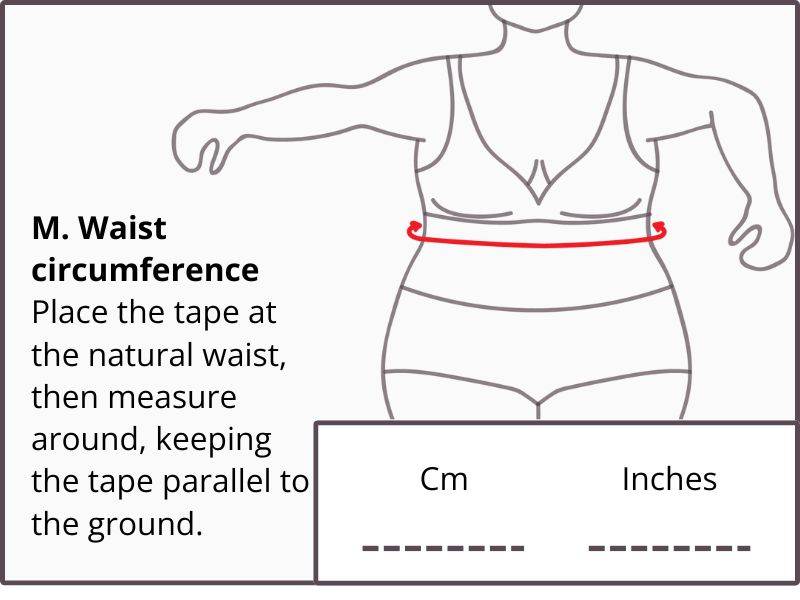
M. Waist circumference
Place the tape at the natural waist, then measure around, keeping the tape parallel to the ground.
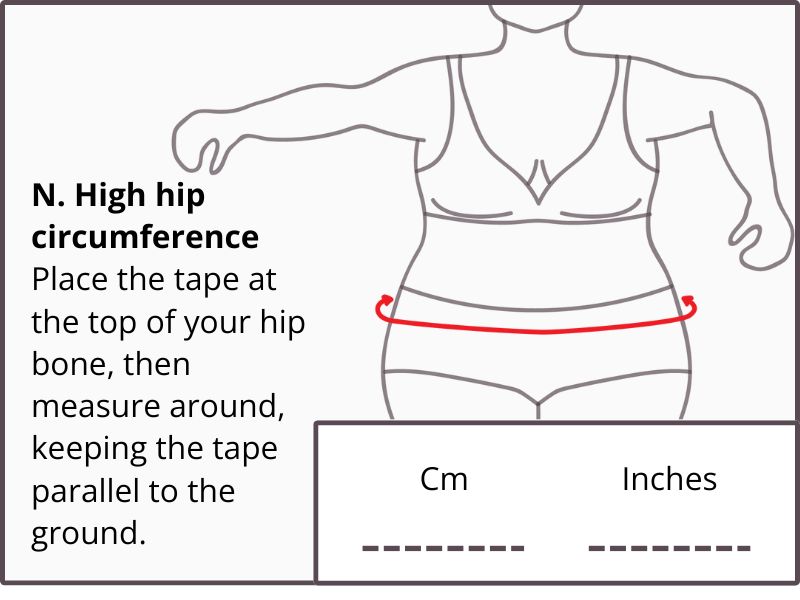
N. High hip circumference
Place the tape at the top of your hip bone, then measure around, keeping the tape parallel to the ground.
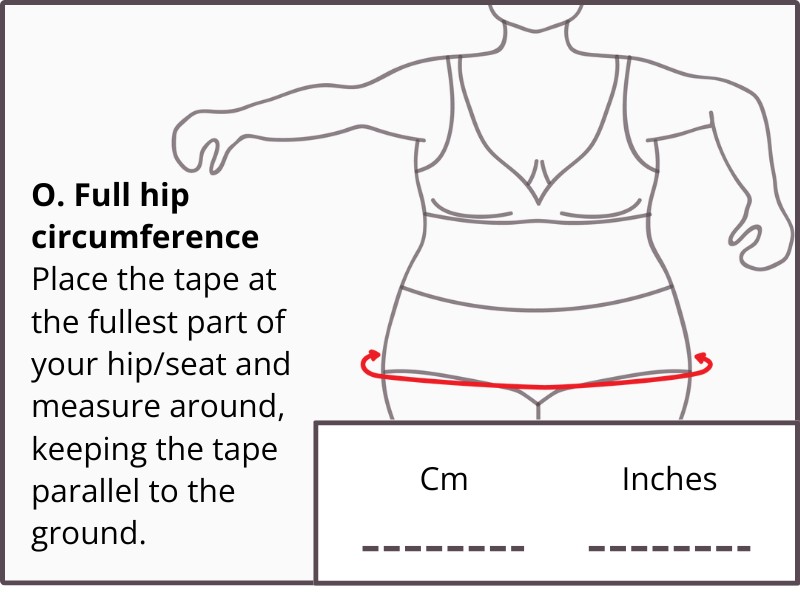
O. Full hip circumference
Place the tape at the fullest part of your hip/seat and measure around, keeping the tape parallel to the ground.
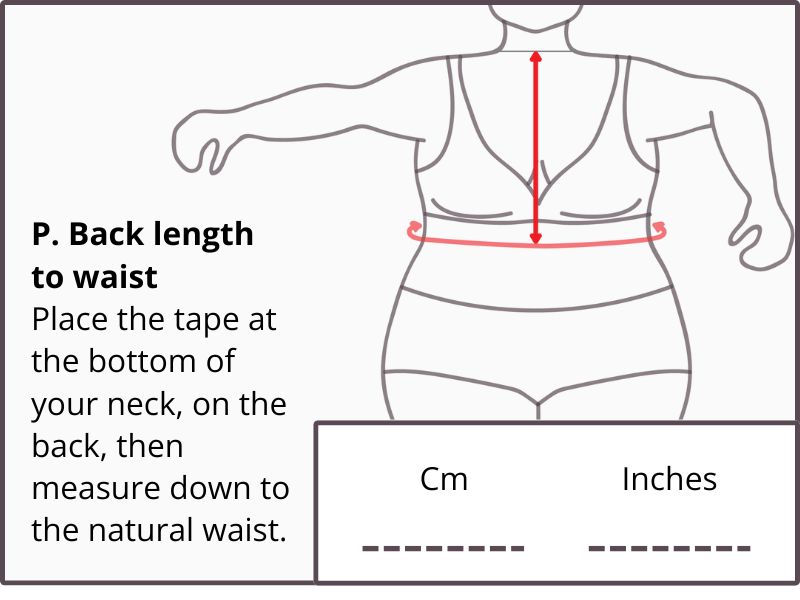
P. Back length to waist
Place the tape at the bottom of your neck, on the back, then measure down to the natural waist.
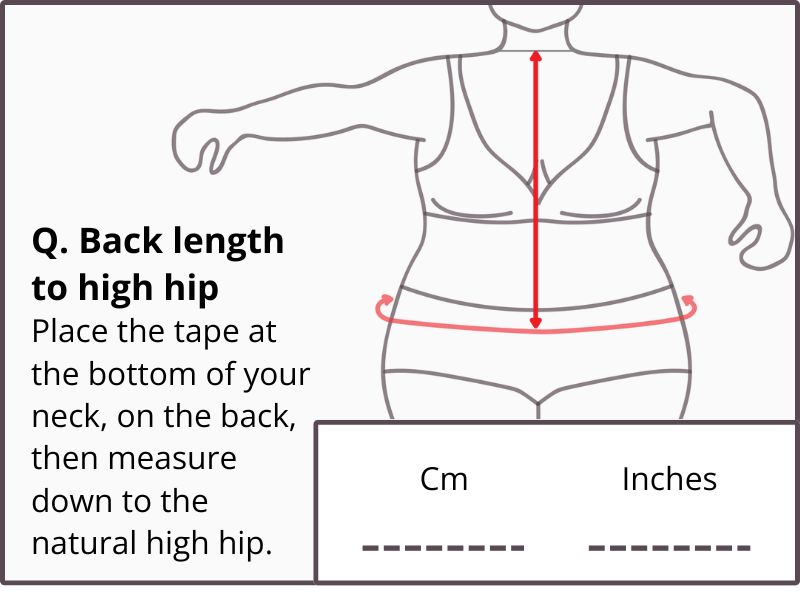
Q. Back length to high hip
Place the tape at the bottom of your neck, on the back, then measure down to the natural high hip.
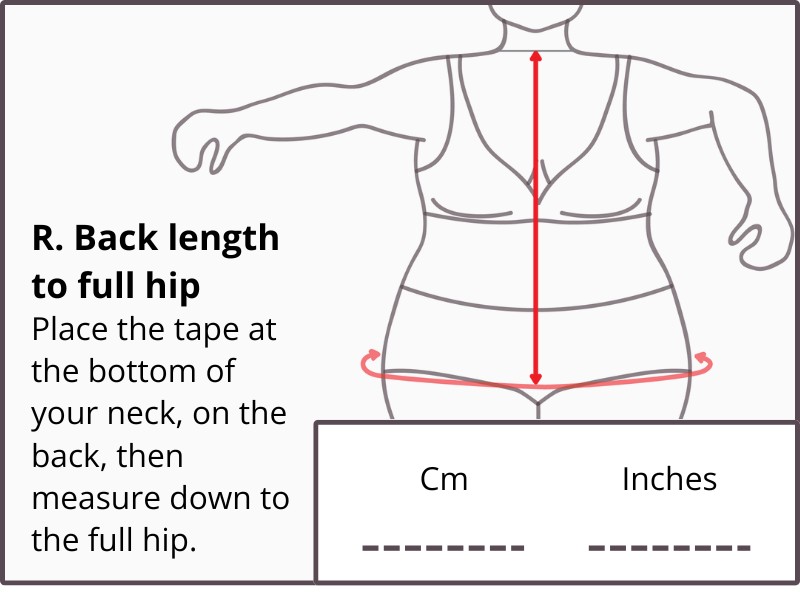
R. Back length to full hip
Place the tape at the bottom of your neck, on the back, then measure down to the full hip.
How to use these measurements
Once your card is full, you are ready to start making things that fit perfectly.
Keep in mind that these are body measurements. Patterns usually give garment measurements, so always add ease before deciding which size you choose to make for yourself.
For a sweater or pullover without an opening in the front/back/side (like a button band or zipper), always use the biggest measurement to choose a size from a pattern.
You can also sometimes choose one measurement for the body and one for the sleeves. Once you know these numbers, you can choose the best fit. This way, you can pick the armhole and sleeve shaping from one size and use it on the body of another size.
For a cardigan, dress or other item that has an opening or uses an elastic stitch pattern, you can add negative ease, so the garment will be form-fitting.
Having your vertical measurements here is crucial because you can choose the perfect spot for waist or bust shaping.
We all have different heights and different torso shapes, so knowing how far from the bust your natural waist sits will influence fit greatly.
Start making projects with your measurements
Now that you have your measurements, you can start a project.
A beginner Tunisian crochet sweater that makes use of many of these measurements is the Sporeprint sweater, which is free on the blog.
Use the filled card to choose the best size for your body and enjoy!
I’ll update this section once more patterns become available, but of course you can search the entire internet to find nice patterns where you can use these measurements, now that you know how to measure yourself.
Now, if you want to find out how exactly to modify these patterns from all around, I’ve prepared a comprehensive guide that you receive access to once you subscribe to my email updates.
You also get this guide in the same file, on the last 3 pages of the file.
If you want the content above, you can also directly subscribe to my emails and confirm your subscription and you’ll get download links for the guides.
I hope this article has been useful and will be useful to you to make perfectly fitting garments, just the way you like them.
I’ll see you soon with other useful articles.
Hugs,
Andrea

