Here’s the story of how my first pattern for a round yoke top came to life. It is a story of stubbornness and patience, lots of lessons learned and many beautiful projects.
When an idea sticks in your head and you can’t shake it, you know it’s time to make it a reality.
Sometimes an idea takes years to form and bubble up to the surface. This was the case with this cotton summer top that is an amalgamation of ideas from the past few years.
I couldn’t make it happen without all the knowledge I’d accumulated over the years regarding garments in general, measurements for garments, building circular projects in wedges, shaping. That, plus my obsession with feathers and wings, which is still very much ongoing.
All of them came together to transform into an idea that became a garment, which became a pattern, from which I and all the testers created new garments.
Contents
First sample
There’s no starting point for this. I’ve had the white to light blue to dark blue gradient yarn cake for several years now. It’s been taunting me for years.
Initially I bought it to make one of the many gradient shawls that I regularly design, but there never was a particular design that stood out from those colors (I usually let the colors of the cake guide my sketches).
Early this year (or late last year? I don’t even remember) I made a round yoke top in Tunisian crochet, with a lacy motif in the yoke, and worked in the round with a double ended hook.
I wanted to replicate that with a thinner yarn that doesn’t contain wool or other warm fibers, using the same hook size. I had previously made a top and a dress using this type of yarn in Tunisian crochet, but I only had the one cake.
For working in the round in Tunisian crochet you need two identical yarns, or two compatible ones at least, and I did not.
So I decided that I’d switch to regular crochet, as you can work in the round with just one cake in regular crochet.
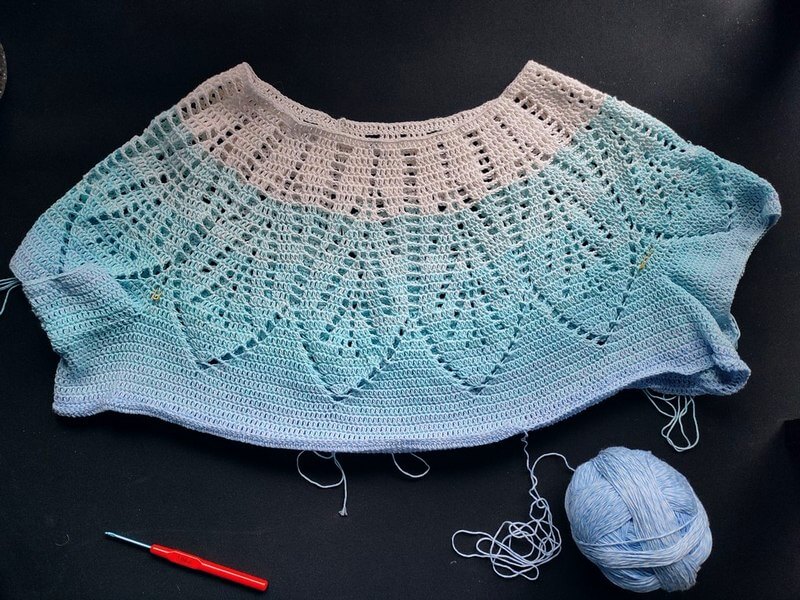
I also had a lot of experience already with designing shawls and capelets using the same type of wedge that I was using for Tunisian crochet, even if the proportions are slightly different between the two.
So nothing stopped me from drawing up a new wedge pattern with a feather motif, but this time in regular crochet, doing some preliminary calculation, and then using that to make a top.
I didn’t want to turn at the end of every row (which was a mistake) and I didn’t do any color control for the more obvious color changes.
I did color control for the sleeves, and that ended up in many, many ends to weave in, as I had to break the yarn for every color change and make a couple of rows on each sleeve.
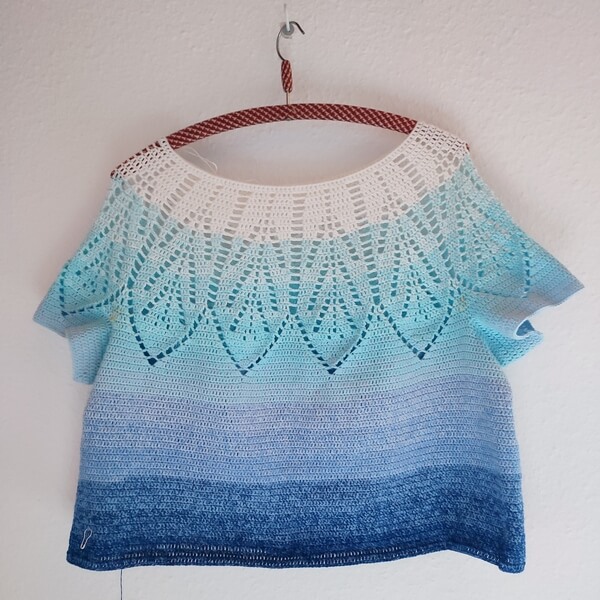
The feathers at the top ended up a little skewed and the spot where I finished every row is pretty obvious in this first sample.
I did however include the “tall stitch shaping” to a big part of the yoke, so that the front of the neckline sits a little lower than the back.
I should have done that for more rows, but at the time I didn’t know much about it, so I just experimented.
It was the first time I made a round yoke crochet item, so I couldn’t experiment with too many parts.
The resulting top fits loosely, as intended, and is extremely comfortable. The pointy tips of the feathers ended up a bit too low on my body, so I decided for the actual pattern to modify them slightly.
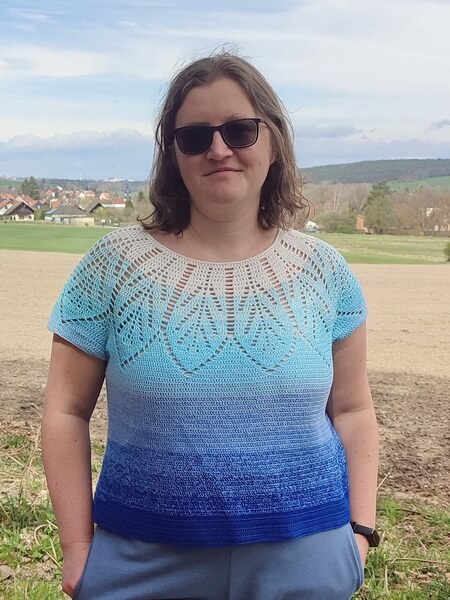
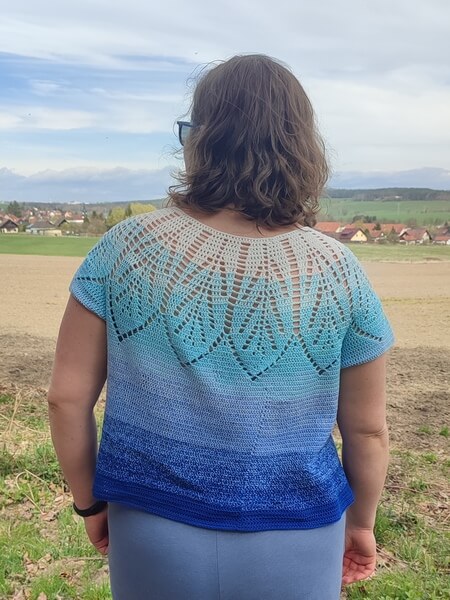
I enjoy wearing this now that it’s summer and the perfect weather for it. I foresee a lot of wear for it when biking or if I ever end up near a beach this summer, over a bathing suit. It’s so easy to wear, and just feels so good on my body.
I think it’s because the 100% cotton yarn has this great drape when you work it with uniform gauge.
Pattern writing
After the first prototype was done, I started thinking about writing up the pattern.
I know you’re supposed to make a gauge swatch, grade and write the pattern, then make the sample, but for this one that method didn’t work.
You don’t know what you don’t know before grading and writing something up, so I couldn’t have written it up without first making one.
In the future I’ll have this experience to rely on when designing round yoke sweaters and tops, but in the past I didn’t have that.
The grading was a little more complicated than I’d expected because I wanted all the sizes to start with a similar neckline size and to have different numbers of wedge repeats, to reach the desired measurements from my table of measurements, to which I obviously added some ease first.
It took me a long while to figure out how to balance the neckline being a specific size, having more or fewer wedges, and being limited to a particular number of rows over which to do all the increases.
I ended up adding narrower bits to the beginning of the wedge for the bigger sizes, to make up for the difference in fabric that is needed to reach closer to the neck.
That made writing up the pattern difficult because every 2-3 sizes you’d have a different set of starting rows.
I also wanted to include some lace patterning in these extra rows, so that the feather begins at about the same distance from the neckline for all sizes, which complicated things further.
It was a challenge, but I’ve figured out more complicated things previously, so with that knowledge of “I can do this”, I did do it.
I ended up creating 12 different charts for the 12 different sizes, which is not ideal, but I couldn’t find a way to communicate the differences for different sizes without doing that. Maybe in the future I’ll think ahead and prevent the need for 12 charts.
Having chains both in the middle and on the edges of the wedge was an extra complicating factor that I failed to take into account when drawing the first wedge design.
That’s a lesson for future patterns – leave one column of stitches somewhere to act as first stitch. Even if it’s not on the edge or in the middle, just having a continuous column of stacked stitches would make writing out the pattern so much easier.
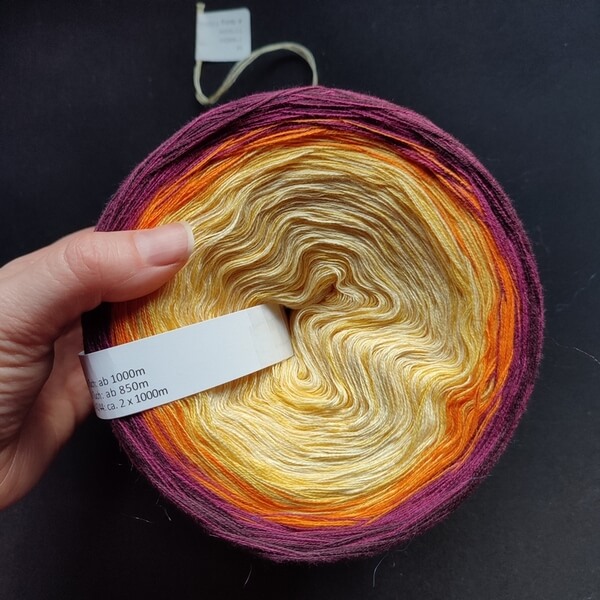
While writing out the pattern, I was also discussing with the nice folks at SparWolle about a possible kit for this pattern. They were happy to collaborate, so they prepared one cake for me to make a sample at the same time as the testers.
Testing and second sample
The yarn from SparWolle arrived a little before the testing started, so I was able to go through it from a tester’s point of view and fix most of the issues that were still there.

We started testing at the beginning of April, with a testing window of originally 8 weeks.
It was extended to 10 weeks just because of life happening, as most testers completed their projects well within the testing period (outside forces stopped some from completing and that’s entirely understandable).
I tried to find testers for all sizes, but I did not for sizes 10-12. I am still providing those sizes in the pattern and if someone is interested in trying them out in their own time, I will gift them the pattern (just write me an email).
I did also put the testing call on YarnPond, where I got a few more testers, which went great, so I recommend that platform if you’re trying to find tests to participate in. It’s mostly knitting at the moment, but hopefully more crochet designers will join.
The testing was a fun experience in the Discord chat, as usual, with beautiful snaps of WIPs and FOs here and there, and feedback that I applied as I got it, otherwise it would be forgotten.
Here are the beautiful testers in their projects, or just their projects, depending on what they’ve sent me.
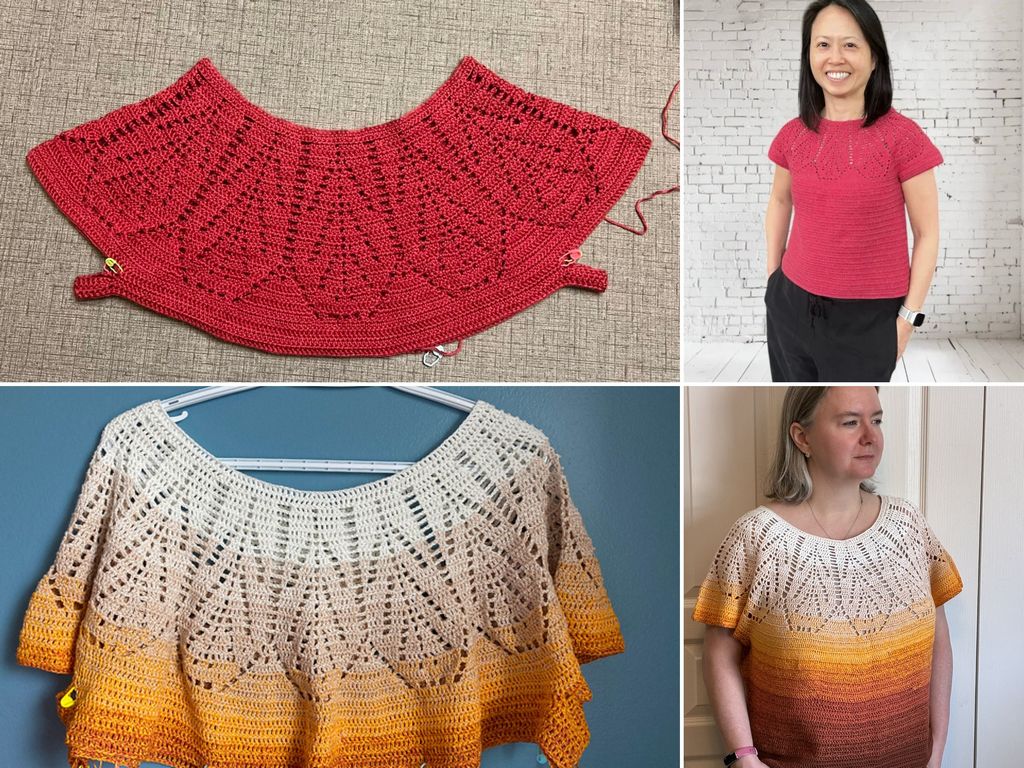
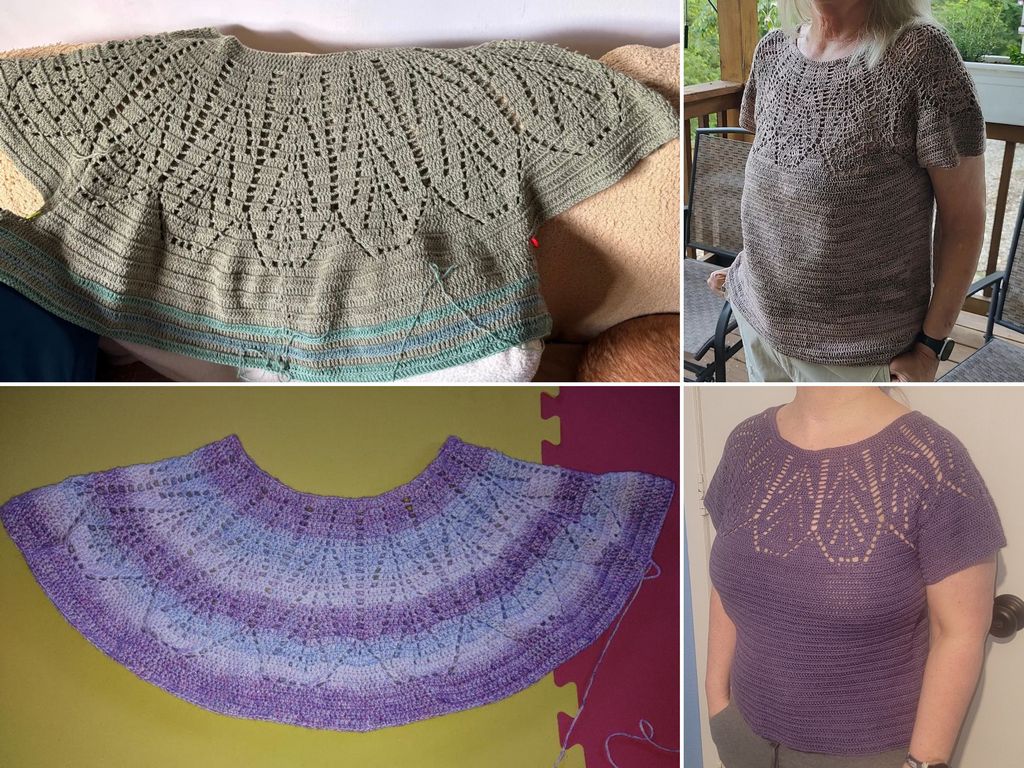
I appreciate seeing all of their lovely choices and especially how they took the customization options to make the tops fit the way they wanted them to.
Some chose to work with the pointy feathers, some with the rounded feathers, as written.
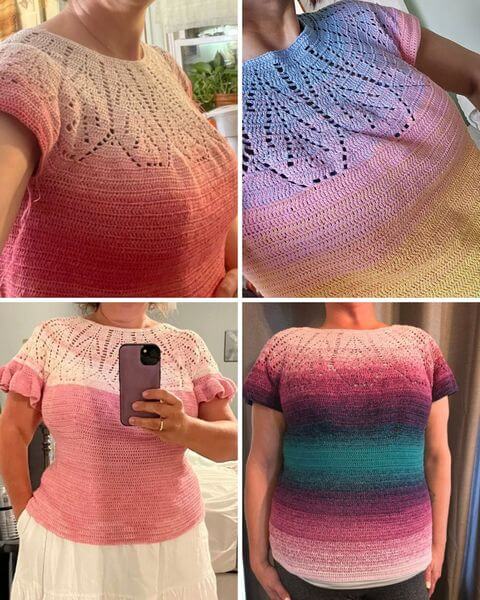

Oh, and let’s not forget the top that I made. I made a size 3, which is one size smaller than what I’d normally wear (the blue one is size 4).
Given that there’s a bit of ease built in the pattern, the smaller size also fits me well, especially since I added the vertical bust shaping at the princess seams in the front.
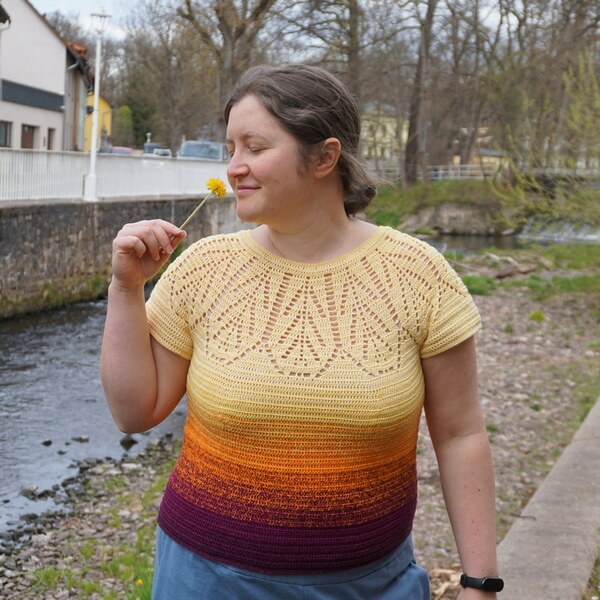
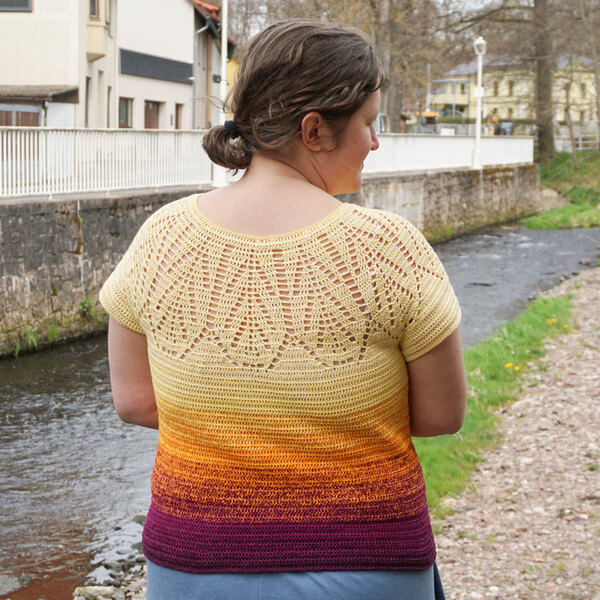
I added instructions in the pattern on how to do this, which is what some of the testers have also used.
The smaller top fits on my body, but it’s not as comfortable to wear as the one made for my size, since there is no ease at the shoulders and I have broad shoulders and thick arms.
If you’re thinking of choosing a smaller size for yours, keep that in mind. You can move stitches from the body to the sleeves or from the back to the front to accommodate different proportions and make things fit better.
For example, if you have a narrow back, but a wider front, you can move some stitches from the back to the front.
Or if you have narrow arms you can take some stitches from the sleeve and add them to the front, so you won’t need to add the bust shaping.
That sample is not for me to wear, though, as it will live in the SparWolle shop in Berlin, where people can see it and get the kits to make their own.
The yarn kits
Speaking of kits, the kits for this pattern come with a particular color distribution that you won’t find in regular gradient cakes.
Early during the grading process, I calculated the yarn use per size and found that the proportion of yarn used for the yoke vs. the rest of the project is about 40% to 60%.
This allowed the folks at SparWolle to create a custom gradient that has more of the first color (about 40%) and then the rest of the cake is a beautiful progression of colors, over the remaining 60% of the cake.
This allows the lace in the yoke to take center stage, and not be covered by color changes, and then the beauty of the gradient shines in the simple body of the top.
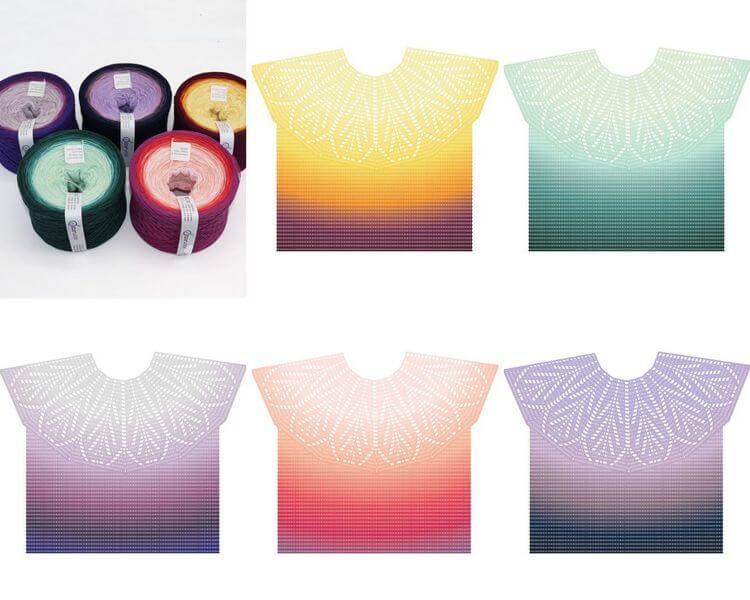
As you could see from my project, the yoke is a light, buttery yellow, and then the body progresses through oranges and pinks to a dark wine color, reminiscent of a sunset.
I also did color control when a thread of a new color came in (every 4th strand change), so the progression of the colors is smooth over the entire surface. I recommend that you also do that if you use one of the kits.
The PDF pattern
Now that’s the story of this pattern. If you want to make one or several for yourself (some of the testers are making their second just because they love it so much), check out the pattern on the platforms below.
And if you’d like to test future patterns or know when they become available, make sure to sign up to my email updates here or by clicking on the image below. You’ll also get a goodie with your first email.
I hope you enjoyed this journey through a design process from idea to finished pattern, and if you’d like to read about other similar journeys, here they are:
- Macaw wings shawl design process
- Mulberry summer top project diary
- Tunisian crochet sweater project diary
- Sempervivum shawl – project diary
Hugs,
Andrea


