In this article, we’ll explore different methods to reduce or remove curling in Tunisian crochet projects. Read on to find out which method will work for your particular project.
If you’ve been using Tunisian crochet for a while, you’ll know exactly what I mean when I say “Tunisian crochet curls“.
If you’ve ever made anything with the simple stitch or with the knit stitch, you know that the curl is part and parcel of your project. There’s no way to take it out.
Or is there?
There are multiple ways and the most obvious one of them isn’t it!
Even though everyone recommends it every time you search or ask in groups how to stop your Tunisian crochet project from curling.
Contents
Video on how to remove curling in Tunisian crochet
If you prefer video demonstrations for what I’m about to show here, please check out the video below.
Why changing the hook size doesn’t work
Whenever I see a question about reducing curling in Tunisian crochet, the first answer is always “Go up a few hook sizes!”, but it doesn’t work.
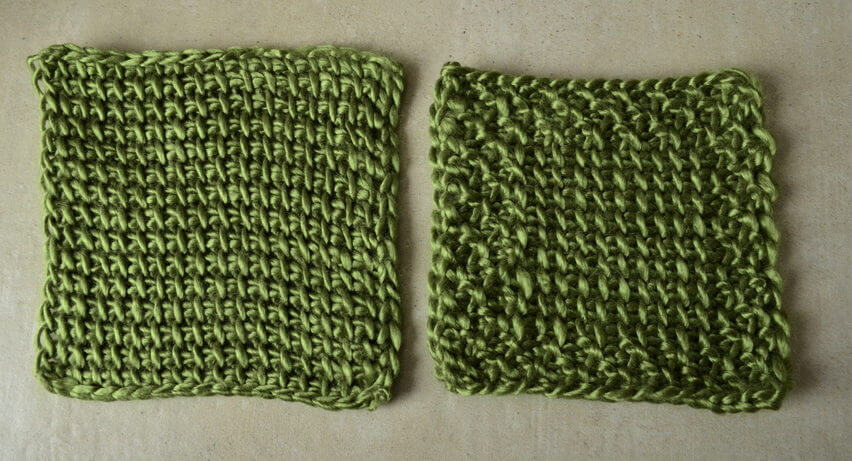
This photo should show you why. There’s a 4 mm difference between the hooks used for these two swatches. Both of them curl.
Neither of the hooks is the right one for this yarn.
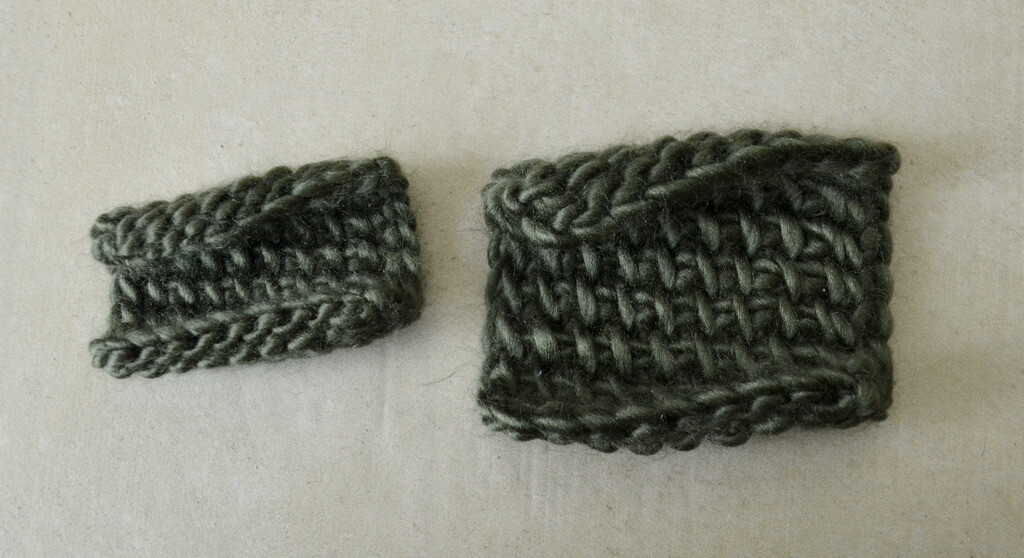
Not only will going up many hook sizes not get rid of the curl; it will also create different tension in your object and the drape of the fabric will change, and there will also appear gaping holes within and between your stitches.
Unless you intend on making lace from simple stitches, going up too many hook sizes will not fix your issue because you are not addressing the root of the curling itself.
For regular Tunisian crochet, you want the tension to be just right. The stitches need to be aligned next to each other, but not squashed into each other.
There should be no holes in the stitches and you should not be able to see more than tiny holes through the fabric when holding it up to light.
If you can see holes that are at least as large as the width of your yarn, go down a hook size.
At the same time, the fabric should not be stiff, unless you’re making a pot holder or a basket, in which case, you are looking for stiffness.
The ideal hook size for your yarn and your tension will not influence the curl of the fabric.
You need to choose the hook to match the yarn and the tension (and sometimes the stitch combination itself), not to reduce as much of the curl as you can.
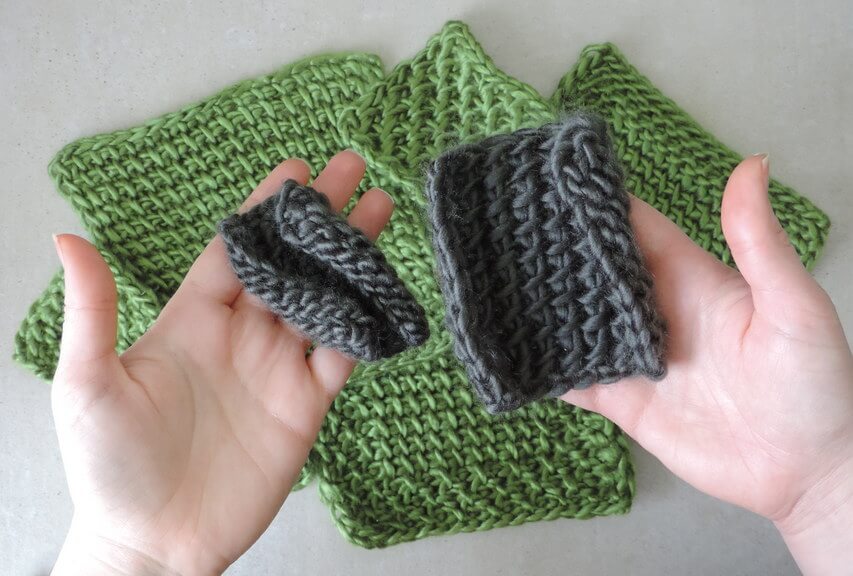
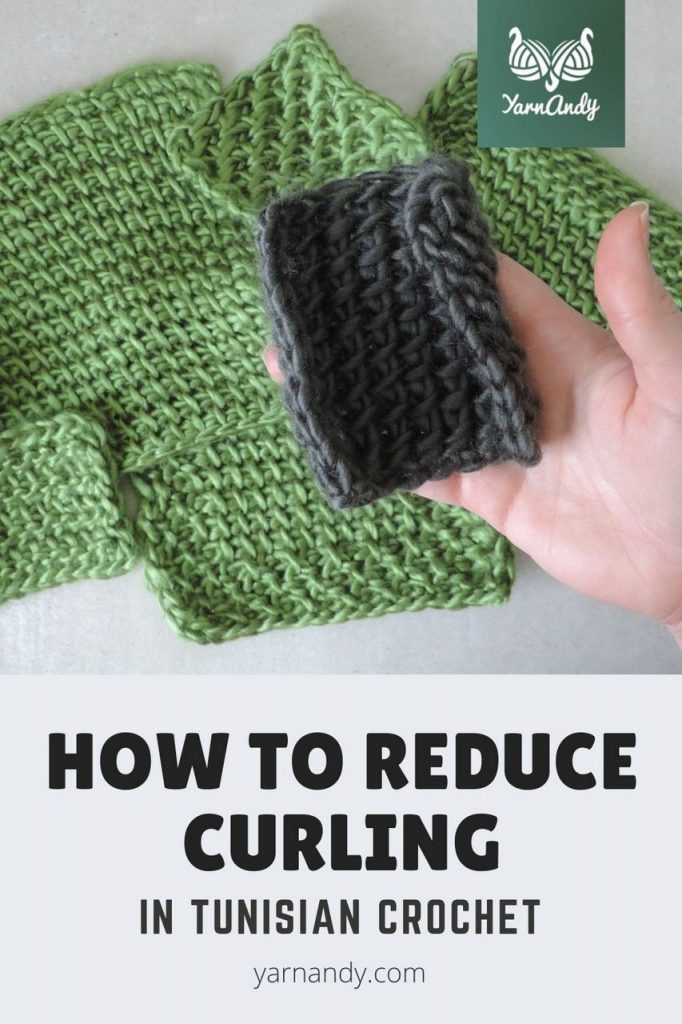
As you can see from the photo above, the two swatches I’m holding are made with wildly different hook sizes (6 mm on the left and 10 mm on the right).
Neither is the right hook for this yarn and this stitch. The 8 mm hook is the proper size for this yarn, as you can see from all the swatches in the background of the photo (we’ll get to those in a bit).
But they are both curling when left on their own!
So increasing the hook size doesn’t work. What does?
Blocking to remove curling in Tunisian crochet
Blocking is one of the easiest ways to reduce or remove curling in your project.
It’s also the second most suggested method for this. But it too has pros and cons and you can’t do it permanently for most fibers.
You can temporarily block certain fibers (wool and cellulose-based fibers, like cotton, linen, hemp, bamboo).
You can permanently block acrylic, but not other synthetic fibers. You could also destroy your project if you’re not careful. I’ll have a separate article about blocking acrylic here on the blog.
First of all, know that blocking will not completely remove the curl from your items if it’s not permanent, like steam blocking.
Steam blocking acrylic
When steam blocking acrylic, the curl will go away only when you steam the item long enough/on high enough heat.
That means that you need to be careful when blocking, so that you don’t accidentally “kill” the acrylic fibers (which means they go completely limp and flat and become much longer than originally, when spun up into a fluffy and bouncy yarn).
Steam blocking will make your acrylic Tunisian crochet projects limp and soft. It will also give them great drape.
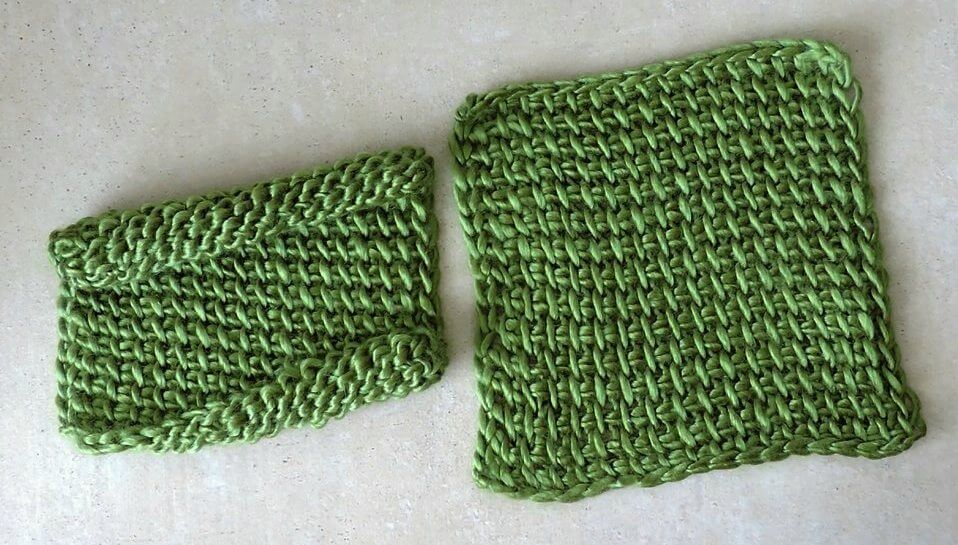
If you are not looking for drape and limpness, do not use this method.
It might also make the yarn lose its plumpness and holes might appear in your fabric, especially if the project is big and heavy and the stitches are under a lot of stress.
Blocking other types of fiber
While blocking acrylic is relatively easy and effective, blocking other fibers is not so much fun.
Wool is easy to block, but will revert to its original state over time, especially if you live in a humid environment.
To block your wool object, you need to wet it, either by submerging it in water and squeezing out the excess (this is usually done when you finish the project, with some gentle detergent/shampoo to clean out the oils from the yarn, then some clean water, both baths cold/lukewarm), or by spraying it with water, then gently placing it on the blocking surface.
Starting from the middle, you spread out the stitches into the intended final shape, all around the mid-point. Then you pin the object in place. Don’t pull too much, or you’ll end up with “lace”.
After the item is dry, it will keep its shape for a while. The curling should be mostly gone too.
But in time, as the object is exposed to humidity, the curling will slowly creep back. That’s when you give the object another bath and another blocking.
Cotton and other cellulose-based fibers can also be washed and pinned into place until dry, but they will bounce back to their shape after you release them from the blocking surface.
Unless you use some starch, of course. This might work for tablecloths and other similar objects that are not in use and will make sure that they also iron nicely.
But if you make dishcloths and other objects that are constantly in use and constantly washed, you can’t starch them.
You’ll need to pick one of the next alternatives I’ll be presenting.
Changing the stitch pattern to a non-curling one
The most obvious and least practical solution for curling is choosing a non-curling stitch pattern for your project from the beginning.
We all know that Tunisian simple stitches and Tunisian knit stitches make fabric curl.
If you’re in the swatching stage and you’re not making a graphghan (an afghan with a graph on it), this is easy to implement.
But if you’re already half-way through the project, this solution will not work for you.
Which stitch patterns don’t curl?
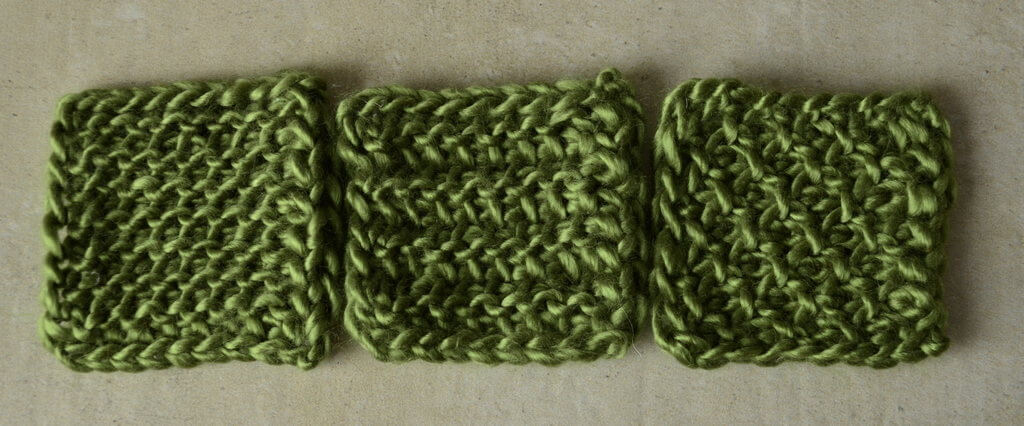
There are many stitch combinations that don’t curl and you might even invent one if you’re bored, but I’ll list some very common ones:
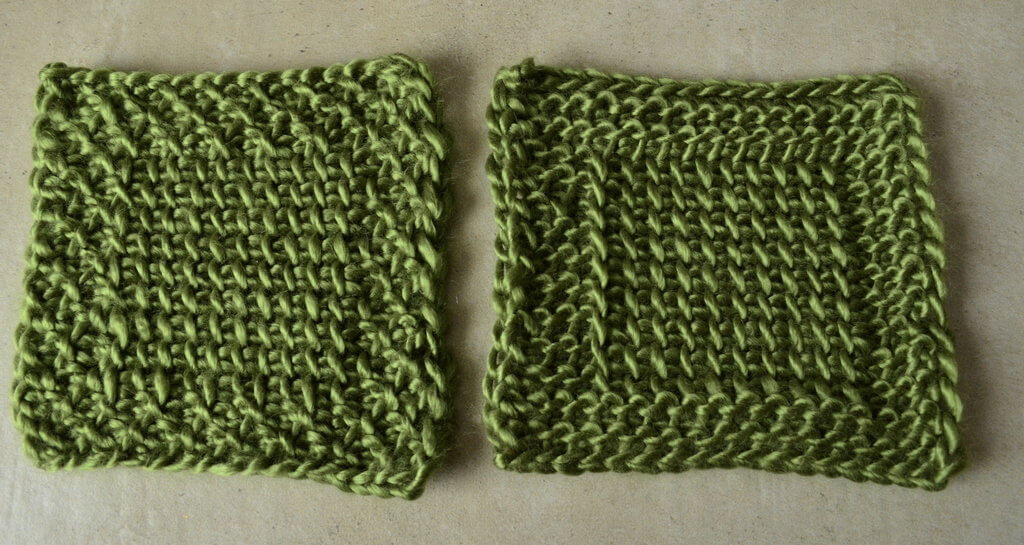
- the honeycomb stitch – a massive favorite of most people who do Tunisian crochet, the honeycomb stitch features alternating simple and purl stitches on two rows; it creates a flat, thin fabric, with a wonderful texture; I’ve used it in two patterns so far, the Limonite shawl and the Manna cowl and headband set (they come with videos if you want to learn how to make this stitch);
- vertical ribbing stitch – when simple stitches alternate with purl stitches, but they are stacked, row after row;
- horizontal ribbing – work one row of simple stitches, one row of purl stitches; this will create ridges in the work, though, so make sure you like the effect before you dive in with the big project;
- purl stitches all the way – work only purl stitches;
- reverse simple stitches – make simple stitches, but from the back;
- the Asparagus stitch – a combination between simple stitches, purl stitches and twisted knit stitches; check it out here;
- any lacy stitch with regular eyelets.
There are more, but these will get you started exploring non-curling stitch combinations.
If you know of any specific ones you’d like to add to this list for others to try out, please leave them in a comment and I’ll add them to the list.
You can use these either in rows or for squares, for entrelac or going around in a spiral.
Their strength is the textured surface, which will show off single color yarns beautifully.
Some are more advanced than others and some take more time than others, but they will all make non-curling projects and save you a headache.
Adding a non-curling border while working on the project
Now if you’re making a graphghan or any project with a specific pattern that you wouldn’t want to change, you could also try including a border around your project.
This is a common technique in knitting.
If you’ve ever been to a yarn store (I mean, who hasn’t), you’ll have seen some knit swatches pinned in random places around the shop, showing the various fabrics that certain yarns will make (why there aren’t crochet swatches beats me, maybe all yarn shop owners are knitters or something).
All these swatches feature a non-curling border, usually a garter stitch one.
This border is created at the same time as the rest of the project, like this:
- when casting on, an even number of extra stitches is cast for the two side borders;
- the project starts with a few rows of garter stitch (in our case, use one of the stitch combinations recommended above for non-curling fabrics);
- the main portion of the pattern begins with half of the extra stitches worked in the non-curling pattern at the beginning of the row, then the actual pattern follows, then the second half of extra stitches are made in the same non-curling pattern;
- when the main portion of the pattern is done, a top border is made in the non-curling pattern in the same number of rows as in the beginning;
- the project is cast off.
Just like that, you add a border to your project while working on it.
You can choose any number of stitches/rows for the border, about 10-12 will be enough for a throw, about 20 for a larger blanket.
This technique is especially recommended if you’re going to make a simple stitch graphghan, where you change colors often to create an image.
I’m not very experienced in this technique, but if you want to find out more about making blankets with color changes, you can check out this awesome group hosted by Jessica Hamric, the number one expert in Tunisian graphghans.
Adding a border after completing the project
If you’ve already finished your project and blocking is not an option, or not recommended (for example, if you have a very big blanket), this method is for you.
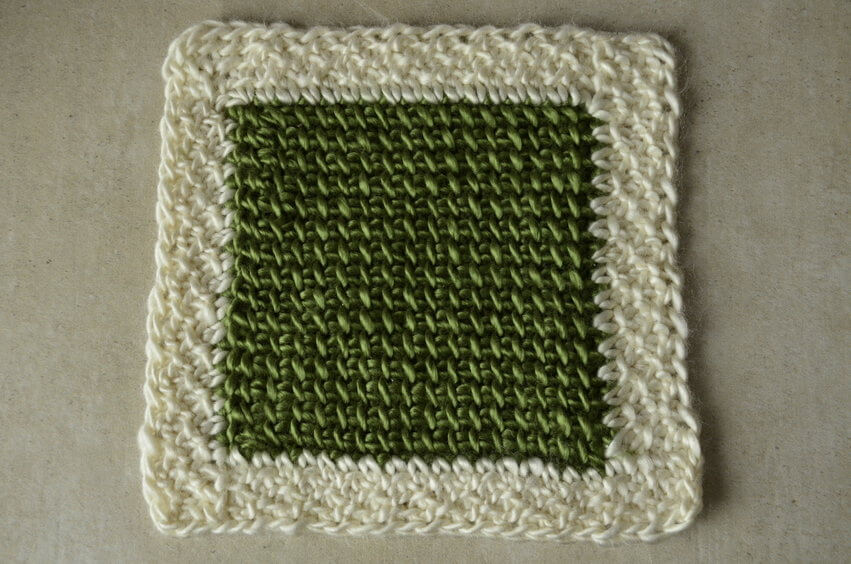
You can add a non-curling border to your project after the project is done and I have a separate article with a pattern for a honeycomb border and two methods of turning the corner, including a video demonstration.
But essentially you work short rows on all sides of the object.
You start working from one corner, going up the side, then turning the corner, going up the next side and so on, until you reach the beginning of the border and bind off, just like in the sketch below.

On the right side of the work, you need to be careful to pick up the loops properly, like in Tunisian entrelac, so you don’t end up with holes on that side.
This will be explained in more detail in the article and video about adding a border.
Wrapping up
We’ve discussed several methods to reduce or remove the curl:
- Changing hook sizes (only works if your tension is off);
- Blocking;
- Using a non-curling stitch pattern;
- Including a non-curling stitch pattern as a border in your project;
- Adding a non-curling border to the project after it’s finished.
I hope all of these methods I presented will help you to remove curling in Tunisian crochet projects that you have (and left in a pile unfinished because of the damned curl) or that you plan to make.
I personally prefer making the item in a non-curling pattern or adding a border after the project is finished.
What’s your favorite method?
Do you know any other method for removing curling in Tunisian crochet? If you tell me about it, I’ll add it to the list above. Maybe adding Tunisian crochet ribbing along the bottom of the project might be one.
If you want to know when I publish more articles like this and Tunisian crochet patterns, among other crochet patterns, sign up below and I’ll let you know.
Hugs,
Andrea


This is exactly what I have been finding out, hook size does not matter in regards of curling. Properly tensioning and drawing the loops tall enough on the forward pass does however help (does not stop it completely though), the loops should sit loosely on the hook and move easily (almost as to be able to put in an extra half size hook in the loops as well as the working one).
It’s tricky to find the right tension for you and the yarn in combination.
Hm, I’ve not found that good tension affects curling, although I do always recommend that people work Tunisian loosely so the loops can move easily along the hook. Maybe some people crochet very tightly even with the correct hook size and that might make the fabric curl more.
I have found that some types of yarn do curl less. For example, I’m working with a high twist cotton with a bit of polyamide and polyester in it, which is intended for socks, but it has almost no curl and is quite limp even before blocking. So maybe I should add that to the list.
I have been crocheting for years, but new to tunisian. I have been practicing varies tunisian stiches in small squares. I so appreciate the information you have shared and look forward to visiting this site more frequently. Thank you.
Thank you for the feedback, Bernadette! I appreciate it and look forward to seeing you around!
If you want to know when I publish the next blog post or to try out patterns before their release, you can subscribe to my emails and apply to test, I send out testing calls to my email subscribers.
Hugs,
Andrea