In this article, we explore various size inclusive body measurements from around the world and compile a starting set of measurements that will be the basis of my future designs.
If you are interested in garment design or if you want to crochet sweaters for your own body shape, use the resources in this article to expand your knowledge about crochet garments.
In this article I discuss measurements relating to sweaters or pullovers, not cardigans, since there is a lot more to discuss in terms of what you can do to fit cardigans.
You can treat this article as a resource for grading your patterns as a crochet or knitting designer, or as a learning tool, to understand how I grade my own crochet and Tunisian crochet patterns and how to measure yourself to find the best fit.
You will also notice that I structured this article pretty much like a scientific paper, with an abstract, introduction, methods, results and discussion, conclusions. This is a nod to my former life as a researcher. Let’s get into it.
Contents
About this article on size inclusive body measurements
I don’t know about you, but I enjoy making clothes that fit.
I especially like to play with yarn and make interesting shapes and textures that can’t be found anywhere else.
I have a hunch that many crocheters and knitters get the same kind of pleasure from making interesting things for themselves.
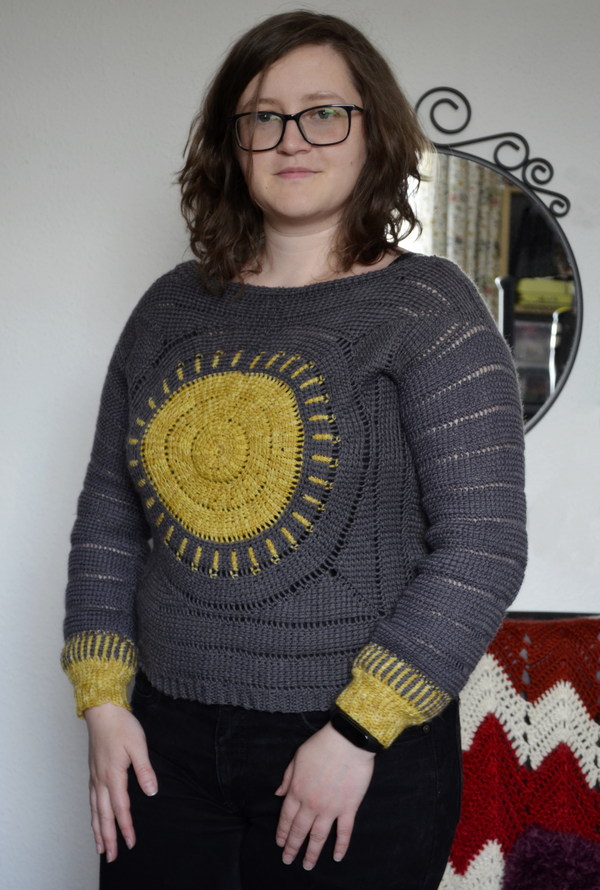
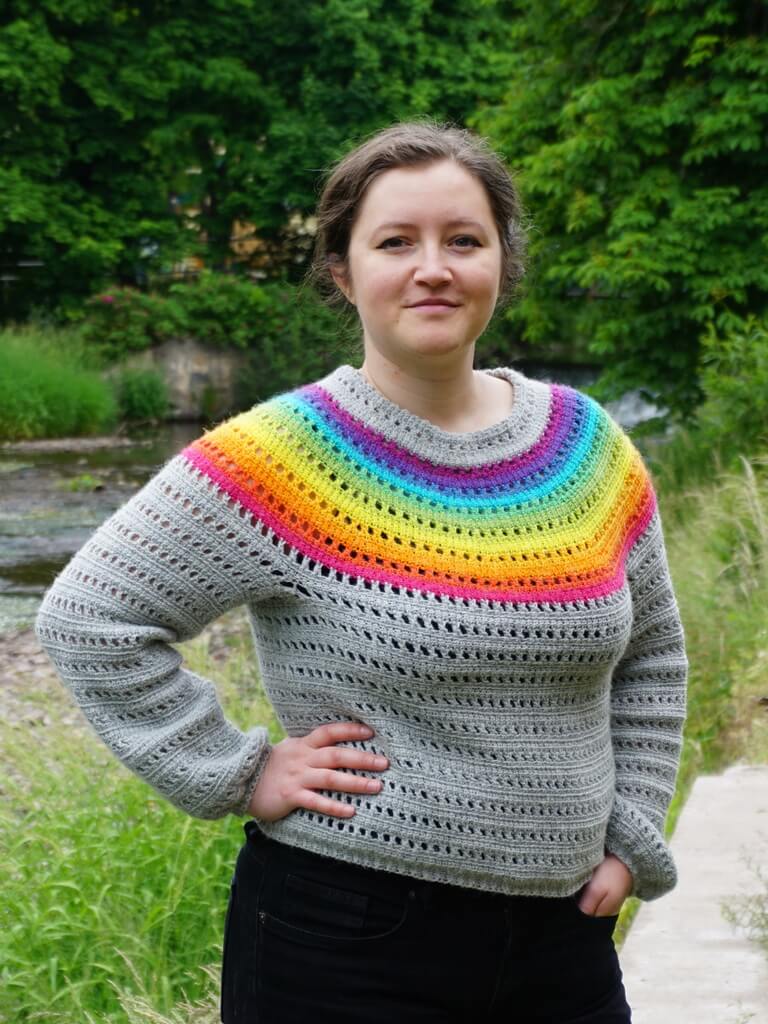
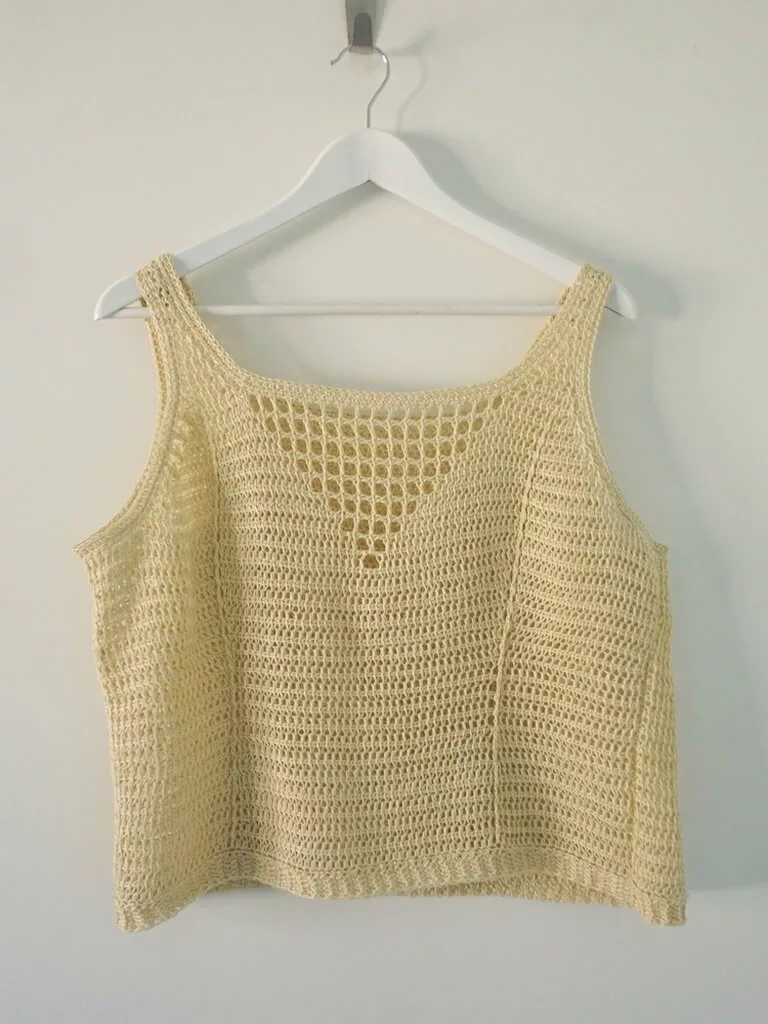
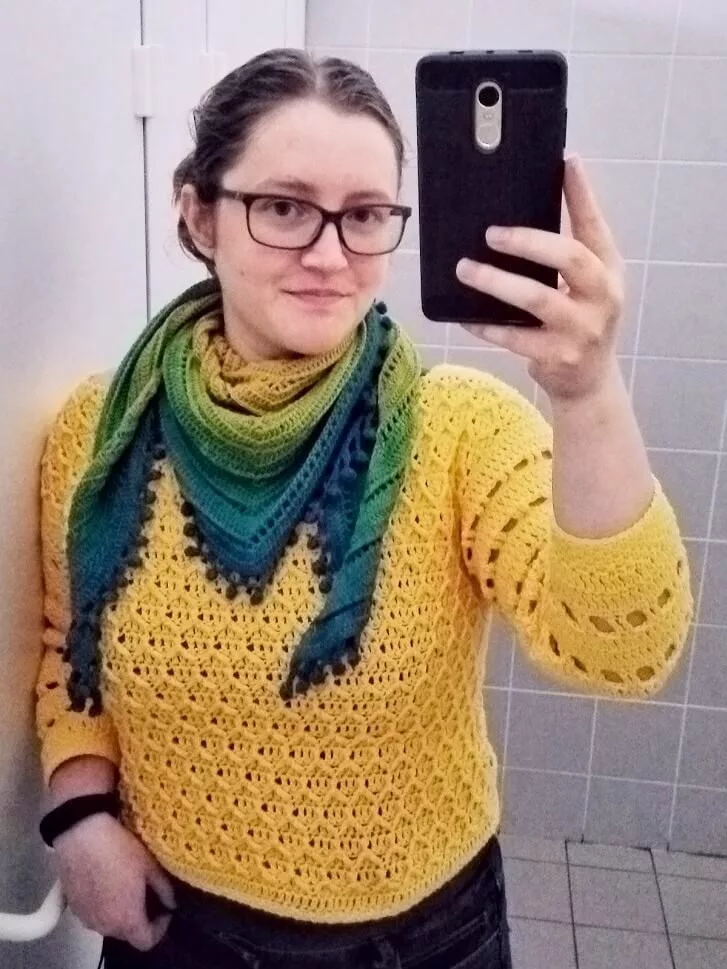
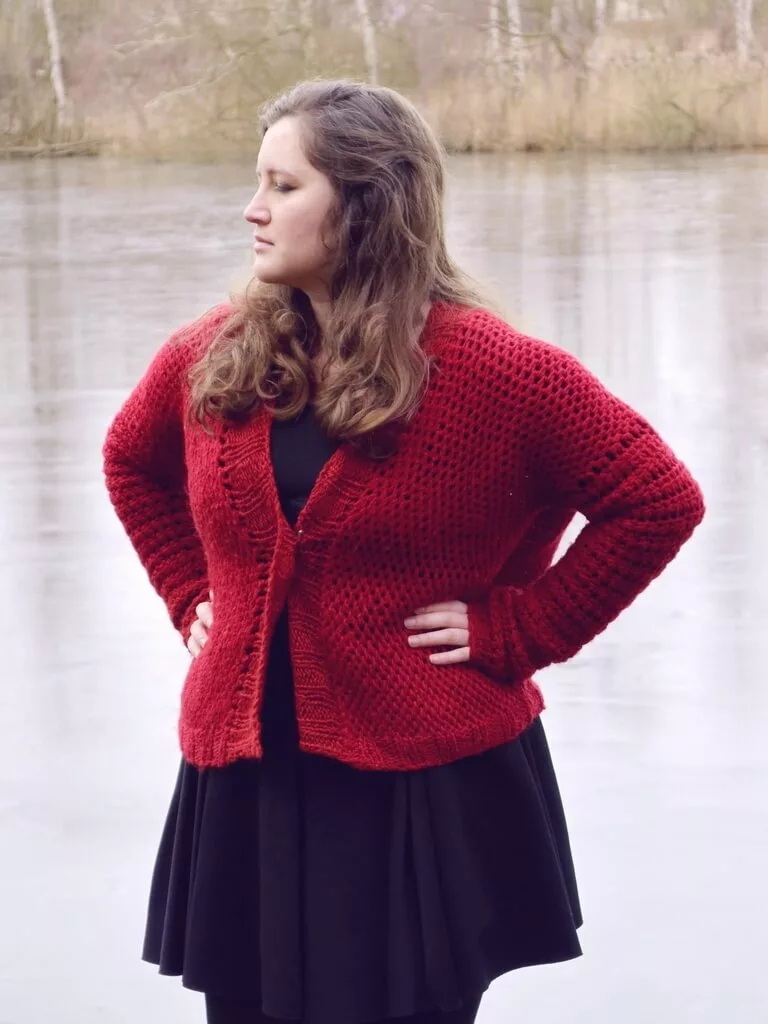
The issue arises from the lack of size and shape inclusivity in most patterns. There are designers who design for larger sizes, don’t get me wrong, but most of them don’t.
Why is that? Is it laziness? Not caring about people with a bust size over 110 cm? Inertia? Or not having measurements to go off of when grading to larger sizes?
I think it’s a combination of all these (minus laziness, I don’t believe in laziness).
But surely there are measurements out there, otherwise the designers who do design for larger sizes wouldn’t be able to work, right?
Well, there are some numbers, many of them made up, as you’ll see soon. I don’t mean “made up” in a bad way, it’s just the way you have to work if you must design for larger sizes.
There are no standards (that I could find) regarding necessary measurements for garment design for large sizes and I mean for the whole industry.
There is one standard that goes up to size 20 (whatever that may mean, possibly 120 cm bust), but that’s not enough. It costs 57 USD as well, so no, thanks.
We’d need a huge study done over a diverse population from around the world, where all the participants measure themselves in various parts of the body and then someone has to process all this data and to offer some mean measurements and some standard deviations.
This would help designers immensely to create patterns for items that fit without a lot of adjustments.
If you want to participate in such a study, I’ve set it up and you can take it here.
All the data is anonymous and all you need is a measuring tape and a helper for some of the back measurements that are not as easy to do.
Since I want to start grading my garment patterns that I’ve been designing for years, but haven’t yet graded, I had to see what was out there.
Methods
I looked at size-inclusive patterns from designers I knew about beforehand because I’d heard them talking about this matter.
I also searched and found a few more popular patterns that have a public schematic with measurements and extracted data from those.
Some of the sources offer finished garment measurement and some offer body measurements. I’ll list and link them all and mention which is which.
Garment measurements vary based on the shape of the garment and intended ease, so I used them more for illustration purposes than anything else.
I created tables of all the different measurements from 12 sources and then I started drawing some shapes. Having the data in text form doesn’t communicate much in terms of how shapes change with the measurements.
I used a vector illustration software to create models of garments for one data set and then I used the measurements from another data set to create a set of pattern pieces, using the freesewing.org software.
I printed and cut out pattern pieces from this second set to see what the shapes look like in 3D. Then I created a more close-fitting set of models, by modifying each shape to get it closer to the measurements in the data set.
After all this, I also generated some line and point graphs for some of the measurements, to show how they change from one size to another and one designer to another.
Then I used all this data and knowledge to compile a list of measurements that I will be using from now on to grade patterns.
Data sources
In the following paragraphs I will mention each source, in the same order that you will see them on the graphs (see bold text).
You can check all the source data out and see it for yourself (I linked everything).
Some of these will be Ravelry links. If you have issues with Ravelry, here’s my fix that works on desktop.
- Aklori Designs – Skellig Pullover with crew neck. Garment measurements, 10 sizes.
- Jacqueline Cieslak – Osprey pullover. Garment measurements, 9 sizes.
- Craft Yarn Council (CYC) – Woman sizes. Body measurements, 9 sizes.
- Jamie Hoffman – Milkweed DK pullover. Garment measurements, 19 sizes.
- Victoria Marchant – Roseability jumper. Garment measurements, 12 sizes.
- Lydia Morrow – Partner Pullover pack. Garment measurements, 11 sizes.
- Natalie in Stitches – Alyssum sweater. Garment measurements, 6 sizes.
- Sister Mountain – Women’s size chart. Body measurements, 9 sizes.
- Tanis Lavallee – Metropolis sweater. Garment measurements, 11 sizes.
- Tincanknits (TCK) – Flax sweater. Garment measurements, 12 sizes.
- Jill Wolcott Knits – Sizing tables. Body measurements, 12 sizes.
- Ysolda – Ysolda sizing chart. Body measurements. 16 sizes.
One of these sources is paid (Wolcott) and the rest are free, so you can do your own math if you want to.
I later found this great resource as well that is no longer available live, you just need to subscribe to Kim’s emails to get access to her own chart of measurements. You’ll notice that it’s not that different from what I ended up with…
Results
Let’s start with the drawings, then I’ll present the graphs.
First set of models
To understand how a sweater changes in shape as the measurements increase, I drew all the sizes in one of these sets.
I chose the Marchant data set because Victoria is a well-known advocate for size and shape inclusivity.
The design is also pretty straightforward, a drop-shoulder sweater with measurements for important parts of the pattern.
I am not sure if the shoulders are correct in my drawings, since there is no shoulder length measurement, so I assumed they move out with the chest size.
I made a gif animation of all the sizes or you can look at each drawing individually if you click on the gallery below.
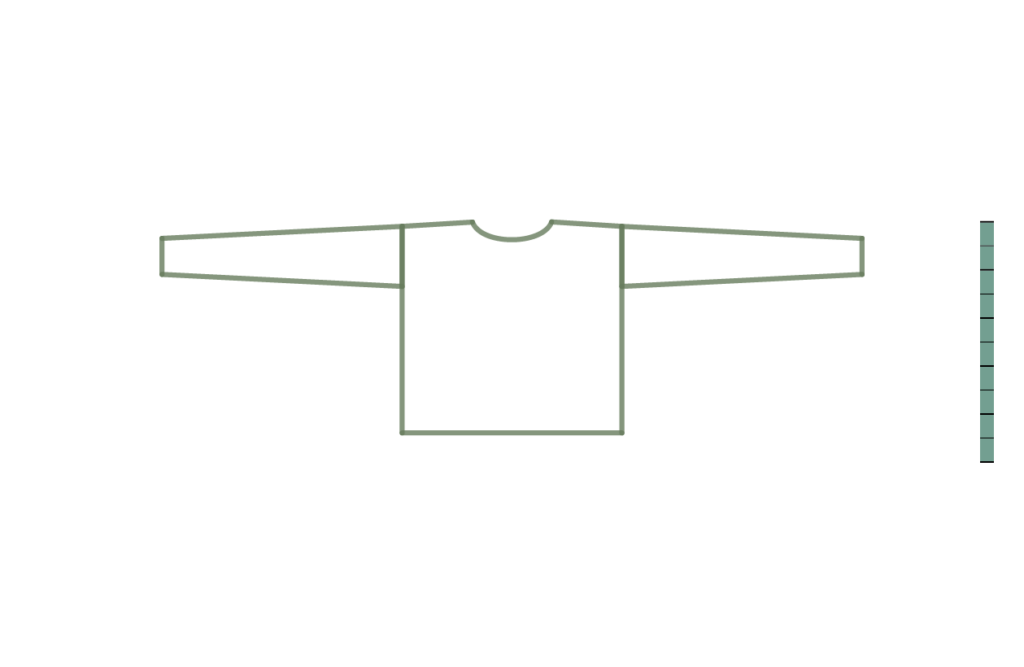
The teal rectangle on the side is a 50 cm ruler with divisions every 5 or 10 cm.
I didn’t write the sizes on the slides, sorry for that. I put the sizes in the caption of each image.
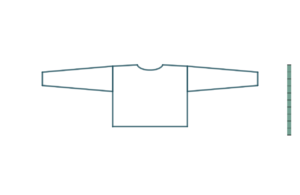
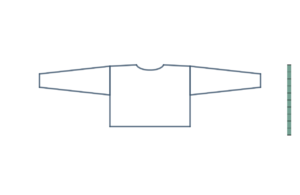
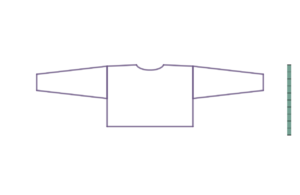
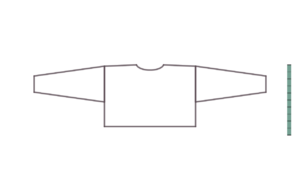
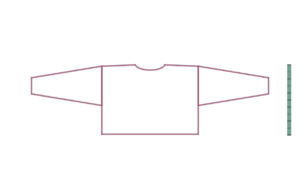
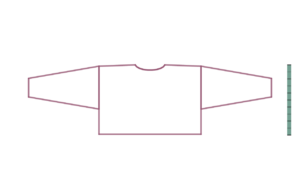
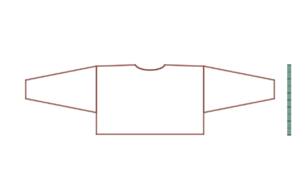
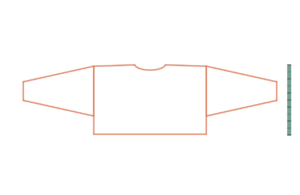
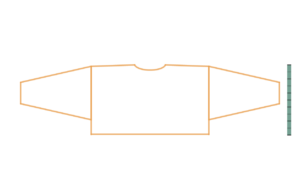
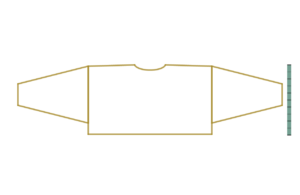
As you can see from these drawings, the wrist moves out a lot as the sizes increase and that means you need to do a lot of pattern adjusting to get your desired sleeve length.
It also means that the sleeves start halfway down your arm and you either get a lot of bunching at the underarm or you can’t lift your arms without lifting the entire sweater.
That’s less than ideal in my opinion, so I would not use this kind of construction. Rather, I’d like the sleeves to start closer to the shoulder.
Please keep in mind that this is not a critique of Victoria or her pattern, as I didn’t buy the pattern and knit the sweater to see the actual fabric. This is only a discussion about numbers and shapes.
Second set of models
So I chose another set of measurements, the Wolcott, and used the free pattern design software from freesewing.org to generate pattern pieces for sweaters with a set-in sleeve, which offers a better fit around the arm.
I input each set of measurements to create a “person” in the app and then used the Sven design to generate a pattern for each person.
These are the results, same as before, an animation and a gallery that you can go through at your leisure. Click on the image below to open the animation in a new tab.
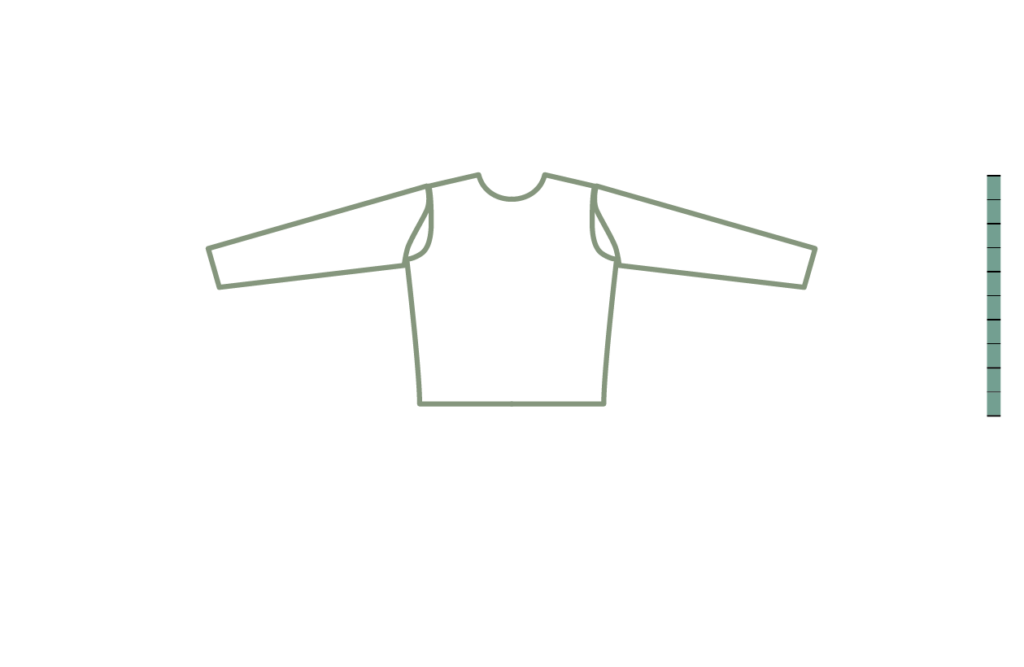
Here’s the gallery. All of these include ease.
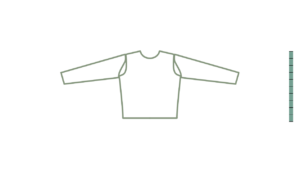
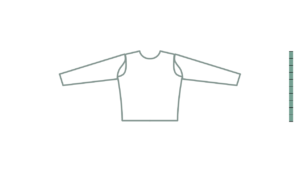
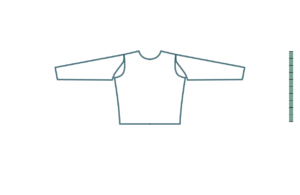
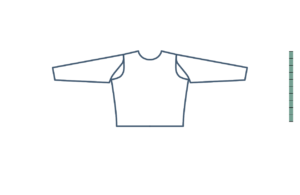
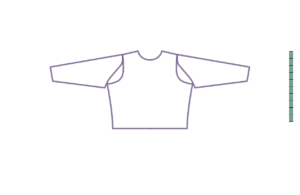
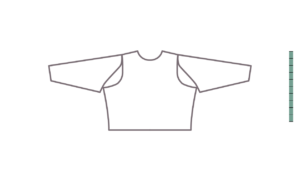
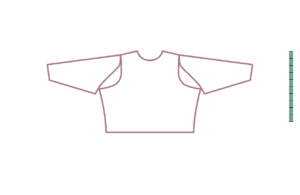
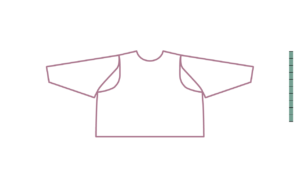
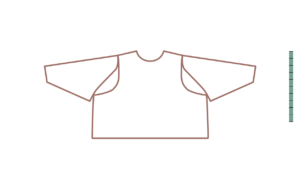
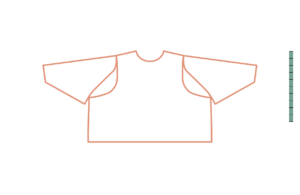
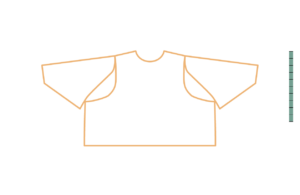
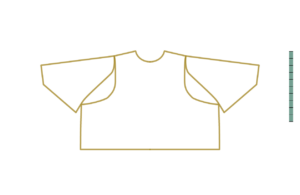
Notice how the armscye increases a lot as you go towards larger sizes.
This might be due to a formula in the design or something of that nature, since their “sample” sizes only go up to 130 cm in the bust measurement.
You can see the sleeve has a huge sleeve cap and is very short, which is not what I was going for.
Sewing samples from the second set of models
I used the second set of shapes to sew some tiny sweaters, to see how these shapes would turn out in actual fabric.
First I made two sweaters using sizes 6 and 12 at a 1:6 scale.
Here’s what they look like. Size 6 looks like a sweater, but 12 doesn’t really look wearable, with the armscye so low.
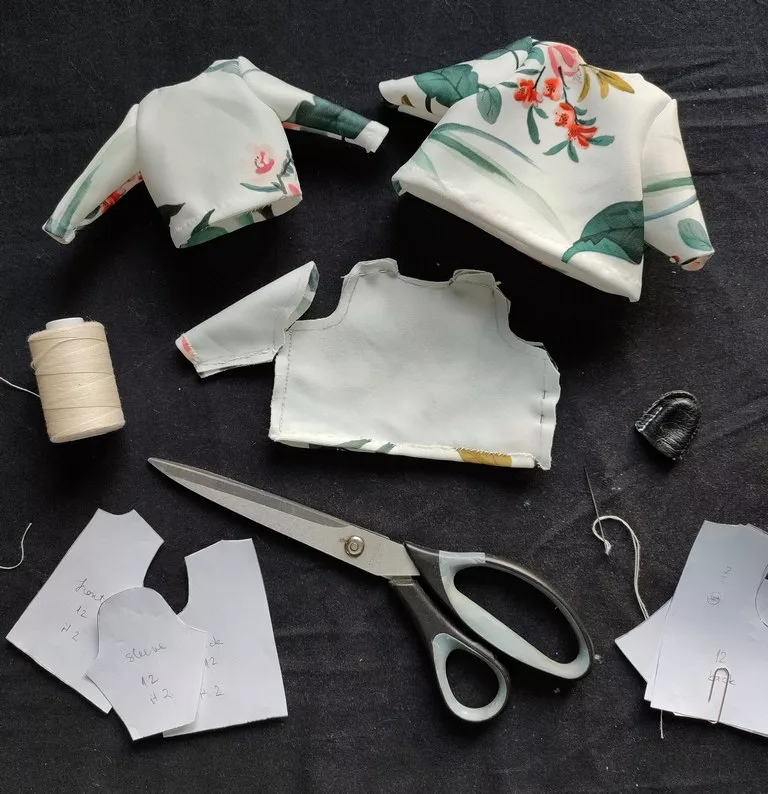
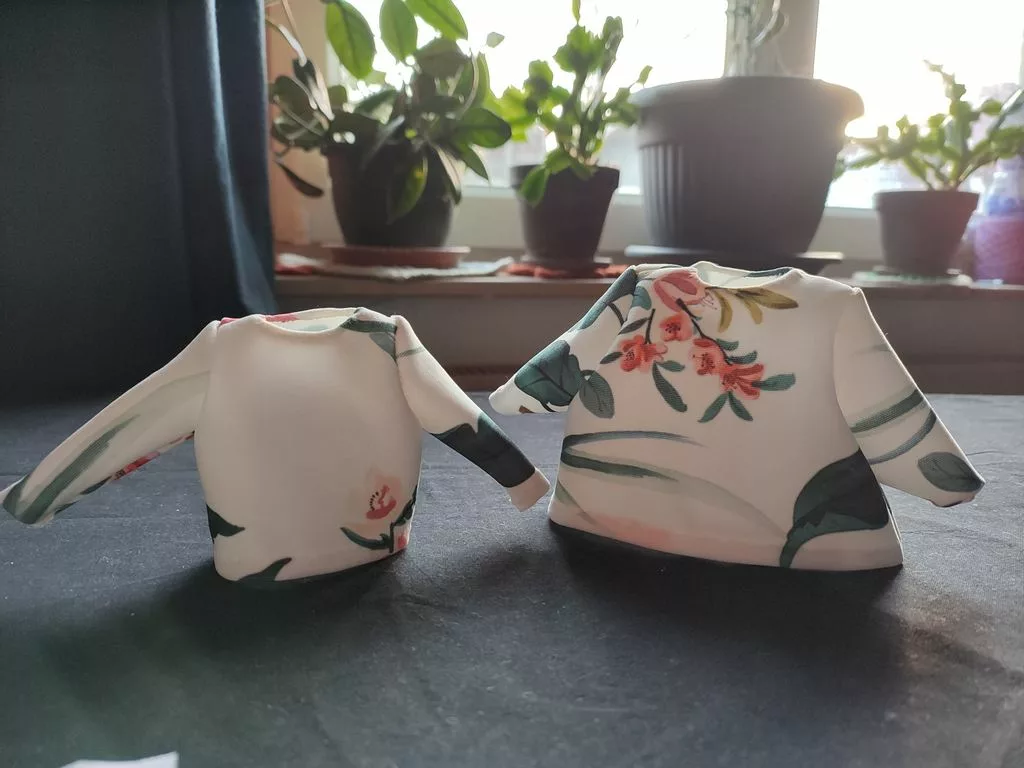
I measured the theoretical bicep circumference from the sleeves of the second set of models (ignoring ease) and got measurements that were way too large.
So I edited size 12 to get a more realistic shape of the sleeves (and made a mistake, but I only found out later) and got a new mini sweater in size 12.
See the difference below.
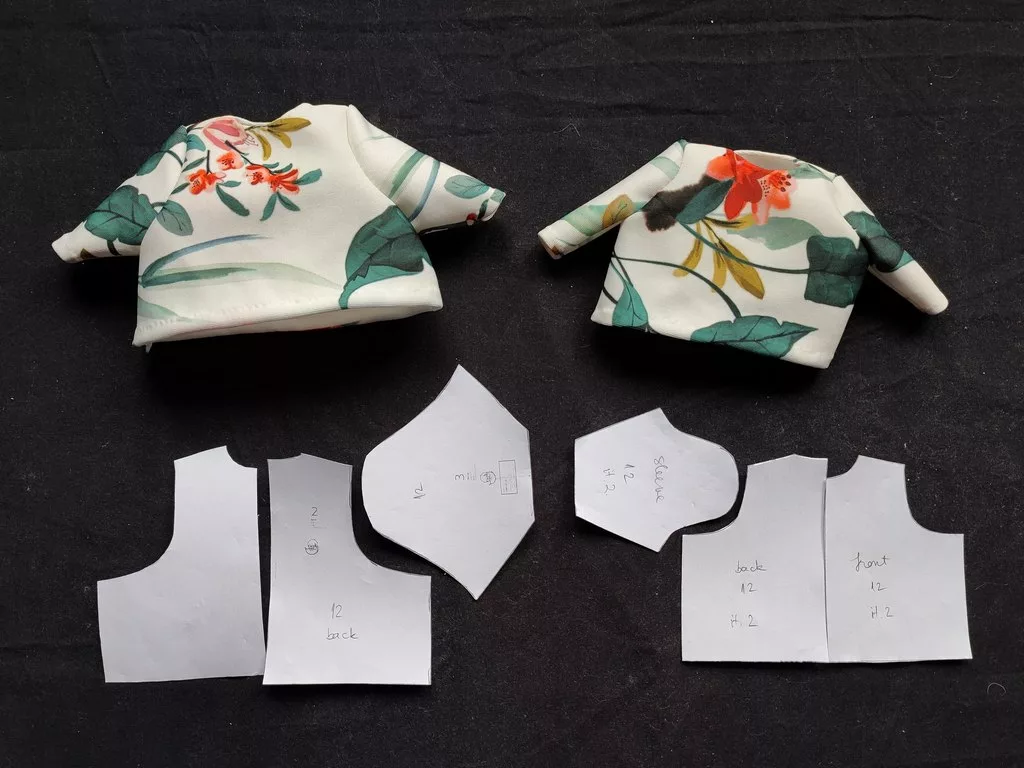
The sleeve on the modified pattern is narrower than the measurements.
Third set of models
The next step was to take all the shapes in the second set and redraw the sleeves and armscyes, but also the waist and hip, to get closer to the Wolcott measurements.
This resulted in a new set of drawings, but this time with a more realistic shape. Click on the image below to open the animation in a new tab.
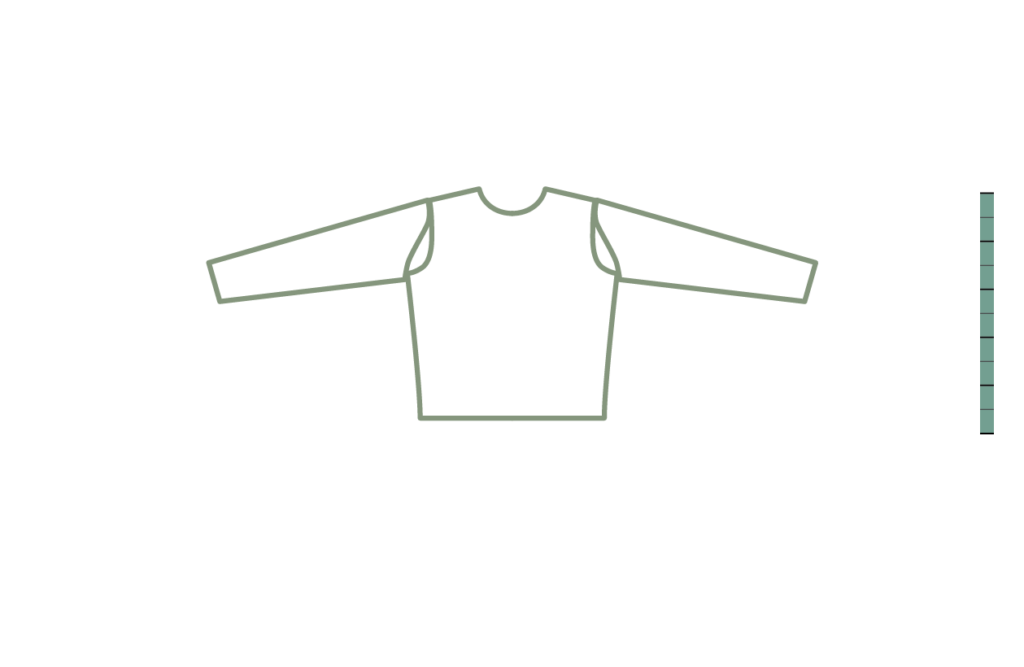
As you can see, the sleeves grow with the body of the garment.
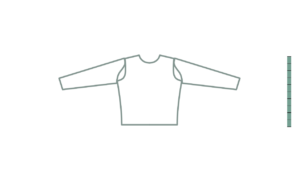
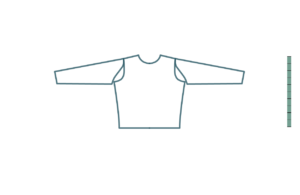
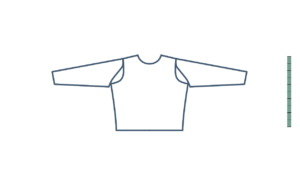
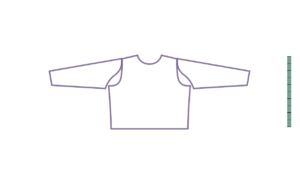
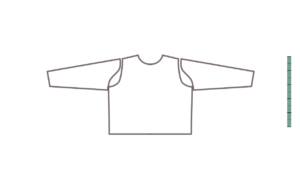
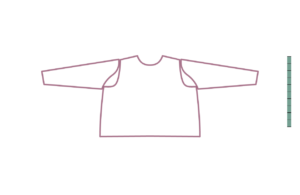
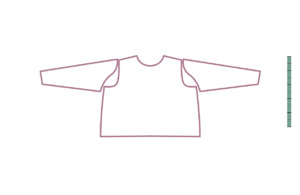
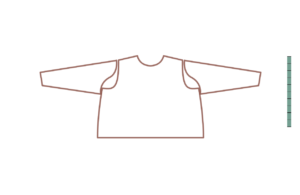
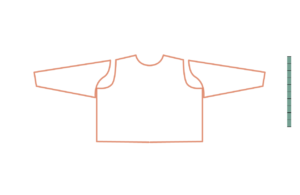
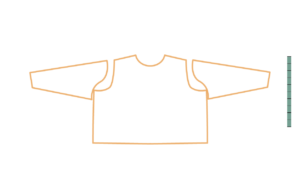
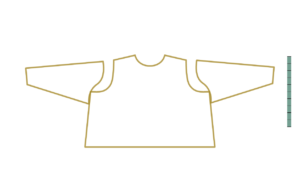
I will stop here with the drawings, as I mostly used them to make sense of the shapes I’m supposed to be designing.
Drawing other shapes
If working flat pieces that need to be seamed, these will be great because I can use them as visual guides when designing.
But for other types of construction, these drawings fall short.
I tried to draw a round yoke and a raglan for size 12 using the measurements in the same set and here’s what I got.
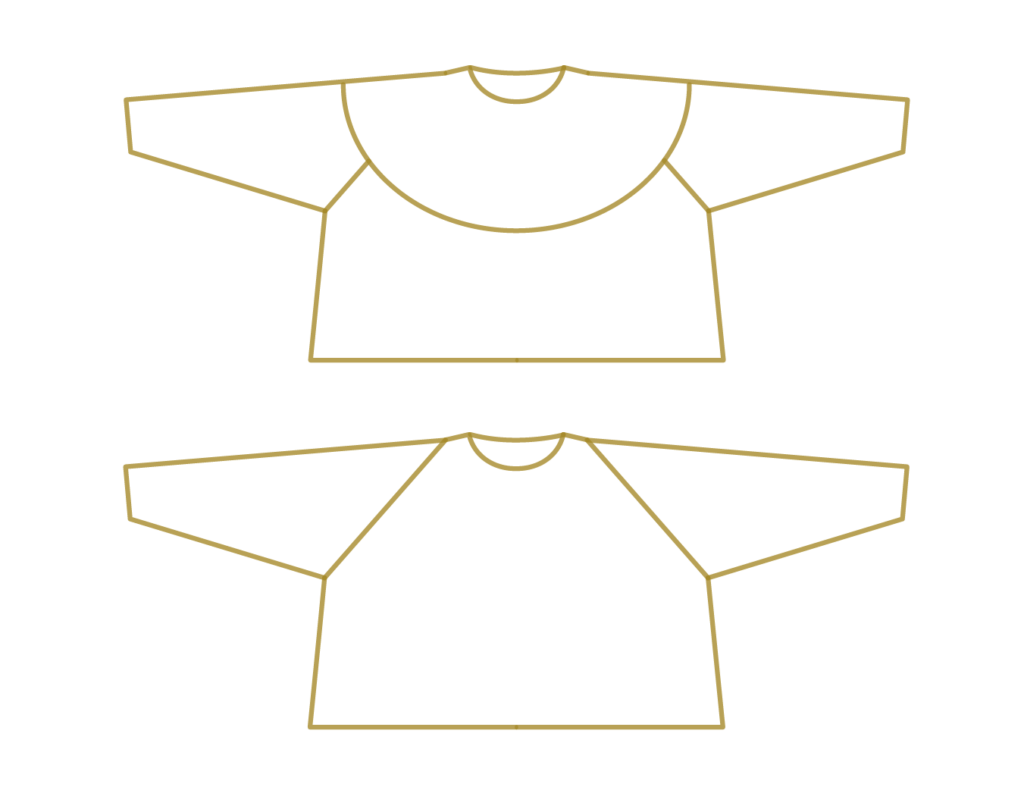
The first is a yoke that is almost as large as the measurement in the dataset (it’s actually larger) and you can see that there is still a need for raglan shaping until you reach the required size of the sleeve and bust.
The second is a raglan that starts a little off the shoulder, so it doesn’t choke you (I’ve seen designs where the raglan starts at the neckline and tried to follow one such pattern, but gave up quickly because it was uncomfortable).
I actually used the raglan shape to draw the yoke because I couldn’t find any way to fit both the round yoke and the sleeves on the drawing.
In reality, what I’ll do when it comes to yokes is making the yoke as large as it needs to go over the shoulders and down to the high bust, where the sleeves need to be separated.
Then I’ll add stitches for the underarm and for the sleeve at the same spot, so the arm can lift.
I don’t know how to draw that in a sketch yet, but it’s what I already do with my round yoke sweaters. The piece becomes 3D and drawing it in 2D without expanding it becomes more difficult.
Graphs
From the datasets, I was able to extract some interesting information. I will present it in graphs with both cm and inches as units, so you can look at the graphs for the units that you are most familiar with.
I will also discuss some observations based on these graphs.
Bust circumference
I started with plotting the bust circumference, since it is the most common measurement mentioned in sweater patterns.
It is also usually considered the largest measurement, ignoring the fact that the hip can very well be much larger than the bust, which influences how garments are constructed or how they fit.
Usually designers tell makers to choose the size in the pattern based on their bust size, so I have also used this measurement to plot other measurements against.
See the drawing below to understand where this measurement is made.
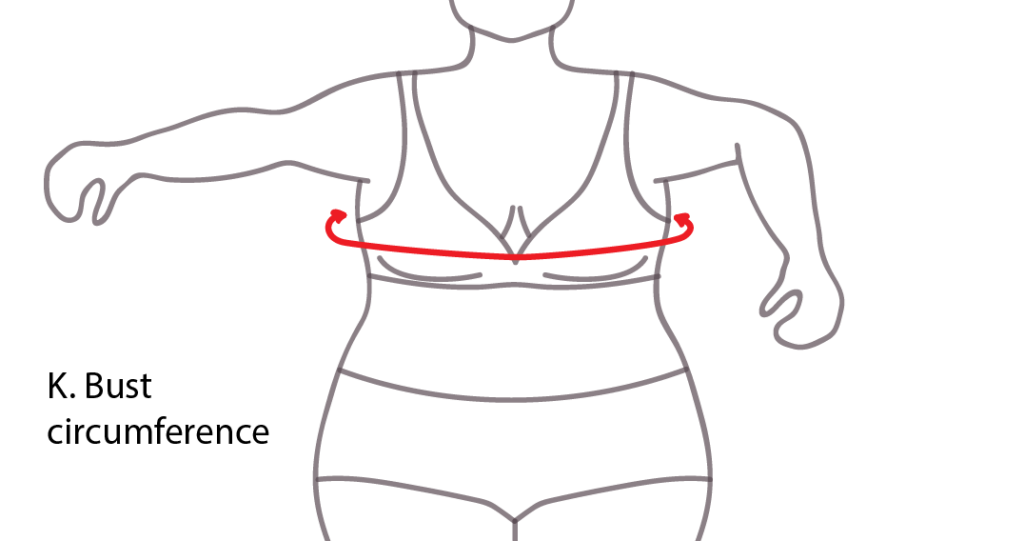
The croquis is based on size 6 measurements from the garment sketches above. It’s very basic, but if you want some fancier ones for sending in magazine calls for submissions, I’ve found an artist who makes some really cute ones (here are the plus sized ones).
I plotted the bust measurements according to the number of sizes in each dataset, not according to anything else, since I didn’t have a standard set of values for the X axis (horizontal).
You will notice that some of these are completely linear, while some grow in a different way.
The Natalie set, for example, is approaching an exponential, which means the difference between one measurement and the next increases.
You can also see that Hoffman uses the same spacing of bust measurements as Ysolda, but with a few more steps.
Most of these have the same difference between sizes, though, which is 10 cm or 4″, which makes math easy.
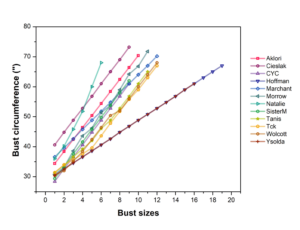
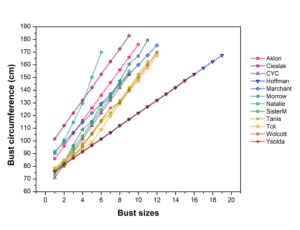
Some start at higher values, but most stop at about 170 cm or 67″.
Bicep circumference
I used the bust values to plot other measurements and see how these change in relation to the bust size.
First is the bicep measurement and you can see below a sketch of where the measurement should be done.
I recommend taking the measurement with the arm flexed, since the bicep itself moves as you move your arms and you need enough space in there to be able to flex your arm.
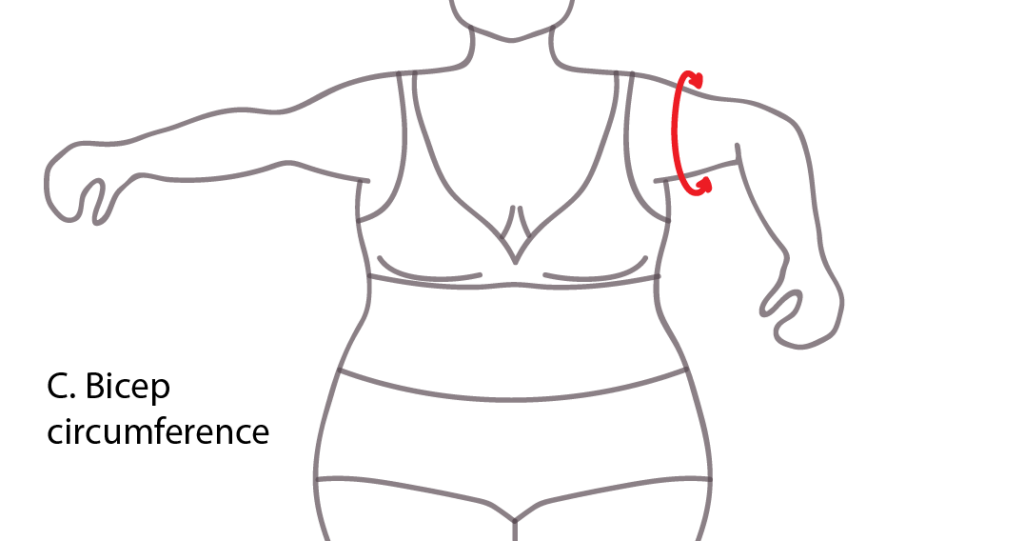
I took all the bicep measurement values from the datasets and plotted them against the corresponding bust size.
A complaint that I see often is that the bicep circumference for different patterns is too small for larger sizes.
Some of the values in these datasets pretty much confirm this. Certain sets stop at around 50-55 cm or 20-22 inches, which is not nearly enough for larger sizes.
I fall somewhere between sizes 5-6 on the Wolcott scale for bust and my flexed bicep circumference is 40 cm.
That would make me a size 8 based on this data. A size 12 in the Ysolda scale. That’s not very practical.
On the other hand, the Marchant set goes all the way up to 80 cm or 32 inches, which might be right or maybe a little too much.
I am curious what the form data will say.
The most important point is that we should be able to choose sleeve width at the top independently of bust circumference, since people with the same bust size can have very different bicep measurements.
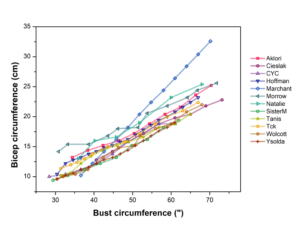
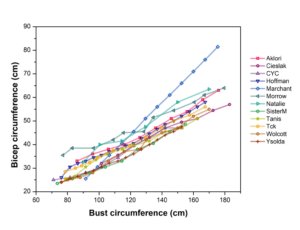
One thing that I wasn’t able to present here due to not enough data is armscye circumference, which is very important for set-in sleeves, but also for modified drop-shoulder sweaters, where the sleeve doesn’t start at the elbow for the large sizes, but just a little off the shoulder.
The armscye tends to not get a lot of attention, but it’s critical for a good fit and your ability to lift your arms or do any activity with your whole body, like working or buying groceries or playing with your kids.
I will make a graph for armscyes once I start getting some measurements in the form.
Wrist circumference
Another important and often overlooked measurement in larger sizes is the wrist measurement.
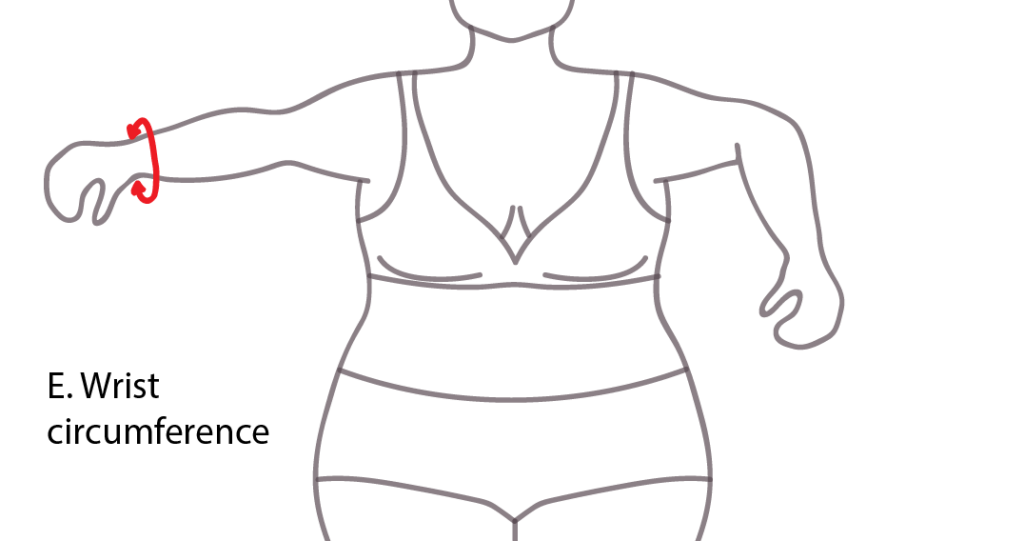
Here’s a graph on where you measure this on the body, just at the junction between your forearm and the hand.
For fitted sleeves (I’m not talking now about fantasy sleeves that fall to the ground), you want a little ease around the wrist, but not so much that it inconveniences you.
There’s nothing I hate more than a soggy sleeve cuff that I accidentally dipped into my soup while cooking/eating or into the dishwashing water. Ugh.
A sleeve cuff should be able to either keep its place around your wrist and not gape to allow cold air in, or to be pulled up to your elbow and stay there if you need it to.
It should not flip-flop about and get into things, like ink or mud or any of the sticky substances that kids love decorating with.
At least that’s what I believe and how I like my sleeves to belong. Then again, I’m autistic and maybe most people don’t care about sleeves and cuffs as much as I do.
So if you also care about sleeves as much as I do, you will not be surprised by the graphs below, where the cuff sizes are all over the place.
Some start really narrow and only go up to the value that the other sets start at (keep in mind that some of these are wrist measurements, while others are cuff sizes in finished garments, so ease included and some have ribbing, which is quite elastic).
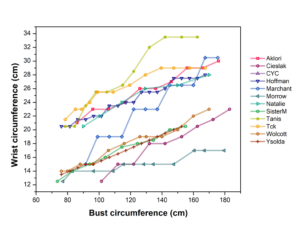
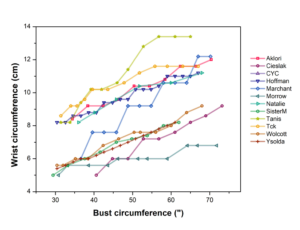
Some sets go up smoothly, while others jump in discreet sets.
There’s no relationship between these datasets and I’m not sure what to extract from them.
One thing that I do believe is that you should either add ease to a non-ribbed (or inelastic, rather) cuff, enough that it goes over your knuckles comfortably, but not more, which would be about 4 cm or 2″, or aim to make the ribbing a the same size as the wrist, without ease.
There’s also the other thing, that wrist size doesn’t vary much with body size, despite what these datasets show you. What I’ve found is that the average wrist size varies between 13.5-17.5 cm or 5.3-6.9″, which with ease translates to 17.5-21.5 cm or 7.3-8.9″.
So I’ll develop a range of my own, with a smooth increase from the smallest to the largest value and then we’ll go from there.
All that said, I am really curious what the form data will tell me about wrist sizes. For now I’ll take the moderate approach from above.
Neck circumference
The neck circumference is one of my biggest issues with these datasets and current patterns in general.
Here’s a drawing of where one should take this measurement. It’ as the base of the neck, right where the shoulders meet the neck.
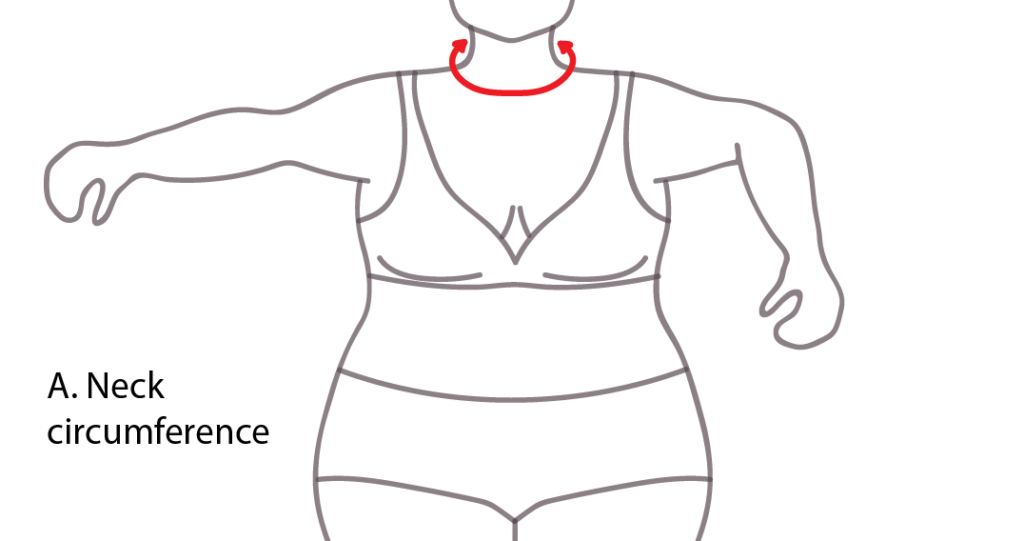
The CYC doesn’t even provide data for neck circumferences. Not even one number.
Many of these points are based on data that I calculated, so they are approximate only, since most of the datasets did not include an actual neckline measurement.
Some offer back neck width and front neck depth measurements, so I did some math to get this graph.
I’m not sure which datasets belong to patterns with ribbing at the neckline.
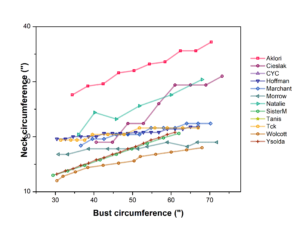
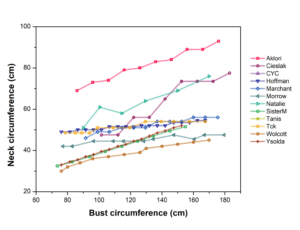
You can see from the graph that some designs have necklines that are way too large for the type of neck shaping they are supposed to have (although this data isn’t that bad as some other examples I’ve seen with loose ribbing, see the example below).
The problem with huge necklines is not only that they look unprofessional, but that the neck area is meant to support the weight of a whole garment.
So when that “support” is flimsy or is too large and moves around, the whole garment falls off your shoulders or becomes lopsided, the armholes move around and prevent body movement and all the hard work you did on your crochet or knit garment goes out the window.
Human heads or necks do not change that much with increasing sizes in other areas.
You need a neckline that allows your head to go through. It should sit around your neck at a decent distance, so it doesn’t choke you (yes, I’m looking at you, all the patterns without front and back neckline adjustments!).
The distance depends on the design and intended neckline ease, but it should be consistent for all sizes. Not 5 cm of ease for the small sizes and 30 cm for large sizes.
In fact, if you design a sweater with a neckline that’s 5 cm larger than the head circumference (nobody sadly talks about the head circumferences outside of hat design), you’ll end up with more distance around the neck of the smaller sizes, since they have a smaller actual neck circumference than the larger sizes.
So you need to adjust ease to the larger sizes based on that difference if you want the neckline to look proportional on all sizes.
Let’s see an example, as I may have lost you with that. I will write it all in cm, as it’s easier to follow with just one type of units.
I’ll be discussing a non-stretchy neckline in this example, as with stretchy ribbing you get the same thing as above with the wrist measurements.
An adult head size measures about 50-60 cm around the crown. That’s what you want to fit the neckline to and let’s say you add 5 cm of ease so it’s easy to put on and take off.
That means that you start with 55 cm. If we believe the Wolcott dataset to be accurate (I did calculate these values, so they might not be that great), that means that at the smallest size of 30 cm you have 25 cm of ease.
This looks like a distance of 4 cm from the actual base of the neck to the start of the neckline.
I got this result by calculating the radius of a circle with 55 cm and that of a circle with 30 cm circumference and getting the difference. The neckline isn’t meant to be a perfect circle, but this is close enough.
That’s the smallest size.
If we want to keep the distance of 4 cm between neck and neckline at the largest size, which has a measurement of 45 cm, then we’ll need to have a finished neckline of 69 cm.
Assuming the largest sizes also have the biggest heads (which might not be true in practice), that’s 9 cm of ease around the head, instead of the 5 cm.
If we decrease the starting ease or do this whole calculation from a larger size, like the one in the middle, this difference would become smaller (66.5 cm at the largest size).
Ribbing would not work for this calculation, as ribbing is elastic and weak (I mean elastic ribbing, not decorative ribbing that has no give).
It is good at keeping things from flaring out or from rolling and that’s its purpose.
If you want ribbing on the neckline, you should add it after making the body, to fill in that space I just talked about (the distance between neckline and neck base).
Ribbing is great, but please don’t use it to support a whole garment.
Thinking and writing about this, now I realize why so many top-down sweaters I see have huge necklines.
They stretch out because they are started with ribbing first and there’s no sturdy line of stitches to keep the neckline in its intended shape.
Experienced makers know to start with a solid cast-on (not elastic) and to add ribbing at the end. This is what I’ve been reading in forums and project notes and I think it’s good advice.
That’s what I will be using from now on as well and you will see that reflected in my table below, with a 3.5 cm distance from neck base to neckline. The rest will be covered by ribbing to the desire of the maker.
Other measurements
There are other measurements involved as well in designing a well-fitting garment, but some of these can be modified easily to fit you.
For example, the length of the torso from the back of the neck, be it to the waist, to the high hip or to the full hip, can vary a lot from person to person.
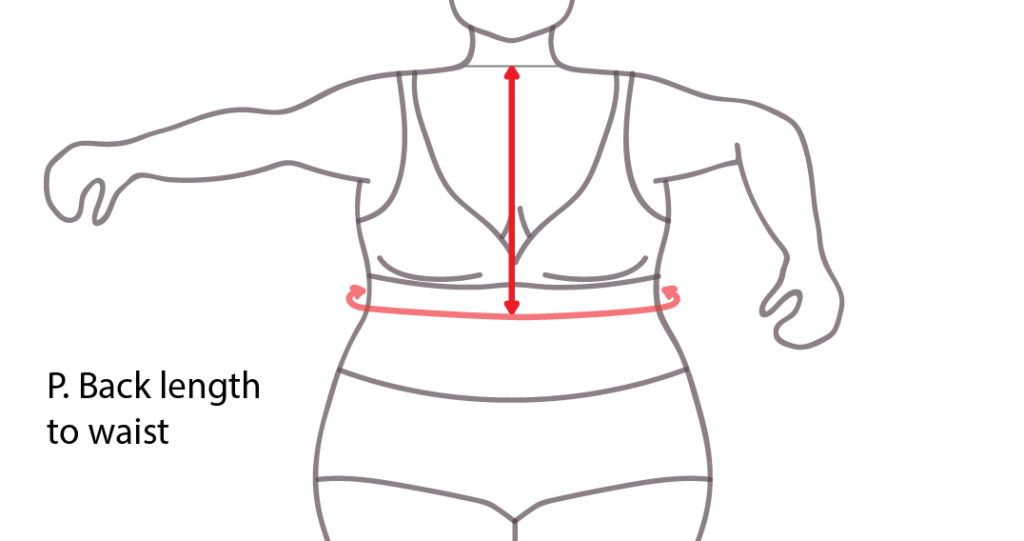
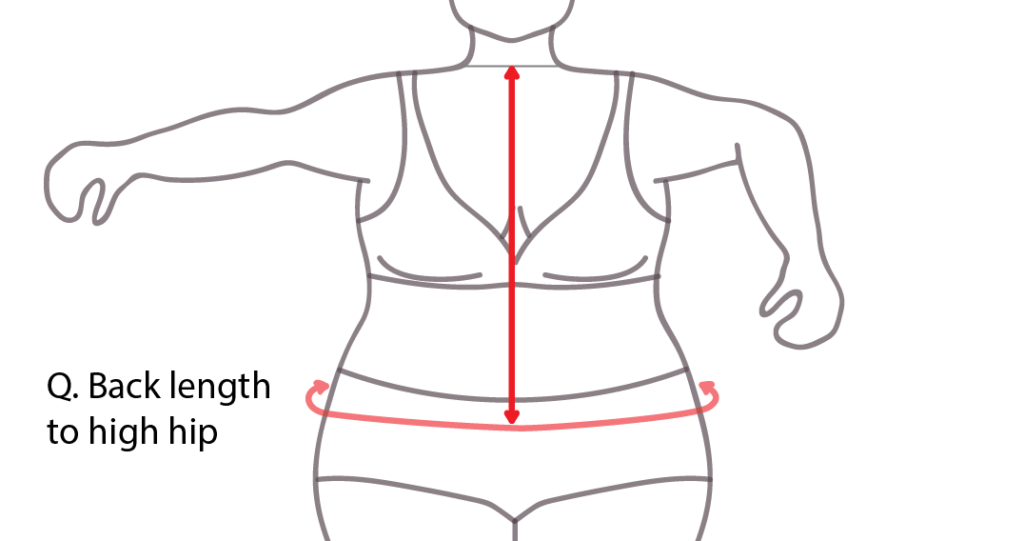
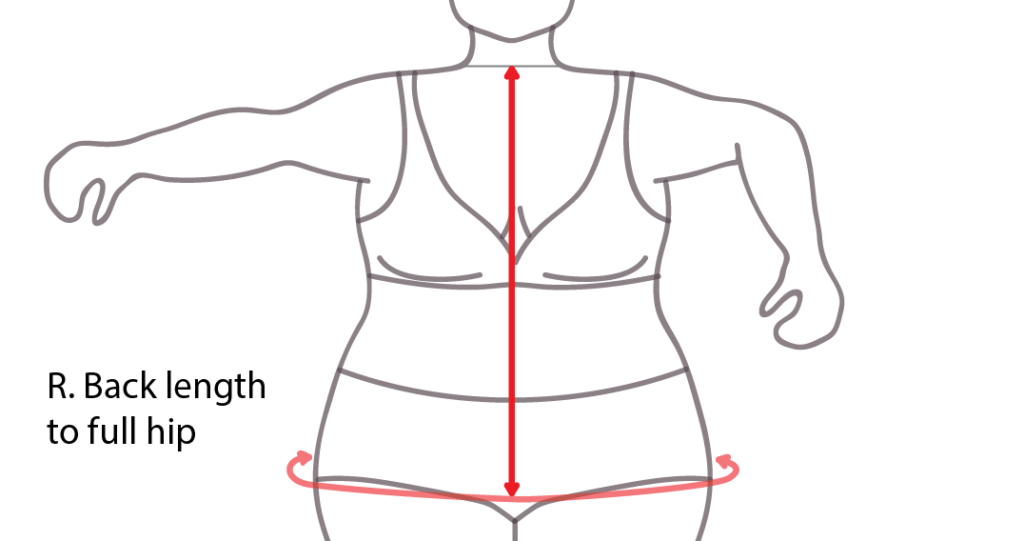
This proportion is important when making fitted items, such as cardigans or dresses with closures, but cannot be easily accommodated by sweaters/tube tops (unless you make an entire sweater in an elastic rib).
You should know these measurements for yourself and learn how to alter row numbers and how to add increases or decreases to fit your particular body shape.
Designers usually choose a particular set of these measurements across all sizes, but with your gauge and a tiny bit of math you can adjust any pattern to fit you.
There are also some differences between the front and back lengths, particularly when the bust-underbust difference is high.
Some patterns include full bust adjustments (which is great!), but most don’t and you may end up with the fabric riding up in the front if you don’t add this adjustment in some designs.
You can learn how to do it yourself with short rows. I have a tutorial for doing that in fitted knitting projects, but I’ll write one for Tunisian crochet as well.
There is also arm length, which can be easily adjusted by adding or removing some of the rows without shaping. If you have a stitch pattern, you can change the frequency of the shaping stitches and keep the stitch pattern intact.
There’s also a yoke depth or raglan depth which can be calculated from the difference between the intended neckline and the shoulder circumference with ease (that’s a very simplistic view).
My own measurements
Here are two tables of measurements, with these ordered in the same way as the form that you fill out, so you can compare things and see where you fall.
I will update these tables over time, leaving the original measurements accessible in each particular pattern (and pattern description) that uses them.
First the table with cm measurements.
| Measurement (cm)/Size | 1 | 2 | 3 | 4 | 5 | 6 | 7 | 8 | 9 | 10 | 11 | 12 |
| A. Neck circumference | 30 | 32 | 34 | 36 | 37 | 38 | 39 | 41 | 42 | 43 | 44 | 45 |
| A2. Neckline* | 52 | 53 | 54.5 | 55.5 | 57 | 58 | 59.5 | 60.5 | 61.5 | 63 | 64 | 66.5 |
| B. Armscye circumference | 35 | 37 | 40 | 43 | 46 | 50 | 50 | 53 | 57 | 60 | 64 | 67 |
| C. Bicep circumference | 26 | 28.5 | 31 | 33.5 | 36 | 38.5 | 41 | 43.5 | 46 | 48.5 | 51 | 56 |
| D. Elbow circumference** | 20 | 21 | 23 | 24 | 26 | 27 | 28 | 30 | 31 | 33 | 34 | 37 |
| E. Wrist circumference | 13.5 | 14 | 14 | 14.5 | 15 | 15 | 15.5 | 16 | 16 | 16.5 | 17 | 17.5 |
| F. Shoulder circumference | 96 | 100 | 105 | 109 | 113 | 118 | 122 | 126 | 131 | 135 | 139 | 148 |
| G. Shoulder length | 12 | 12 | 12 | 13 | 12 | 12 | 12 | 14 | 14 | 14 | 15 | 15 |
| H. Shoulder width | 35 | 36 | 38 | 39 | 40 | 41 | 43 | 44 | 45 | 46 | 48 | 50 |
| I. Arm length | 50 | 51 | 52 | 54 | 55 | 55 | 55 | 55 | 56 | 56 | 56 | 56 |
| J. Upper bust circumference | 84 | 86 | 88 | 92 | 94 | 96 | 100 | 102 | 104 | 106 | 108 | 112 |
| K. Bust circumference | 78 | 86 | 95 | 103 | 111 | 120 | 128 | 137 | 145 | 153 | 162 | 170 |
| L. Under bust circumference*** | 68 | 76 | 85 | 93 | 101 | 110 | 118 | 127 | 135 | 143 | 152 | 160 |
| M. Waist circumference | 60 | 68 | 76 | 85 | 93 | 101 | 109 | 117 | 125 | 134 | 142 | 150 |
| N. High hip circumference | 71 | 81 | 91 | 102 | 112 | 122 | 132 | 142 | 152 | 163 | 173 | 183 |
| O. Full hip circumference | 84 | 93 | 103 | 112 | 122 | 131 | 141 | 150 | 160 | 169 | 179 | 188 |
| P. Back length to waist | 41 | 41 | 41 | 42 | 43 | 43 | 44 | 45 | 46 | 48 | 51 | 53 |
| Q. Back length to high hip | 45 | 47 | 48 | 50 | 52 | 52 | 54 | 57 | 58 | 60 | 63 | 65 |
| R. Back length to full hip | 62 | 63 | 65 | 66 | 67 | 69 | 70 | 72 | 73 | 74 | 76 | 77 |
| Waist to hips | 4 | 6 | 7 | 8 | 9 | 9 | 10 | 12 | 12 | 12 | 12 | 12 |
| Yoke depth | 17 | 18 | 19 | 21 | 21 | 22 | 22 | 22 | 23 | 24 | 25 | 26 |
** calculated as the average between bicep and wrist
*** calculated as difference of 10 cm from full bust
Here’s the same table, but with inches.
| Measurement (“)/Size | 1 | 2 | 3 | 4 | 5 | 6 | 7 | 8 | 9 | 10 | 11 | 12 |
| A. Neck circumference | 12 | 12.75 | 13.5 | 14.5 | 14.75 | 15.25 | 15.5 | 16.5 | 16.75 | 17.25 | 17.5 | 18 |
| A2. Neckline* | 20.75 | 21.25 | 21.75 | 22.25 | 22.75 | 23.25 | 23.75 | 24.25 | 24.5 | 25.25 | 25.5 | 26.5 |
| B. Armscye circumference | 14 | 14.75 | 16 | 17.25 | 18.5 | 20 | 20 | 21.25 | 22.75 | 24 | 25.5 | 26.75 |
| C. Bicep circumference | 10.5 | 11.5 | 12.5 | 13.5 | 14.5 | 15.5 | 16.5 | 17.5 | 18.5 | 19.5 | 20.5 | 22.5 |
| D. Elbow circumference** | 8 | 8.5 | 9.25 | 9.5 | 10.5 | 10.75 | 11.25 | 12 | 12.5 | 13.25 | 13.5 | 14.75 |
| E. Wrist circumference | 5.5 | 5.5 | 5.5 | 5.75 | 6 | 6 | 6.25 | 6.5 | 6.5 | 6.5 | 6.75 | 7 |
| F. Shoulder circumference | 38.5 | 40 | 42 | 43.5 | 45.25 | 47.25 | 48.75 | 50.5 | 52.5 | 54 | 55.5 | 59.25 |
| G. Shoulder length | 4.75 | 4.75 | 4.75 | 5.25 | 4.75 | 4.75 | 4.75 | 5.5 | 5.5 | 5.5 | 6 | 6 |
| H. Shoulder width | 14 | 14.5 | 15.25 | 15.5 | 16 | 16.5 | 17.25 | 17.5 | 18 | 18.5 | 19.25 | 20 |
| I. Arm length | 20 | 20.5 | 20.75 | 21.5 | 22 | 22 | 22 | 22 | 22.5 | 22.5 | 22.5 | 22.5 |
| J. Upper bust circumference | 33.5 | 34.5 | 35.25 | 36.75 | 37.5 | 38.5 | 40 | 40.75 | 41.5 | 42.5 | 43.25 | 44.75 |
| K. Bust circumference | 31.25 | 34.5 | 38 | 41.25 | 44.5 | 48 | 51.25 | 54.75 | 58 | 61.25 | 64.75 | 68 |
| L. Under bust circumference*** | 27.25 | 30.5 | 34 | 37.25 | 40.5 | 44 | 47.25 | 50.75 | 54 | 57.25 | 60.75 | 64 |
| M. Waist circumference | 24 | 27.25 | 30.5 | 34 | 37.25 | 40.5 | 43.5 | 46.75 | 50 | 53.5 | 56.75 | 60 |
| N. High hip circumference | 28.5 | 32.5 | 36.5 | 40.75 | 44.75 | 48.75 | 52.75 | 56.75 | 60.75 | 65.25 | 69.25 | 73.25 |
| O. Full hip circumference | 33.5 | 37.25 | 41.25 | 44.75 | 48.75 | 52.5 | 56.5 | 60 | 64 | 67.5 | 71.5 | 75.25 |
| P. Back length to waist | 16.5 | 16.5 | 16.5 | 16.75 | 17.25 | 17.25 | 17.5 | 18 | 18.5 | 19.25 | 20.5 | 21.25 |
| Q. Back length to high hip | 18 | 18.75 | 19.25 | 20 | 20.75 | 20.75 | 21.5 | 22.75 | 23.25 | 24 | 25.25 | 26 |
| R. Back length to full hip | 24.75 | 25.25 | 26 | 26.5 | 26.75 | 27.5 | 28 | 28.75 | 29.25 | 29.5 | 30.5 | 30.75 |
| Waist to hips | 1.5 | 2.5 | 2.75 | 3.25 | 3.5 | 3.5 | 4 | 4.75 | 4.75 | 4.75 | 4.75 | 4.75 |
| Yoke depth | 6.75 | 7.25 | 7.5 | 8.5 | 8.5 | 8.75 | 8.75 | 8.75 | 9.25 | 9.5 | 10 | 10.5 |
** calculated as the average between bicep and wrist
*** calculated as difference of 10 cm from full bust
The data from the second table was derived from the first table and rounded to the nearest .25″.
The font is very small because I had to choose between you seeing the whole table or having to scroll, but since the first column cannot be made to stick, that was not a good option.
You can click on this link that will take you to a page where both tables are in the wide format and you can see the numbers better.
You can use the data in these tables for your own designs.
You can create your own tables to publish along with your pattern descriptions, but you may not copy and paste these tables in their entirety on your website or claim them as your own.
Conclusions and final remarks
Hopefully you’ve found this long article useful and that you’ve learned something about garment design, your body or this world.
If you do use this data for your designs, please mention the source of your measurements (this article) and let me know, as I would be happy to share your design. I love supporting fellow artists and designers and to share their work with my little audience.
As for conclusions about the data itself, you may have noticed that it’s not very easy to find a middle ground and it will take us a while until we get a good set of measurements that anyone can use to create great garment patterns.
Until then, you can help by filling out this form with your measurements and telling your friends about it as well.
The form will stay open until the end of 2023, but I may extend this if there is demand.
Thank you for reading all the way to the end and make sure to subscribe to my email updates (see below) if you want to know when my first pattern using these measurements as a base will come out or if you want to test it.
I send out all testing calls to subscribers and only make public calls if I don’t find enough testers in my list.
Now I’m off to finish my sweater!
Hugs, Andrea


Hello Andrea ! I Just finished watching your vlog, and noticed you were talking about sweaters so I decided to come here and bravo this is very helpful ! I enjoy tunisian crochet and which to make my own garments but didn’t know where to start, and didn’t really desire to make a bunch of rectangles. I wanted more shape to the garment to compliment my somewhat wide and long torso for I am very tall. This was very detailed and helpful. Thanks alot !
That’s great, thank you! Yes, rectangles aren’t great for human bodies.
You saw in the vlog that I plan on writing a few articles about shaping.
I don’t remember if I mentioned neck shaping, but it’s very important and I’ll dedicate one article to that topic as well.
Once again, you have exceeded in your teaching techniques! this brought me back to design collage (eons ago) And those little fabrics samples! We had to do so many of them! Great Work!
Thanks, Cyndi! Glad it brought back memories, let’s hope it will help a better future for garment design.
We have two responses in the form already!