What’s the most elastic Tunisian crochet ribbing you’ve ever made?
In this tutorial, I want to show you how to make super elastic ribbing for your own projects, using only two easy Tunisian crochet stitches, the Tunisian knit stitch and the Tunisian reverse purl knit stitch.
I’ve previously shown you how to make 6 types of Tunisian crochet ribbing, but those were mostly decorative, with only two of them functional.
In this detailed written and video tutorial I will show you how to make different types of reversible and very elastic ribbing using the two Tunisian crochet stitches mentioned above.
Contents
About the most elastic Tunisian crochet ribbing
This type of ribbing is meant for projects where you need the elasticity and the method works for any kind of yarn, including entirely non-elastic yarns, like in the example below.
Here I have an example of a very limp, completely non-elastic yarn, and it also works on this, as you can see. I did not decrease at all, and this is what this kind of ribbing does to the cuff of a sweater.
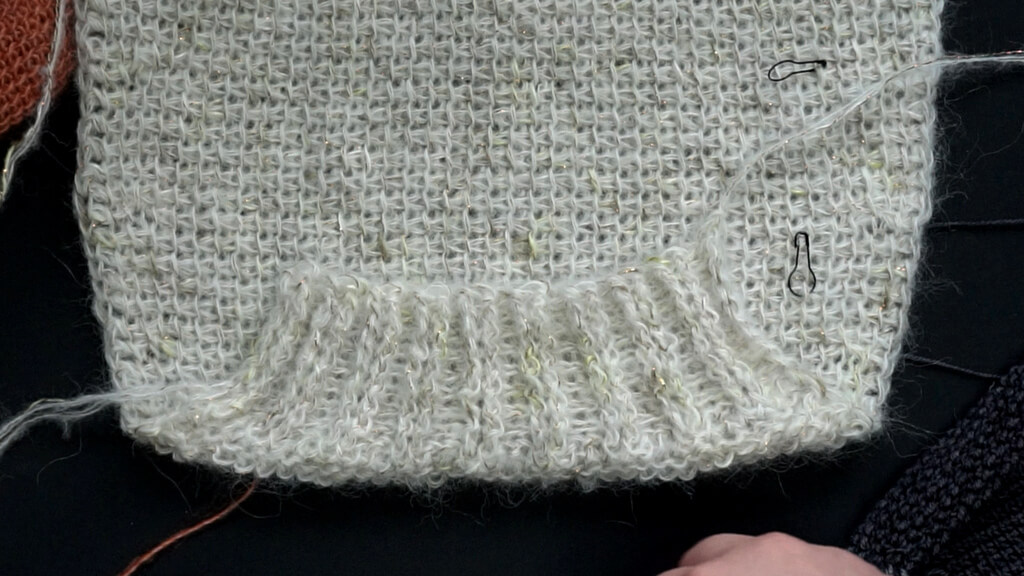
You can stretch it out to the entire length of the project, and it will go back to its original shape after a little while.
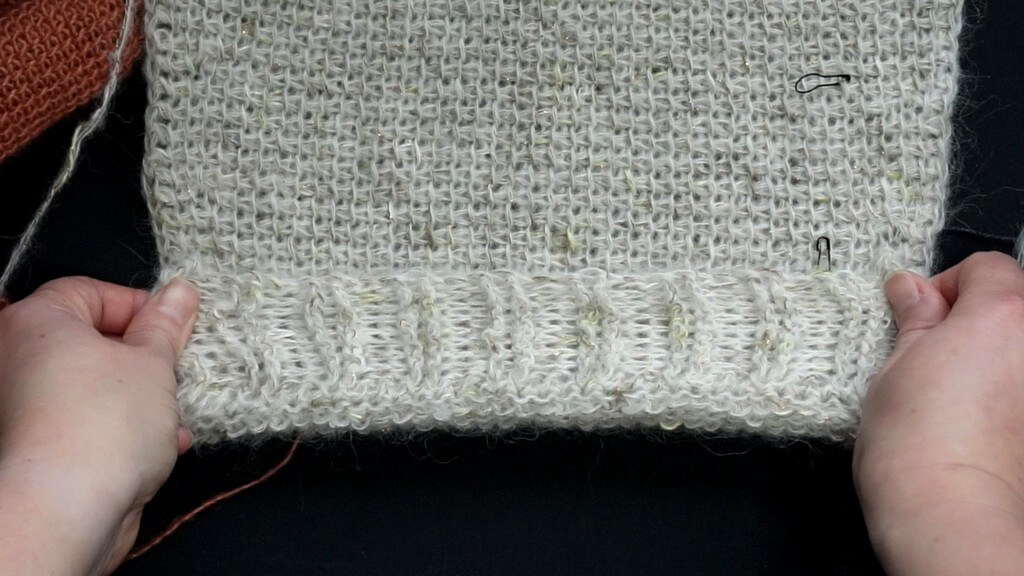
It is also decorative, not just functional, as it looks the same on the front and back of the fabric.
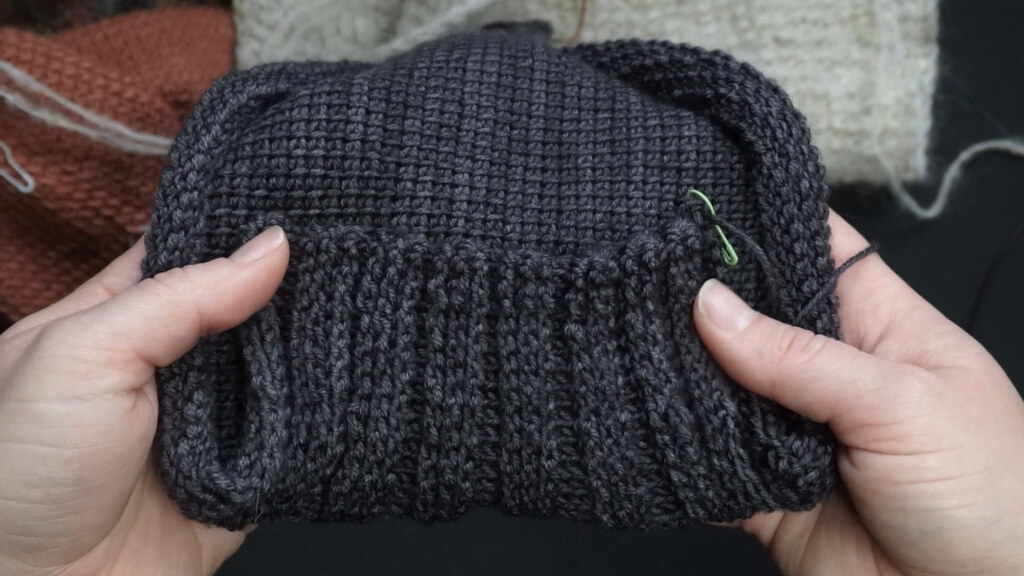
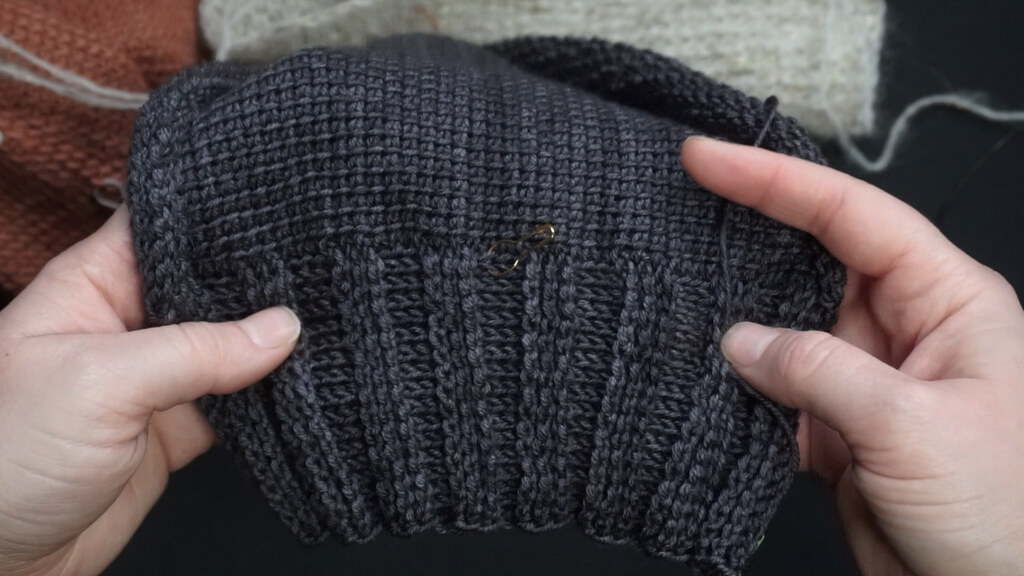
This means that it is great for cuffs and other things that need to be reversible or need to be folded over when worn.
To see how elastic this ribbing can be, just see below, where I stretch the cuff of this sideways beanie. It has a reduction of 55%!
Which means the 3×3 ribbing occupies less than half of the original width of the fabric.
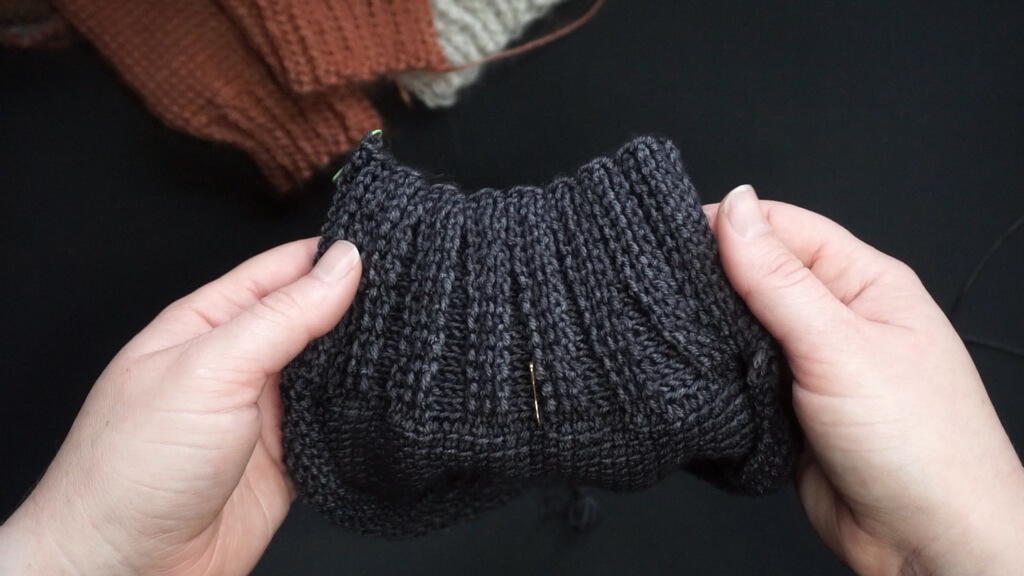
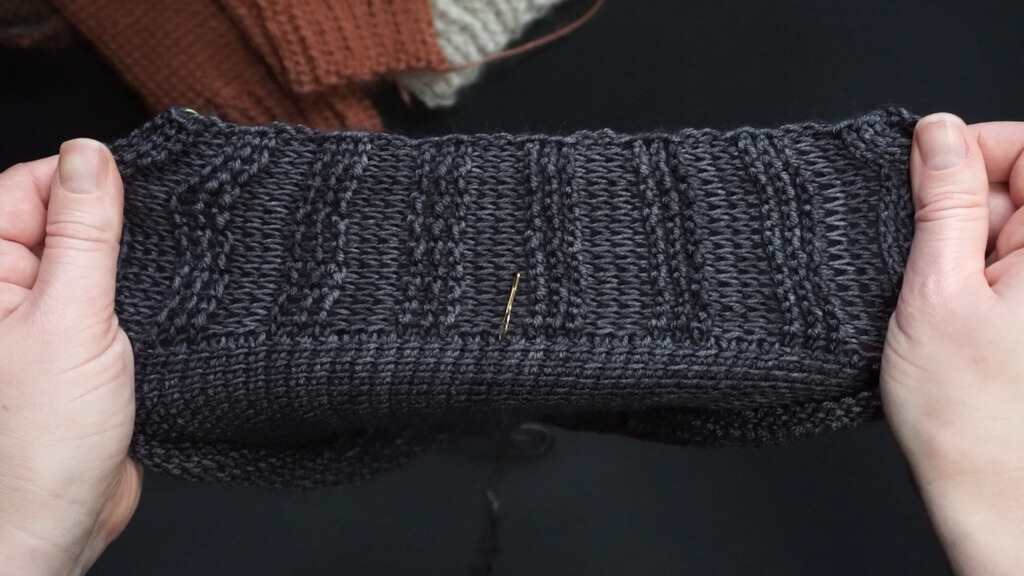
This ratio also depends on the number of rows of each type and on the elasticity of the yarn itself.
For the light colored sample above made with non-elastic yarn, the 2×2 ribbing measures 55% of the original width.
Video tutorial
Right handed video on the main Yarnandy channel.
Left handed video on the Yarnandy left handed channel.
How to make elastic Tunisian crochet ribbing
You can attach this ribbing to the side of a project or incorporate it into a project worked sideways.
You need to start with a foundation row. Learn how to make a foundation row in this tutorial.
The foundation row should include the number of stitches that you need for your ribbing, depending on how wide you want it.
In this tutorial, the ribbing will be 6 stitches wide, with 3 simple stitches on the side to act as a buffer, so you can see how narrow the ribbing will be compared to the regular fabric.
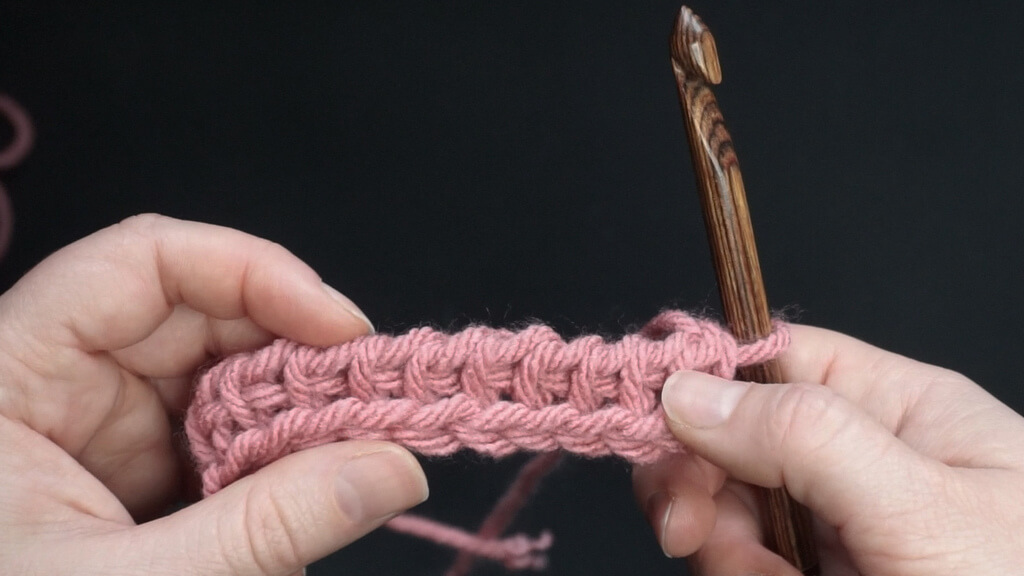
The first part of this tutorial will show you how to make the 1×1 ribbing, which means you make one row of Tunisian knit stitches, followed by one row of Tunisian reverse purl knit stitches.
Insert the hook from front to back to make Tunisian knit stitches.
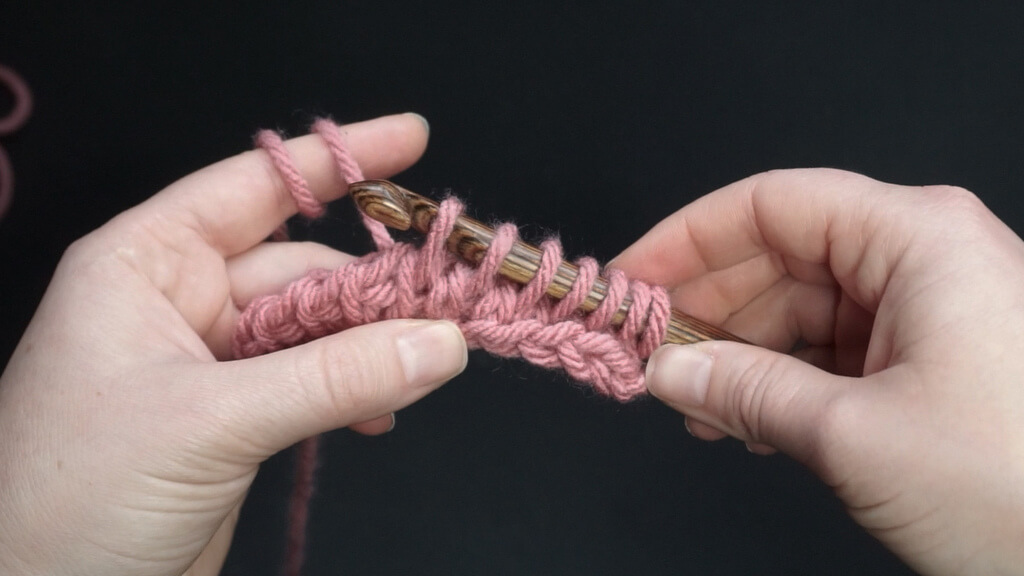
Continue the row in your desired pattern and do a return pass. If you are attaching the ribbing to the side of a project, pick up one more loop in the side of the project and do a short row return pass.
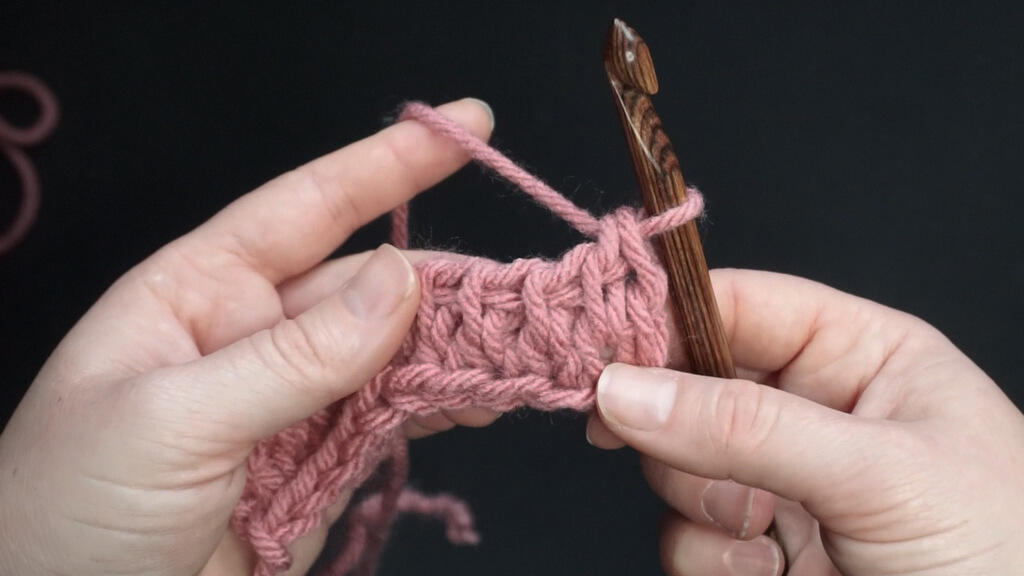
For the second row, bring the yarn to the front and start making Tunisian reverse purl knit stitches, by inserting the hook from the back to the front, between the vertical bars of the stitches.
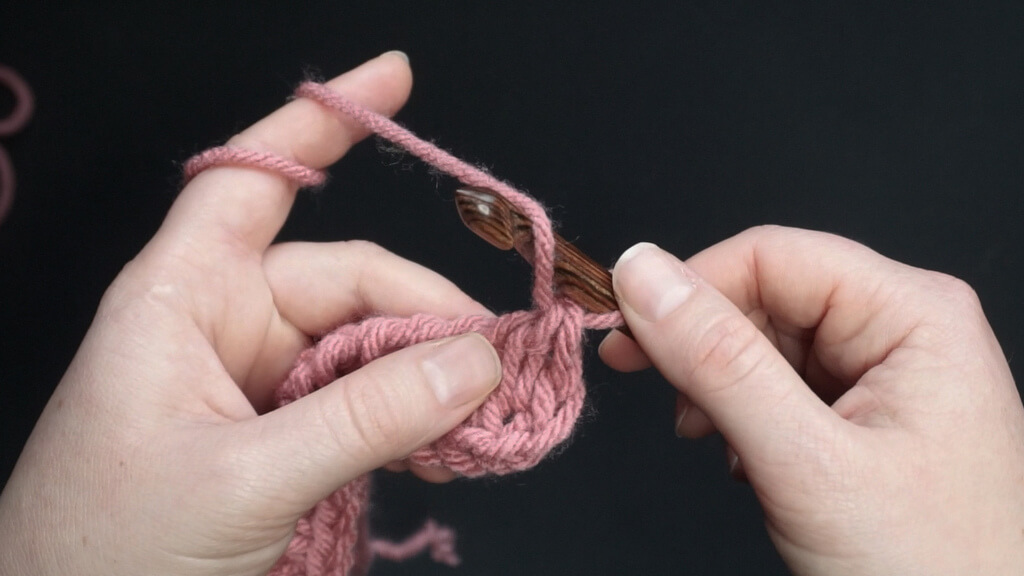
Pick up the same number of stitches and either continue in pattern or pick up one loop on the edge of your project, then make the respective return pass.
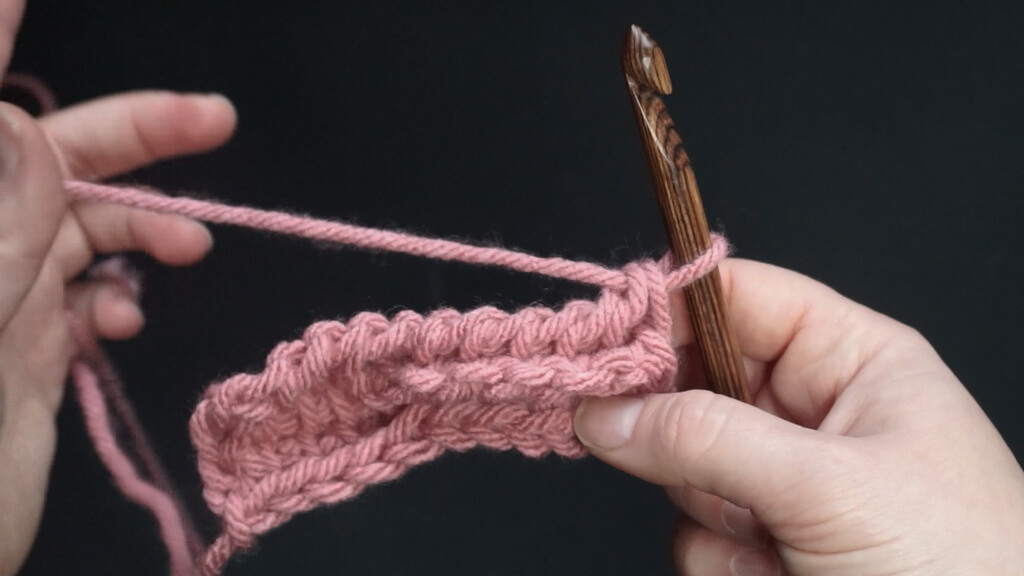
Repeat these two rows to make 1×1 ribbing. It will scrunch up as you work.
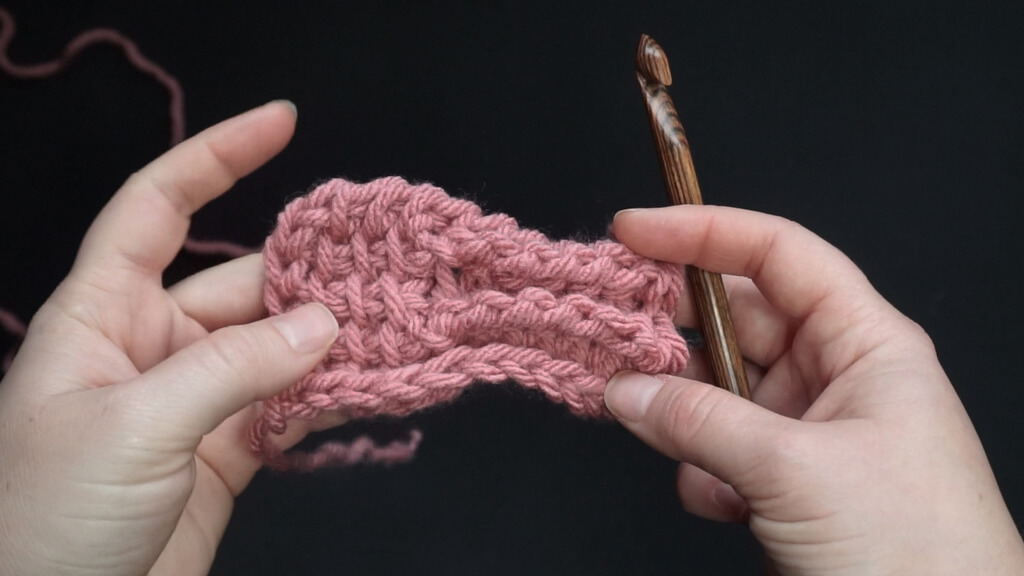
If you turn the work and open up the rows, you will notice the back looks like it also has rows of knit stitches and reverse stitches.
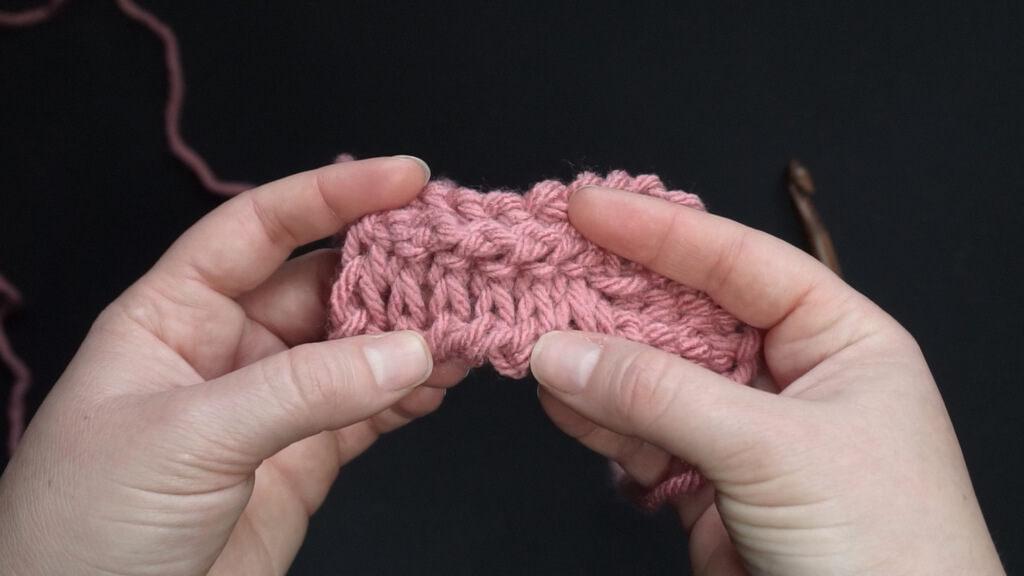
When compared to the Tunisian crochet 1×1 ribbing made with the Tunisian reverse purl stitches, you will notice the new version has a lot more elasticity.
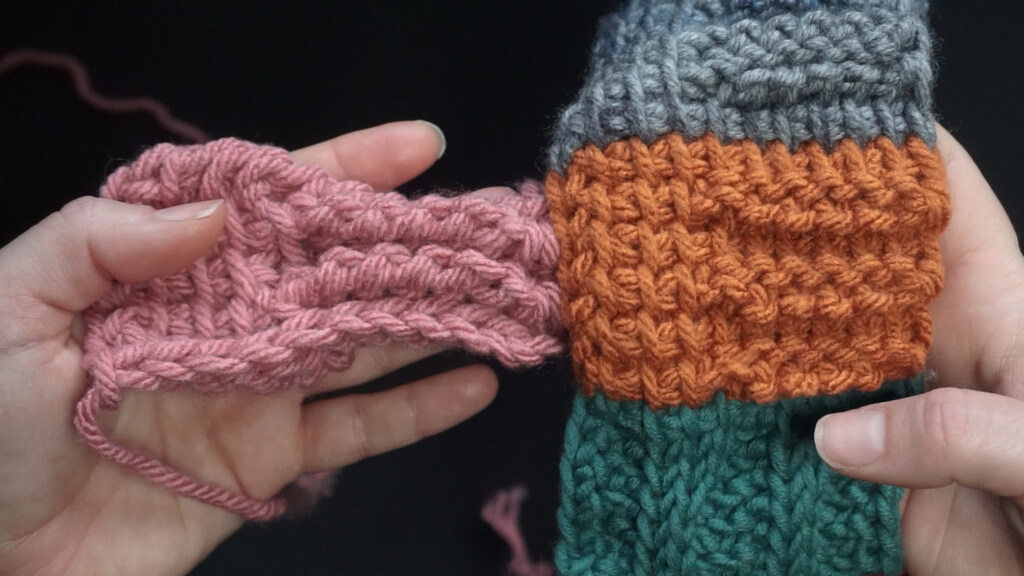
For the 2×2 ribbing, you have the same steps, except you make each type of row twice.
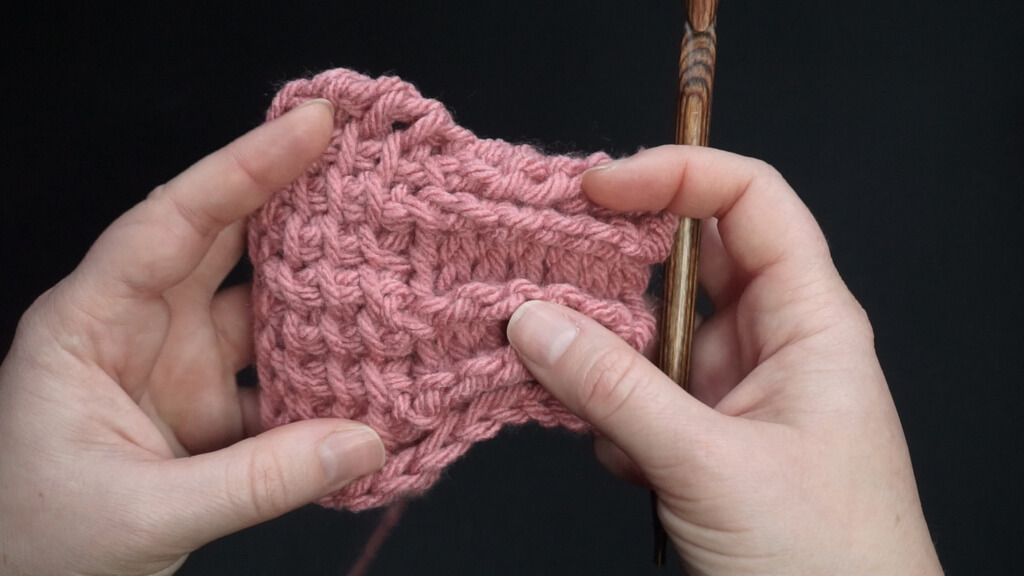
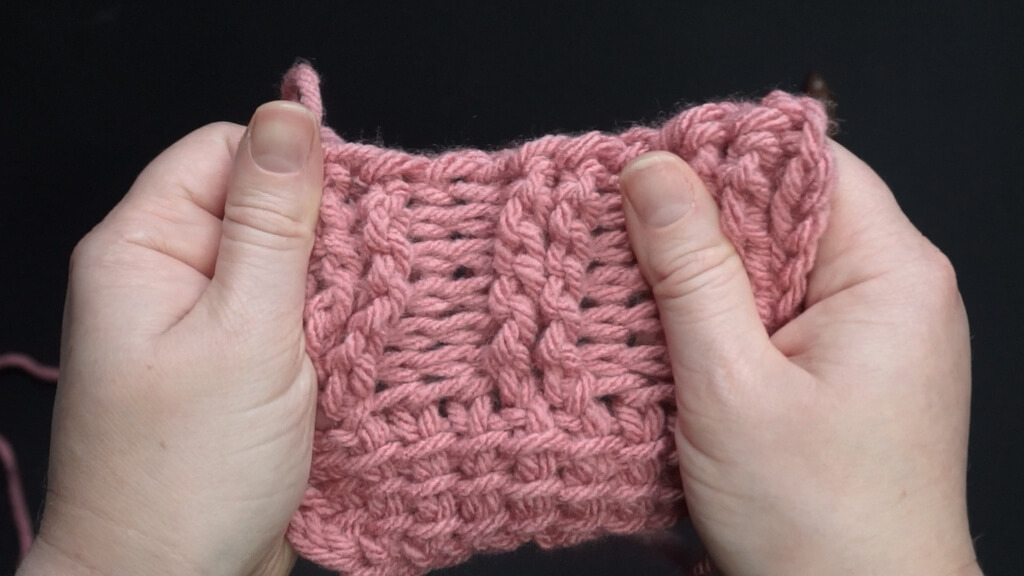
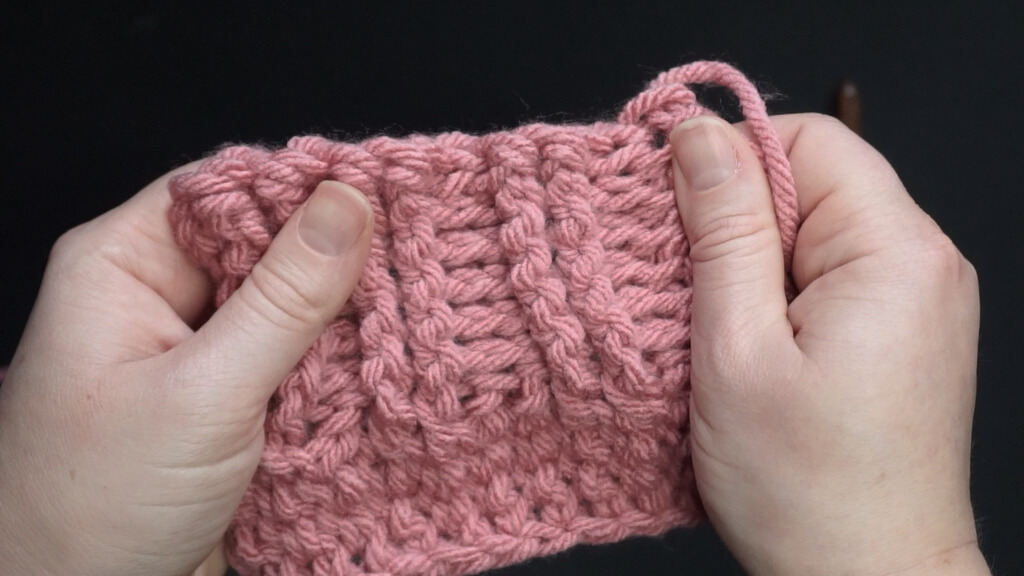
After a while, the ribbing starts to pull the whole fabric in, like in the example below where I made 8 rows of 2×2 ribbing.
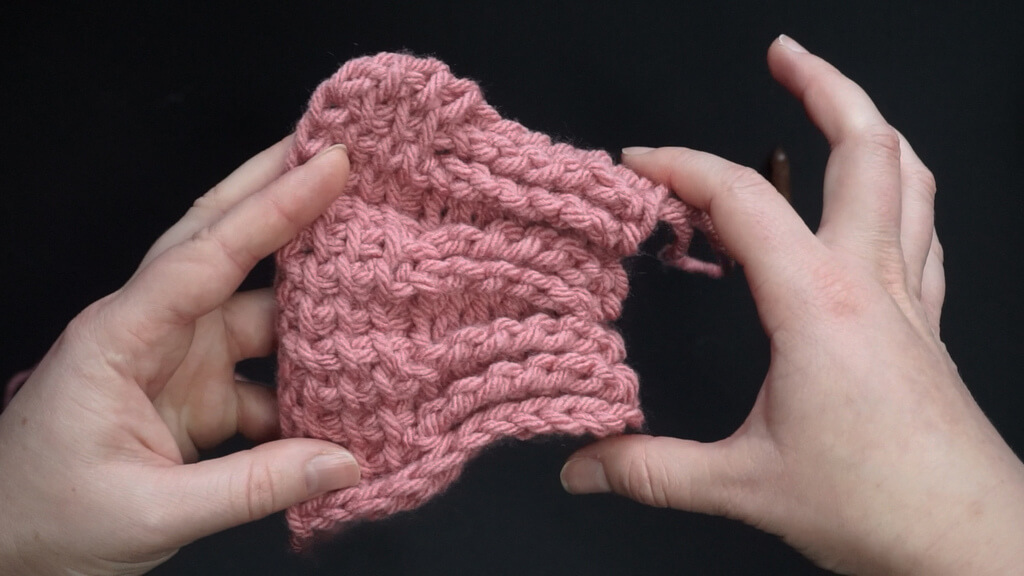
The fabric can be pulled open and it will look the same on both sides, like in the two photos below.
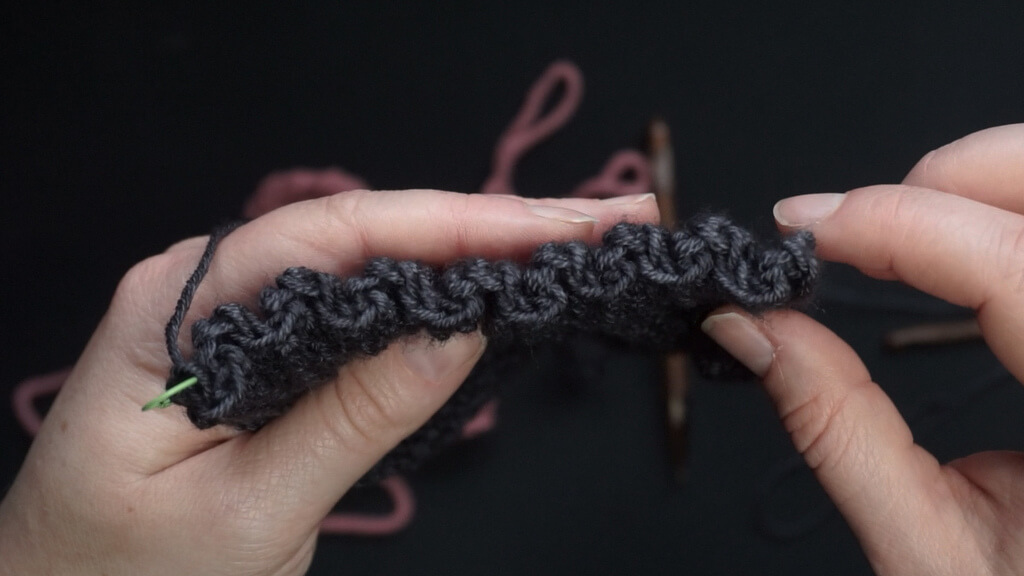
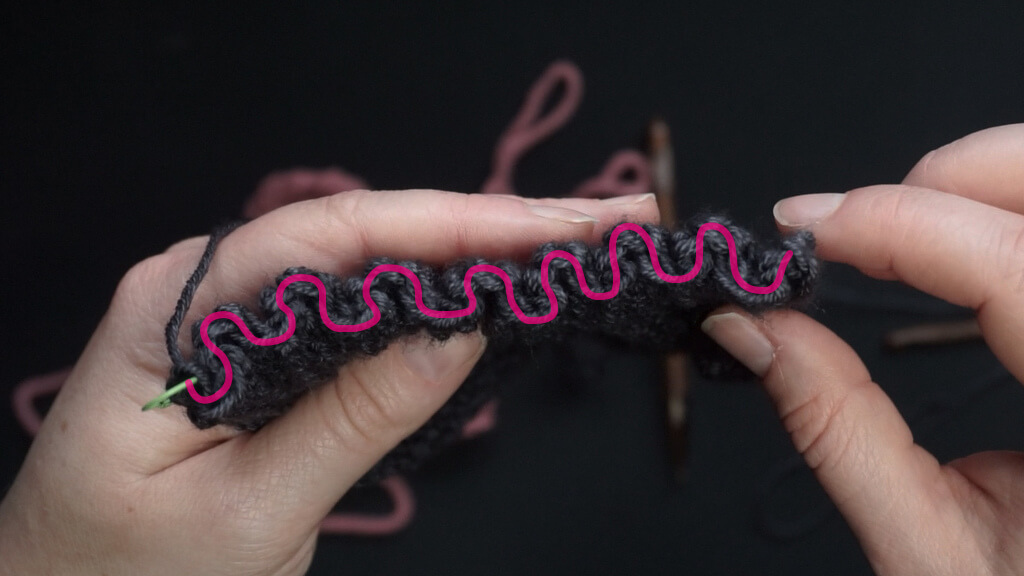
If you look at the fabric sideways, you will observe why this type of ribbing is so elastic.
I highlighted in the photo on the right how much the fabric curls in one direction and then the next, with narrower and shorter waves in the 1×1 ribbing and wider and taller waves in the 2×2 ribbing.
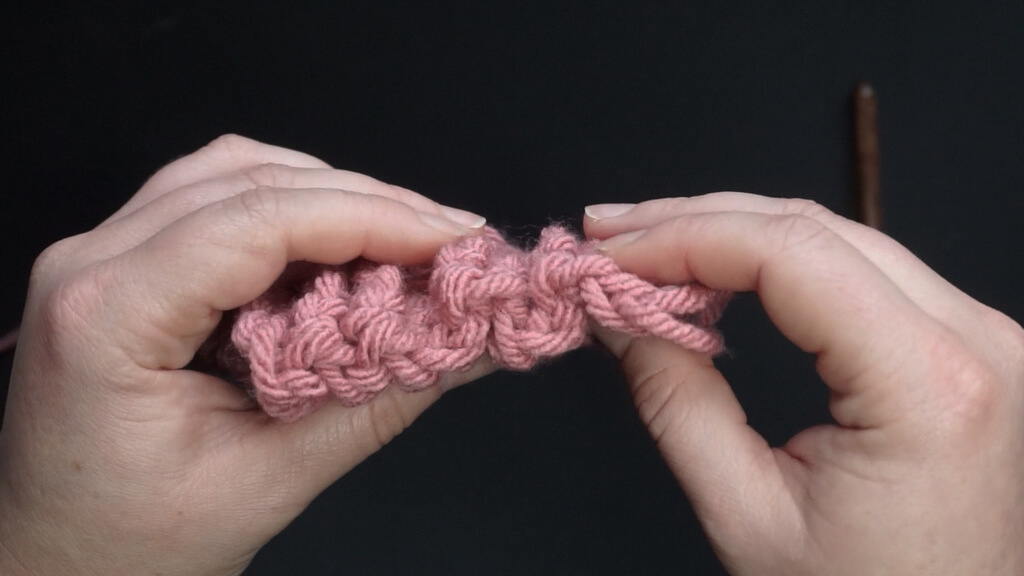
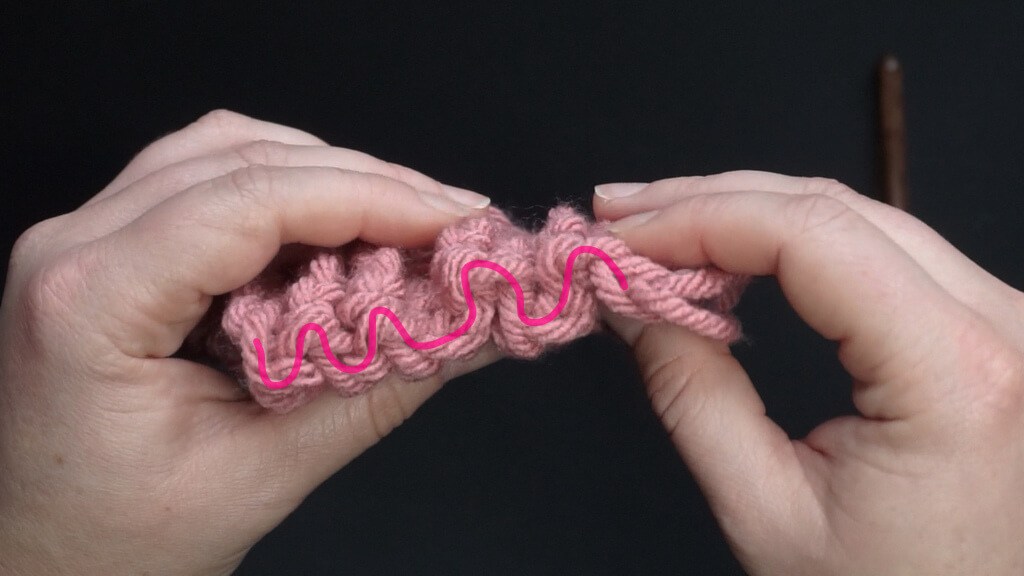
In the 3×3 ribbing made with a smaller hook and thinner yarn, you can see the same waviness.
I highlighted the edge stitches again, to show how much the edge meanders, which is reflected in how tightly the fabric scrunches in on itself.
Where to use the elastic Tunisian crochet ribbing
Now that you know how to make this type of ribbing, where should you use it?
My recommendation is that you use it anywhere you need that elasticity.
That might be the ribbing of a hat, whether you make it sideways and incorporate the ribbing in the pattern, or you make it flat and attach the ribbing later, or even if you work the main part of the hat in the round with a double ended hook, then attach the ribbing on the edge with only one hook.
It might be on at the cuff of a sweater, where you make the sleeves without ribbing and attach this ribbing at the end.
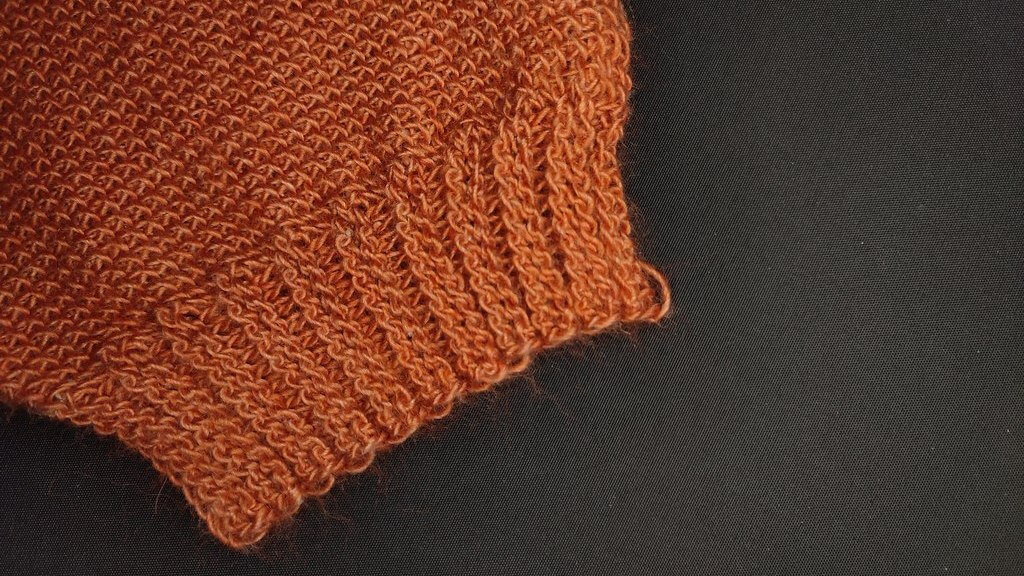
You can use this ribbing on a neckline, to make the neckline uniform and smooth around your neck.
You can even use this ribbing to create entire garments and items that hug the curves of your body.
I’ll be exploring these uses of this ribbing and the other types of ribbing in future projects. If you want to know the results of these experiments, make sure you sign up to my email updates.
And if you want to try some of my patterns using Tunisian crochet, see some examples below.
Oak apples pillow – free Tunisian crochet pattern
Tunisian crochet blanket square – Asparagus stitch
Free Tunisian crochet pocket shawl pattern – Cozy pinecones
Diamond lace Tunisian crochet free bandana pattern
Free Tunisian crochet summer top pattern – Honeydew tank top
Tunisian crochet cat ear beanie free pattern
Fun Tunisian crochet pumpkin patterns
Manna cowl and headband – Tunisian crochet patterns
Macaw wings shawl TCAL – Tunisian crochet along
Free Tunisian crochet pattern – Fall leaf garland


