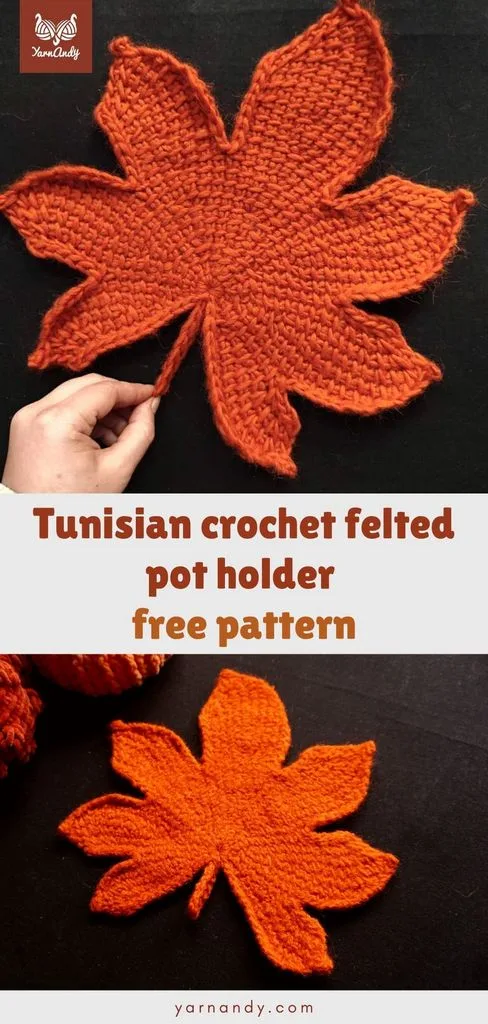
Get into the festive autumnal spirit with an adorable Tunisian crochet felted leaf decoration, either made of felting wool as a pot holder, or a cute decoration around the house or on the table, made of any other type of yarn.
This article includes affiliate links, which may make me a small commission at no cost on your part, if you make any purchases using my links.
About this Tunisian crochet felted pot holder pattern
This is an intermediate Tunisian crochet leaf pot holder pattern that can be worked up in wool and felted into a fun accessory for your kitchen.
In thinner yarn, it makes a fun fall home accessory or it can also be a part of a fall leaf garland, along with the matching leaf pattern published previously.
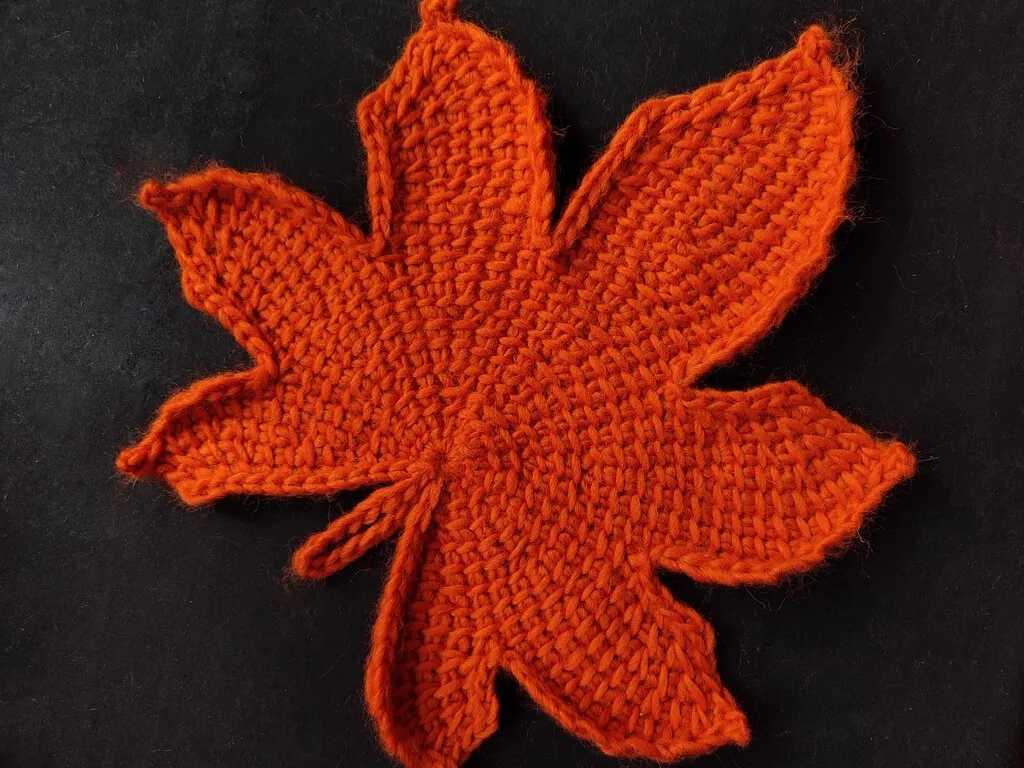
The shape of this leaf is typical of plane or sycamore leaves, with seven sections.
The leaf is constructed with short rows and worked in the round in a magic ring.
The shape is achieved by using increases and by casting off stitches. There is a video available about Tunisian crochet in a magic ring.
Size and measurements
When meeting gauge and working all rows in the pattern, the triangle measures 60 cm across the top and 28 cm in depth, due to the slight elasticity of the lace pattern.
Gauge
Make a swatch to pick the right hook for this project. The swatch consists of 16 Tss and 16 rows.
The gauge in this pattern is 11 rows of 12 Tss in a 10 cm by 10 cm or 4″ by 4″ square inside the gauge swatch.
Skill level
Intermediate, due to increases and cast off decreases, short rows, working all the rows in the magic ring.
Observations
- This is a Tunisian crochet pattern worked flat, which means you always work on the right side of the fabric (the side that will be towards the outside).
- You will work in the open magic ring, creating regular rows and short rows. Only the regular rows reach the magic ring.
- All rows are ended with a short row return.
- When picking up a loop in Fs, insert the hook behind the front vertical bar and the front horizontal bar to pick up the loop, to prevent a hole from forming there.
- Always pick up loops in the back bumps of chains.
- In the (round brackets) you have the number of loops on the hook for each row, including the first loop.
- In the instructions, “BO St” refers to the last St you bind off on the previous row and from which you start chaining.
Size
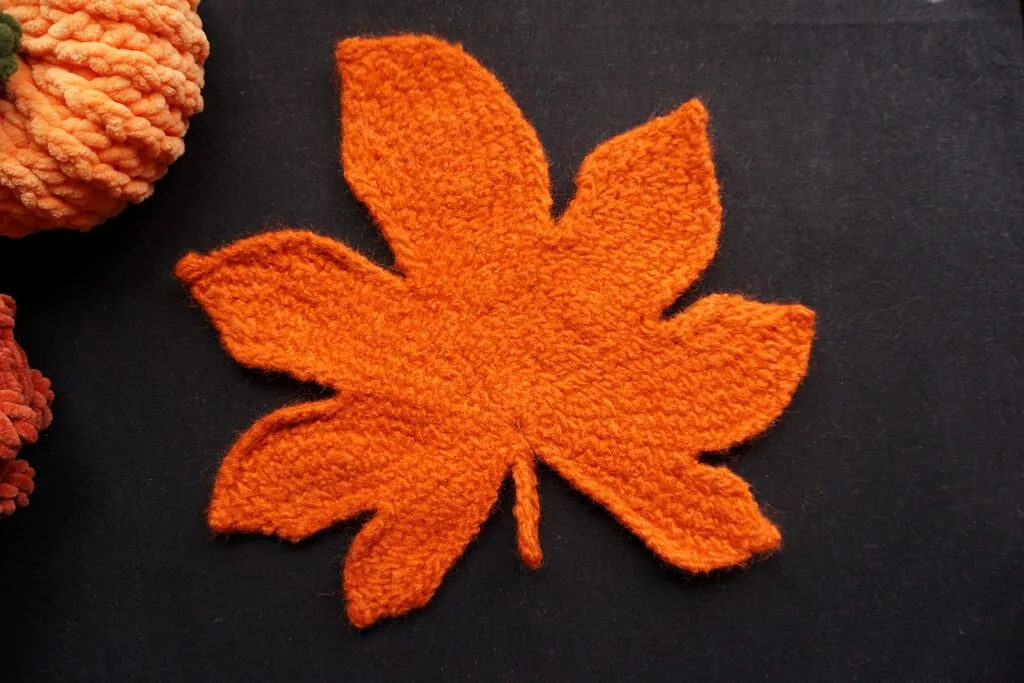
The finished leaf measures about 30 by 30 cm or 12″ by 12″ before felting.
After felting, depending on the amount of felting, it should measure about 24 by 24 cm or 9.5″ by 9.5″.
You can make it smaller by using a smaller hook, or larger by using thicker yarn and a larger hook that is suitable for Tunisian crochet.
Notions
- Yarn: pure wool yarn for felting, one color in chunky or size 5 weight at approximately 50 meters per 50 grams, 70-80 grams or 70-80 meters for a felted pot holder; alternatively, use another type of fiber if not felting;
- Hook – 8 mm hook or hook that gets you gauge – straight Tunisian crochet hook or with cable;
- Other notions: tapestry needle, scissors, blocking pins and mats if blocking, soap and hot water if felting.
Examples of budget wool yarn for felting that works with this pattern (affiliate links):
- Lana Grossa Feltro;
- Lana Grossa Feltro Print;
- Viking Of Norway Naturgarn;
- Schoeller und Stahl Filzi;
- Schachenmayr Wash + Filz-it! Fine.
A more luxurious version with alpaca is Valley Yarns Berkshire Bulky.
If you prefer shopping from Amazon in the US, here’s the only yarn in this category that I was able to find: Drops Snow. It has a great color selection, good price and high quality.
Many of the colors in these yarns would work well with this pattern. Choose a yellow or orange for autumn or go with any shade of green for spring and summer.
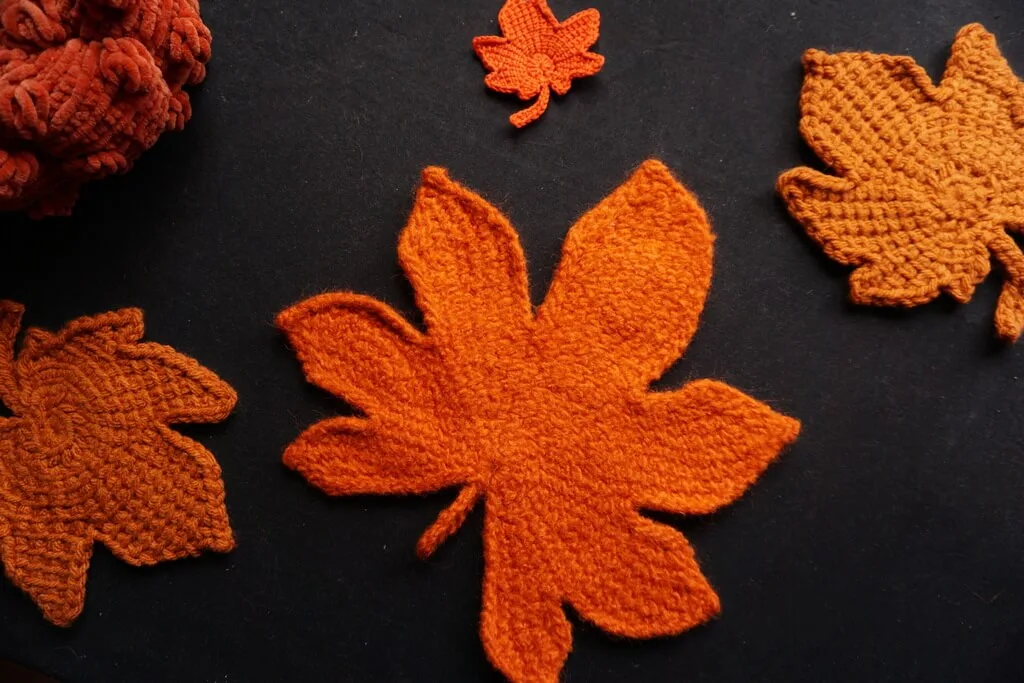
You can use the same yarn for smaller leaves as well, to make them into cute coasters, as seen in the photo above.
The pattern for the smaller leaves is free on the blog as well.
The pattern for the pumpkin up in the corner is also available for free on the blog.
Abbreviations
These are all the abbreviations used in the pattern.
- BO – bind off: insert hook into next St as if to make a Tss, pull up a loop, slip it through the loop on the hook;
- Ch – chain;
- Fs – Tunisian first stitch;
- MR – magic ring;
- Pic – picot – Ch 3, Sl St in 3rd Ch from hook;
- Rep – repeat;
- Sc – single crochet (US terms) or double crochet (UK terms);
- Sl St – slip stitch;
- SRR – short row return: Rep [YO and pull through 2 loops] until 1 loop is left on the hook;
- St(s) – stitch(es);
- Tss – Tunisian simple stitch – insert hook behind the next vertical bar, YO and pull up a loop;
- Tss2tog – Tunisian simple stitch decrease – insert hook behind the next 2 vertical bars, YO and pull up a loop;
- YO – yarn-over.
Video tutorial for a part of this leaf
If you need help in visualizing or interpreting the instructions below or if you find a spot that is more difficult to do, watch this video first to see how to make one section of the leaf, then continue with the instructions.
Right handed video tutorial
Left handed video tutorial
Instructions
Start with an open magic ring.
Row 1. In MR,Ch11, pick up 11 loops in back bumps, pick up 1 loop in MR, SRR (13)
Row 2. Ch 1, pick up 1 loop in Ch, pick up 1 loop in Fs, 9 Tss, SRR (12)
Row 3. Ch 1, Pic, pick up 1 loop in Ch, pick up 1 loop in Fs, 8 Tss, SRR (11)
Row 4. Tss2tog, 1 Tss, Tss2tog, 8 Tss, SRR (12)
Row 5. Tss2tog, 1 Tss, Tss2tog, 8 Tss, pick up 1 loop in MR, SRR (13)
BO 3 Sts.
Row 6. Ch 4, pick up 4 loops in back bumps, pick up 1 loop in BO St, 8 Tss, pick up 1 loop in MR, SRR (15)
Row 7. Ch 1, pick up 1 loop in Ch, pick up 1 loop in Fs, 12 Tss, SRR (15)
Row 8. Ch 1, pick up 1 loop in Ch, pick up 1 loop in Fs, 11 Tss, SRR (14)
Row 9. Ch 1, Pic, pick up 1 loop in Ch, pick up 1 loop in Fs, 10 Tss, SRR (13)
Row 10. Tss2tog, 1 Tss, Tss2tog, 10 Tss, SRR (14)
Row 11. Tss2tog, 1 Tss, Tss2tog, 10 Tss, SRR (14)
Row 12. Tss2tog, 1 Tss, Tss2tog, 10 Tss, pick up 1 loop in MR, SRR (15)
BO 4 Sts.
Row 13. Ch 5, pick up 5 loops in back bumps, pick up 1 loop in BO St, 9 Tss, pick up 1 loop in MR, SRR (17)
Row 14. Ch 1, pick up 1 loop in Ch, pick up 1 loop in Fs, 13 Tss, SRR (16)
Row 15. Ch 1, pick up 1 loop in Ch, pick up 1 loop in Fs, 12 Tss, SRR (15)
Row 16. Ch 1, Pic, pick up 1 loop in Ch, pick up 1 loop in Fs, 11 Tss, SRR (14)
Row 17. 10 Tss, SRR (11)
Row 18. Tss2tog, 1 Tss, Tss2tog, 11 Tss, SRR (15)
Row 19. Tss2tog, 1 Tss, Tss2tog, 12 Tss, SRR (16)
Row 20. Tss2tog, 1 Tss, Tss2tog, 12 Tss, pick up 1 loop in MR, SRR (17)
BO 5 Sts.
If you want to make a smaller leaf with only 5 sections, bind off 2 more stitches and skip to Row 40.
Row 21. Ch 6, pick up 6 loops in back bumps, pick up 1 loop in BO St, 10 Tss, pick up 1 loop in MR, SRR (19)
Row 22. Ch 1, pick up 1 loop in Ch, pick up 1 loop in Fs, 15 Tss, SRR (18)
Row 23. Ch 1, pick up 1 loop in Ch, pick up 1 loop in Fs, 14 Tss, SRR (17)
Row 24. Ch 1, pick up 1 loop in Ch, pick up 1 loop in Fs, 13 Tss, SRR (16)
Row 25. Ch 1, pick up 1 loop in Ch, pick up 1 loop in Fs, 12 Tss, SRR (15)
Row 26. Ch 1, Pic, pick up 1 loop in Ch, pick up 1 loop in Fs, 11 Tss, SRR (14)
Row 27. Tss2tog, 1 Tss, Tss2tog, 11 Tss, SRR (15)
Row 28. Tss2tog, 1 Tss, Tss2tog, 12 Tss, SRR (16)
Row 29. Tss2tog, 1 Tss, Tss2tog, 13 Tss, SRR (17)
Row 30. Tss2tog, 1 Tss, Tss2tog, 14 Tss, SRR (18)
Row 31. Tss2tog, 1 Tss, Tss2tog, 14 Tss, pick up 1 loop in MR, SRR (19)
BO 8 Sts.
Row 32. Ch 5, pick up 5 loops in back bumps, pick up 1 loop in BO St, 9 Tss, pick up 1 loop in MR, SRR (17)
Row 33. Ch 1, pick up 1 loop in Ch, pick up 1 loop in Fs, 13 Tss, SRR (16)
Row 34. Ch 1, pick up 1 loop in Ch, pick up 1 loop in Fs, 12 Tss, SRR (15)
Row 35. Ch 1, Pic, pick up 1 loop in Ch, pick up 1 loop in Fs, 11 Tss, SRR (14)
Row 36. 10 Tss, SRR (11)
Row 37. Tss2tog, 1 Tss, Tss2tog, 11 Tss, SRR (15)
Row 38. Tss2tog, 1 Tss, Tss2tog, 12 Tss, SRR (16)
Row 39. Tss2tog, 1 Tss, Tss2tog, 12 Tss, pick up 1 loop in MR, SRR (17)
BO 7 Sts.
Row 40. Ch 4, pick up 4 loops in back bumps, pick up 1 loop in BO St, 8 Tss, pick up 1 loop in MR, SRR (15)
Row 41. Ch 1, pick up 1 loop in Ch, pick up 1 loop in Fs, 12 Tss, SRR (15)
Row 42. Ch 1, pick up 1 loop in Ch, pick up 1 loop in Fs, 11 Tss, SRR (14)
Row 43. Ch 1, Pic, pick up 1 loop in Ch, pick up 1 loop in Fs, 10 Tss, SRR (13)
Row 44. Tss2tog, 1 Tss, Tss2tog, 10 Tss, SRR (14)
Row 45. Tss2tog, 1 Tss, Tss2tog, 10 Tss, SRR (14)
Row 46. Tss2tog, 1 Tss, Tss2tog, 10 Tss, pick up 1 loop in MR, SRR (15)
BO 6 Sts.
Row 47. Ch 3, pick up 3 loops in back bumps, pick up 1 loop in BO St, 7 Tss, pick up 1 loop in MR, SRR (13)
Row 48. Ch 1, pick up 1 loop in Ch, pick up 1 loop in Fs, 9 Tss, SRR (12)
Row 49. Ch 1, Pic, pick up 1 loop in Ch, pick up 1 loop in Fs, 8 Tss, SRR (11)
Row 50. Tss2tog, 1 Tss, Tss2tog, 8 Tss, SRR (12)
Row 51. Tss2tog, 1 Tss, Tss2tog, 8 Tss, pick up 1 loop in MR, SRR (13)
BO 11 Sts.
Sl St in Mr.
Leaf stem
Ch 16, Sl St in the MR to make a loop.
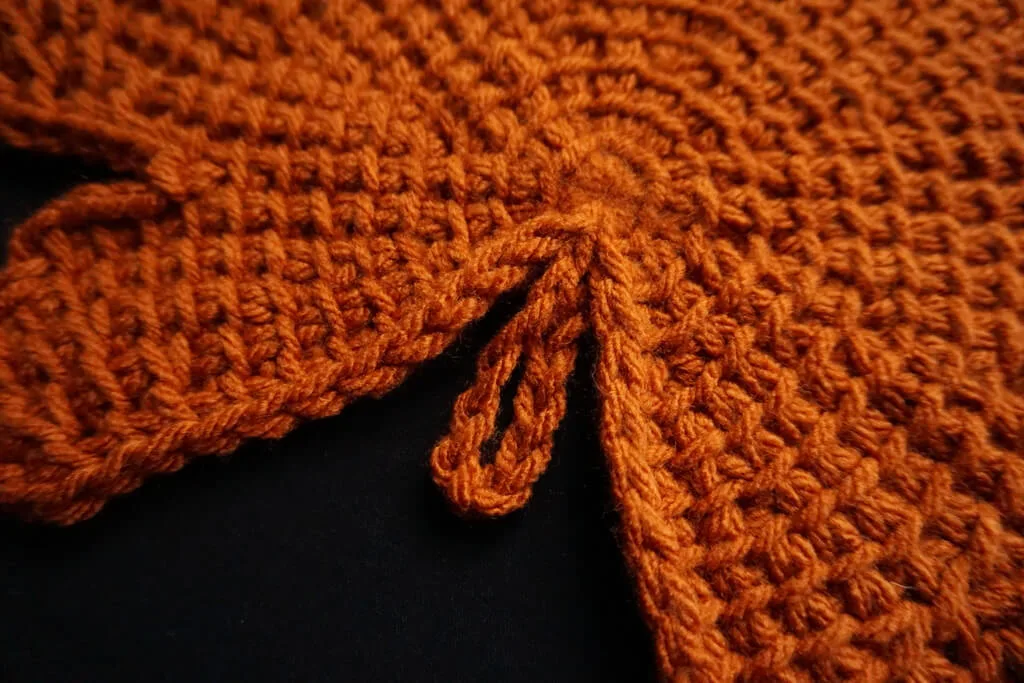
OR Ch 10, then make Sts in the back bumps of the chains, starting with the 2nd Ch.
5 Sc, 4 Sl St, Sl St back into the MR. Close the MR, then cut the yarn and weave in the ends on the back of the work.
Finishing off the pot holder
If you used wool yarn for felting, now is the time to felt the leaf pot holder.
You can felt it by machine by putting it in your laundry (with like colors) and washing at over 40 degrees Celsius (over 104 F).
Alternatively, you can felt it by hand in a basin of hot water with soap.
Either method works well, you will just be able to control the felting better when doing it by hand.
If at the end you feel like the pot holder is not compact or thick enough, you can repeat the process.
At the end, the leaf should shrink up to 30-40% in size and become stiff.
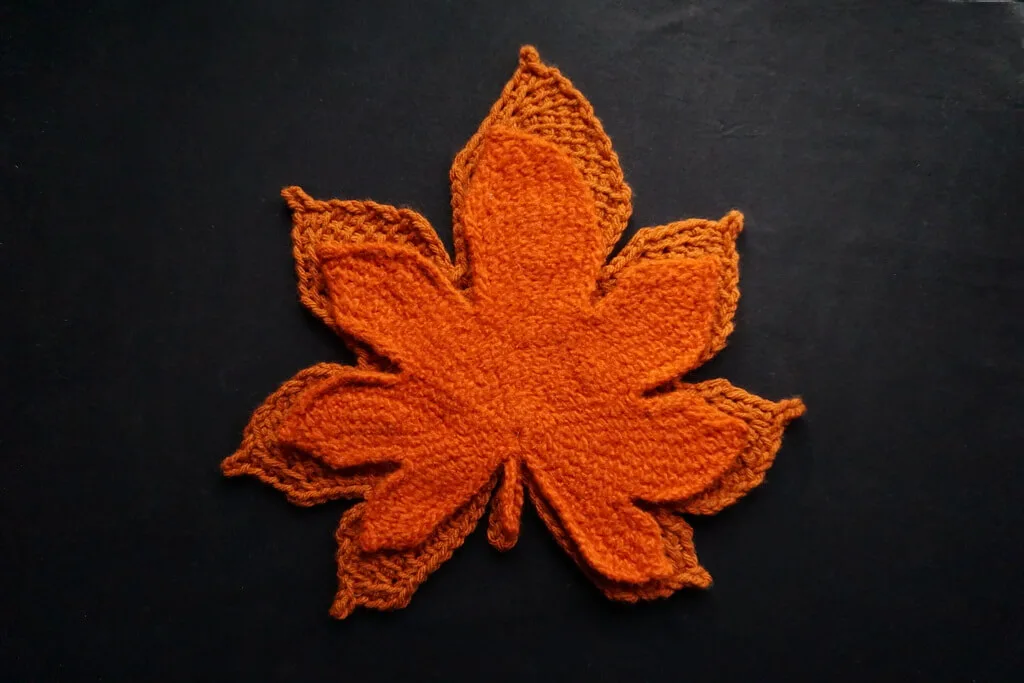
If using acrylic, use steam to block the leaf and make all the segments lie flat.
If using cotton, you can wash and block the leaf in shape while it dries or you can iron it.
You can also starch it and stiffen it, but in that case you should only use the leaf as a decoration, not a pot holder.
Do not use acrylic or starched cotton for holding hot objects.
Final remarks
If you have any trouble with the pattern, write me a comment down below or use the contact form here to write me an email.
I hope, however, that you’ll have fun with the pattern and try out other Tunisian crochet patterns that I’ve put out so far.
Corner to corner Tunisian crochet scarf pattern
Nordic star Tunisian crochet baby blanket pattern
Tunisian crochet cat ear beanie free pattern
Free wavy mosaic Tunisian crochet pattern
Feather and fan Tunisian crochet pattern for a washcloth
Tunisian crochet asymmetrical rounded triangle shawl tutorial
How to start a Tunisian crochet project in a magic ring
How to make different shawl shapes in Tunisian crochet
How to sew Tunisian knit stitch row to row
How to make a Tunisian crochet mosaic bee potholder
If you’re interested in more patterns for felted Tunisian crochet pot holders, I’ve got at least one that will be published soon, so sign up to my email updates here if you want to know when it is ready.
Also if you want to see what this pattern looks like knit.
Hugs,
Andrea
