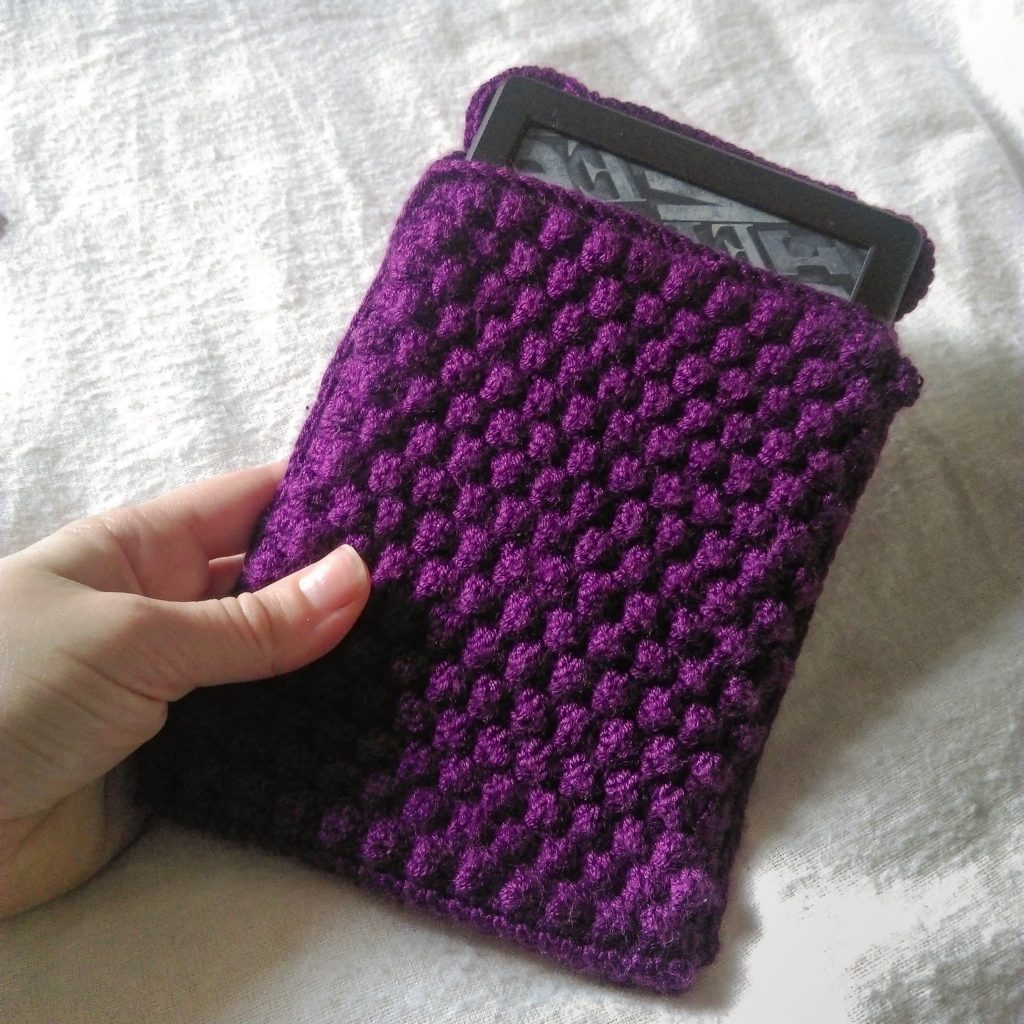
Use this free crochet Kindle case pattern to make a soft and sturdy case for your electronics. You can adapt the size for any eBook reader or other tablet.
If you’re like me and take your eBook reader everywhere that you need to wait for more than 2 minutes, you need to make sure it stays safe in your bag or backpack.
I’ve been taking my Kindle everywhere with me for the past eight years (writing this in 2025). It’ been in this sturdy case that I made from microfiber yarn and it’s still going strong.
No scratches, no issues with the screen. I can’t even believe it’s been that long and the case still looks great, with a bit of pilling.
My previous Kindle (which was at least 5 years old at that point) got a screen problem while I was hiking somewhere and it was in the top of my backpack, but it wasn’t in this case, which would have probably protected it.
Oh well. I hope yours keeps your eReader as safe and for as many years as mine did my own Kindle. Read on to learn how to make your own from very basic crochet stitches.
Why crochet a Kindle case?
As I’ve said before, pampering your electronics is not a bad thing and could be even beneficial for them over time.
I should know, I always try to take care of my items, to make them last as long as they can, even though today I completely shattered my new thermos (this happened in 2016, when I first wrote the pattern).
I feel terrible, since I’ve only used it for one week and had brought it to the office today to inaugurate it with a liter of hot tea.
Too bad that I’m sometimes so clumsy that I manage to drop things and smash them to bits…
This kind of event (oh, trust me, there have been more) makes me appreciate even more the care that can be offered by such an item as a nice and cozy Kindle case.
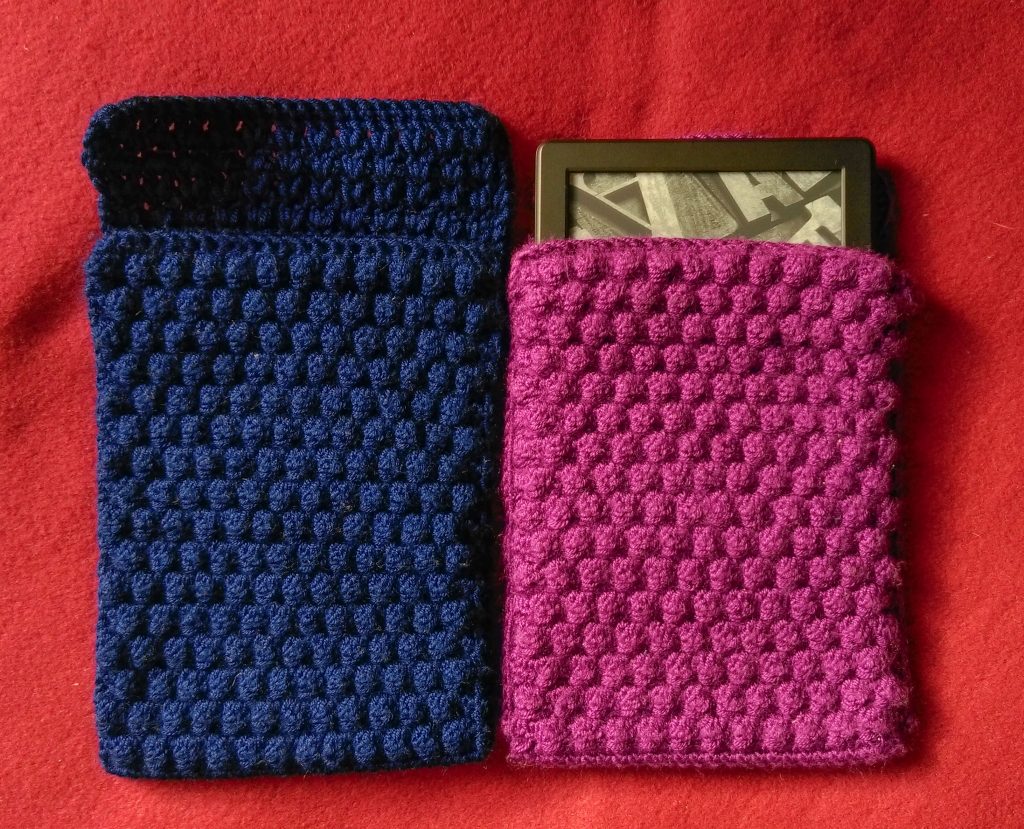
Since it only takes a few hours to whip up and it’s much more durable and protective than one of those hard, plastic cases that offer no padding, I do believe you will not only make this for yourself, but for your lovely friends as well, especially the ones that like to read (even though the pattern can be adapted to any size of flat electronic devices).
These instructions are written using US terms.
Size and gauge
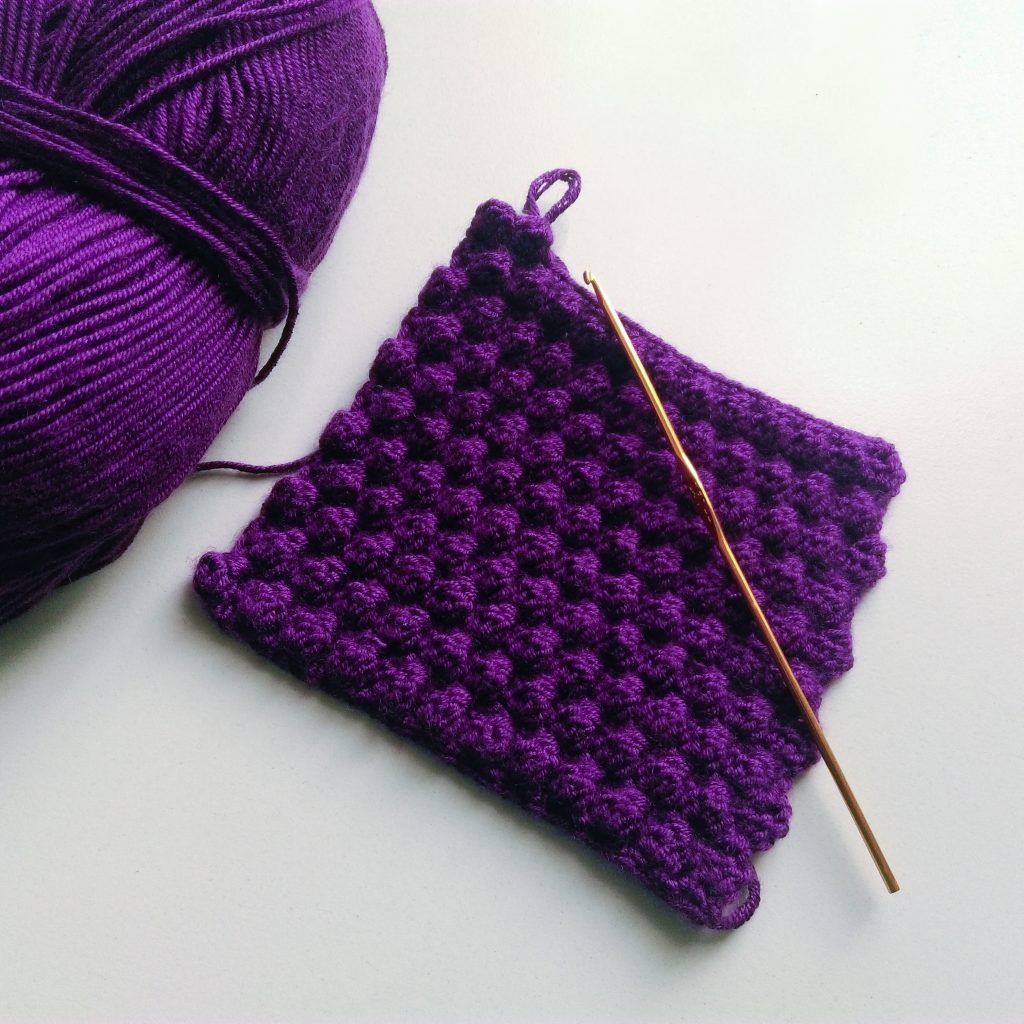
For a generation 8 Kindle (16×11.5×0.9 cm) the size of a swatch made of 10 Sc and 10 rows should be 5 x 4 cm.
For other devices, using the same basic structure, you can use a larger hook with a thicker yarn/smaller hook with thinner yarn or add/subtract multiples of two stitches per row.
The finished piece is 17 cm x 13 cm (without the flap) and fits the Kindle snugly (the thickness of the device makes it fit properly).
Difficulty
Advanced beginner to intermediate (due to tight tension).
Notions
- Yarn: any size 3 or DK weight (11 wpi or recommended for working with 3-3.5 mm needles); around 100 meters (or 110 yards);
- Hook: 2.5 mm for a thick and sturdy fabric that will keep its shape (between a B and a C for the US, you can use either one that works for your tension);
- Tapestry needle;
- Scissors;
- Optional: two buttons for closing the top part of the Kindle case.
Stitch abbreviations
- Bob – bobble stitch made of a cluster of 3 double crochet (you can increase up to 5, but for me 3 was enough): [YO, insert hook into St, YO and pull up a loop, YO and pull through 2 loops on hook] 3 times, YO and pull through all 4 loops on the hook;
- Ch – chain
- Dc – double crochet
- FSC – Optional – foundation single crochet
- Sc – single crochet
- Sk – skip
- Sl St – slip stitch
Keep in mind when making a crochet Kindle case
- Ch1 or Ch2 at the beginning of rows do NOT count as stitches and you should never work in them.
- Every row should have 26 stitches (except the last one in the flap).
- Repeat instructions are placed in [square brackets].
- If you want an even thicker case, you can increase the number of dc in each bobble, but I find that three are enough to give that feel of bubble-wrap and not be extremely tiring.
- You may be used to doing Dc or Hdc instead of Sc in between the bobbles, but this method ensures that the fabric is thick and has a unique texture, since only the bobbles are visible.
- If you want to change the size of the finished wrap, for a different e-book reader, you can add or remove multiples of 2 stitches in the first row and subsequent rows.
Instructions for the crochet Kindle case
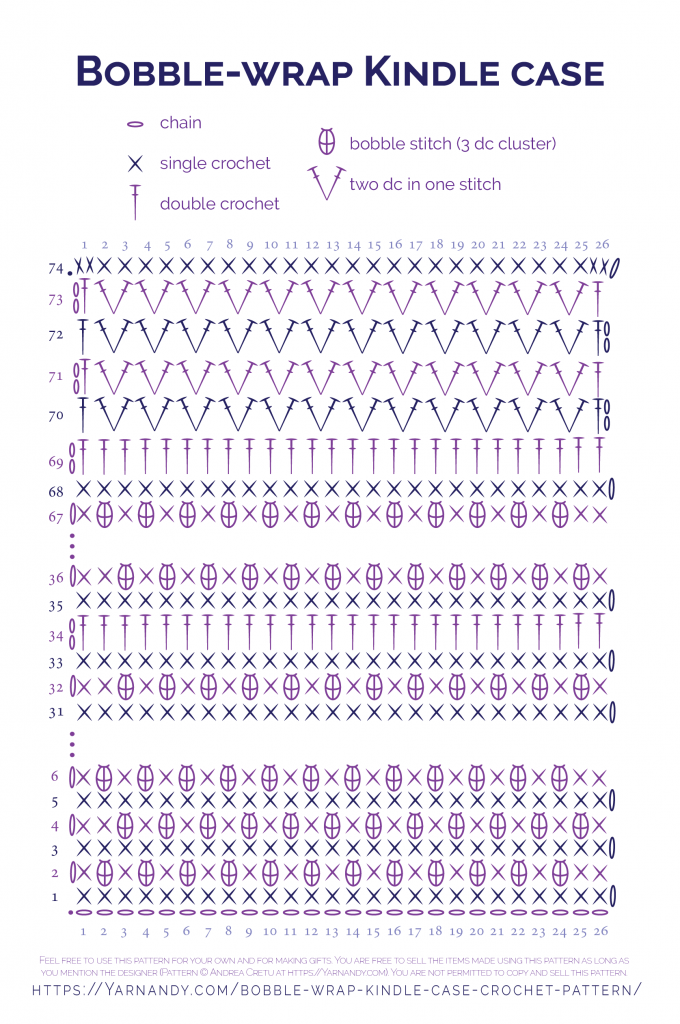
If you prefer working from a diagram, scroll on to the end of the instructions to see it.
Body
Start with either a chain of 26 or 26 FSC.
If you do FSC, it will be your R1, so skip to R2.
Row 1. Ch1, 1Sc in first stitch, 25Sc, turn (one Sc in every stitch)
Row 2. Ch1, 1Sc in first stitch, repeat [Bob, 1Sc] 12 times, Sc, turn
Row 3. Ch1, 1Sc in first stitch, 25Sc, turn
Row 4. Ch1, 1Sc in first stitch, Sc, repeat [Bob, 1Sc] 12 times, turn
Rows 5-32. Repeat rows 1-4 another 7 times.
Row 33. Ch1, 1Sc in first stitch, 25Sc, turn
Row 34. Ch2, 1Dc in first stitch, 25Dc, turn
Row 35. Ch1, 1Sc in first stitch, 25Sc, turn
Row 36. Ch1, 1Sc in first stitch, 1Sc, [Bob, 1Sc] 12 times, turn
Row 37. Ch1, 1Sc in first stitch, 25Sc, turn
Row 38. Ch1, 1Sc in first stitch, [Bob, 1Sc] 12 times, 1Sc, turn
Row 39. Ch1, 1Sc in first stitch, 25Sc, turn
Rows 40-68. Repeat rows 36-39 another 7 times
Row 69. Ch2, 1Dc in first stitch, 25Dc, turn
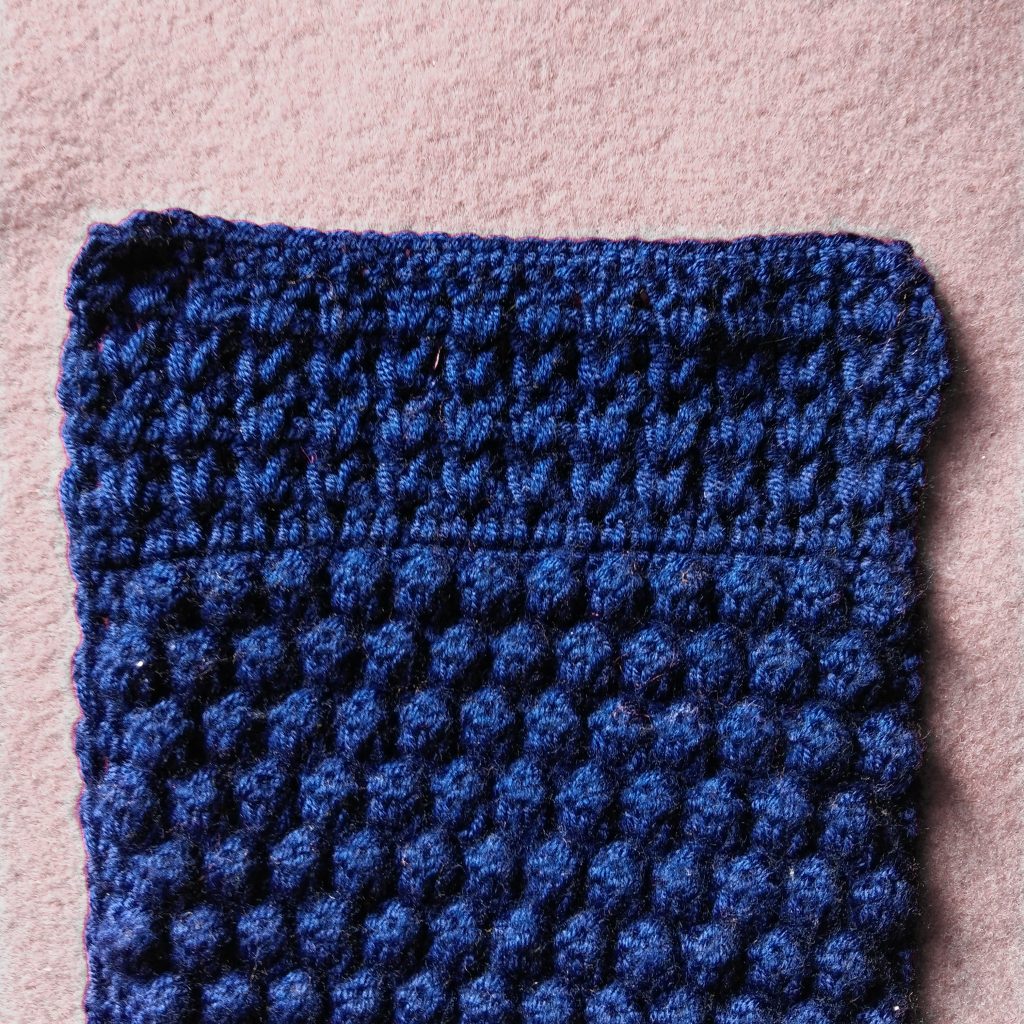
The first row of the flap is created with V-shaped pairs of Dc, using the spaces between the Dc in the previous rows, not the loops. The next rows are worked in the spaces inside the V-shaped pairs of Dc. The last row of Sc is worked in the loops of each Dc.
Row 70. Ch2, 1Dc in first stitch, repeat [Sk1, 2Dc in next space between 2Dc] 12 times, 1Dc, turn
Row 71. Ch2, 1Dc in first stitch, repeat [Sk1, 2Dc in space between 2Dc] 12 times, 1Dc, turn
Rows 72-73. Repeat row 71
Row 74. Ch1, 1Sc in the first stitch, Sc all the way to the last stitch. Cut off the yarn and weave in the ends.
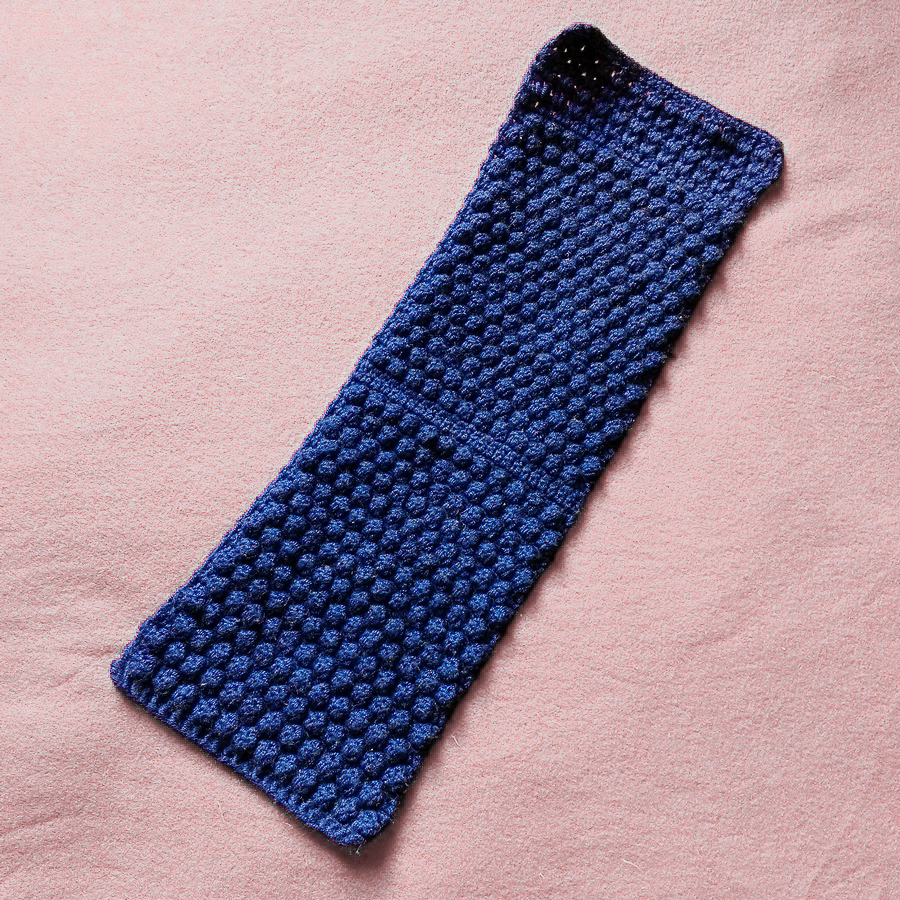
Finishing touches
Starting from the row of Dc that will form the base of the case, using the same yarn, connect the two sides using a slip stitch.
One Sl St in each pair of Sc will give an even, elegant edge.
Connect the two sides all the way to the flap, then Sl St along one of the edges, then connect the two sides on the last edge, returning to the bottom row of Dc.
Wash the item by hand, in warm water, with gentle detergent, to remove any oils from your hands and to freshen it up. Lay on a flat surface to dry.
If you want to, sew on a couple of buttons on the front of the case (sew them to the Sc, not the bobble St).
Otherwise, after putting the Kindle in its new case, tuck in the flap for protection.
That’s it! Your Kindle case is finished!
Diagram for this Kindle case crochet pattern
If it’s easier for you to follow a diagram, here is one I created for you.
I really hope you enjoyed this pattern. If you have any suggestions, corrections or ideas on how to use this pattern for anything else, please leave them in the comments section.
I would love to see your finished objects made from this pattern. You can connect your project to the Ravelry page for this pattern.
If you want to check out some more free patterns, here they are.
Let me know if you have any questions or suggestions.
Happy hooking!
Andrea

am i working the front and back stitch when doing the bobbles?
Hm, I’m not sure what you are asking. There is only one stitch at a time, the fabric is flat. You work under both the front and back loop at the top of each stitch, if that’s what you are asking.
And one more question… what is the difference between row 70 and 71?
Hello again! Lovely pattern! In row 70 and 71, where it says “Dc in first stitch” do I do it between the Dc or in the loops?
Hey Nicole, sorry I didn’t see your comments, I didn’t get a notification like I usually do.
You work the first stitch in the first stitch, then the rest between stitches, the last in the last stitch.
Row 70 has the difference that you don’t already have the V stitches in the row before, so you need to create them.
On Row 71 you already have the V stitches. Does that make sense? When in doubt, always consult the chart, it’s there to help you visualize your stitches.
Can I make the pattern in size 2 yarn weight as long as I make longer and more rows?
Yes, you’d need to make a swatch first. I’d go with a little bigger than 5 cm by 5 cm or 2″ by 2″ to check how many bobbles you need to cover the side.
Then you can use the pattern as is with your stitch counts, work until you reach the length of one side, do the turn, work until you reach the same length and do the flap.
Rows 40 to 68 says repeat rows 35 to 39, 7 times, is that a typo and should that be rows 36 to 39?
Love the pattern by the way
Susan
Yes, it should be 36-39, it’s a 4 row repeat, I’ll fix it right now. Thanks for telling me and I’m glad you’re enjoying the pattern!
Hi! I am looking forward to making my kindle cover, it’s very pretty! Before I do, could you please clarify is the pattern’s written in UK or US terms? Thank you!
Hey, sorry for the late reply, your comment was unfortunately sent to spam by the overzealous akismet. The pattern is written in US terms, like all my patterns (I will add that detail to the text, thanks for pointing it out). I hope you managed to make it since writing. If so, I’d love your feedback.
Thanks for dropping by,
Andrea